Page 8 of 20
Re: 1//32 Hasegawa Ki-61-1 Tei Hien
Posted: Sat Apr 22, 2023 9:24 pm
by jkim
Thanks guys!
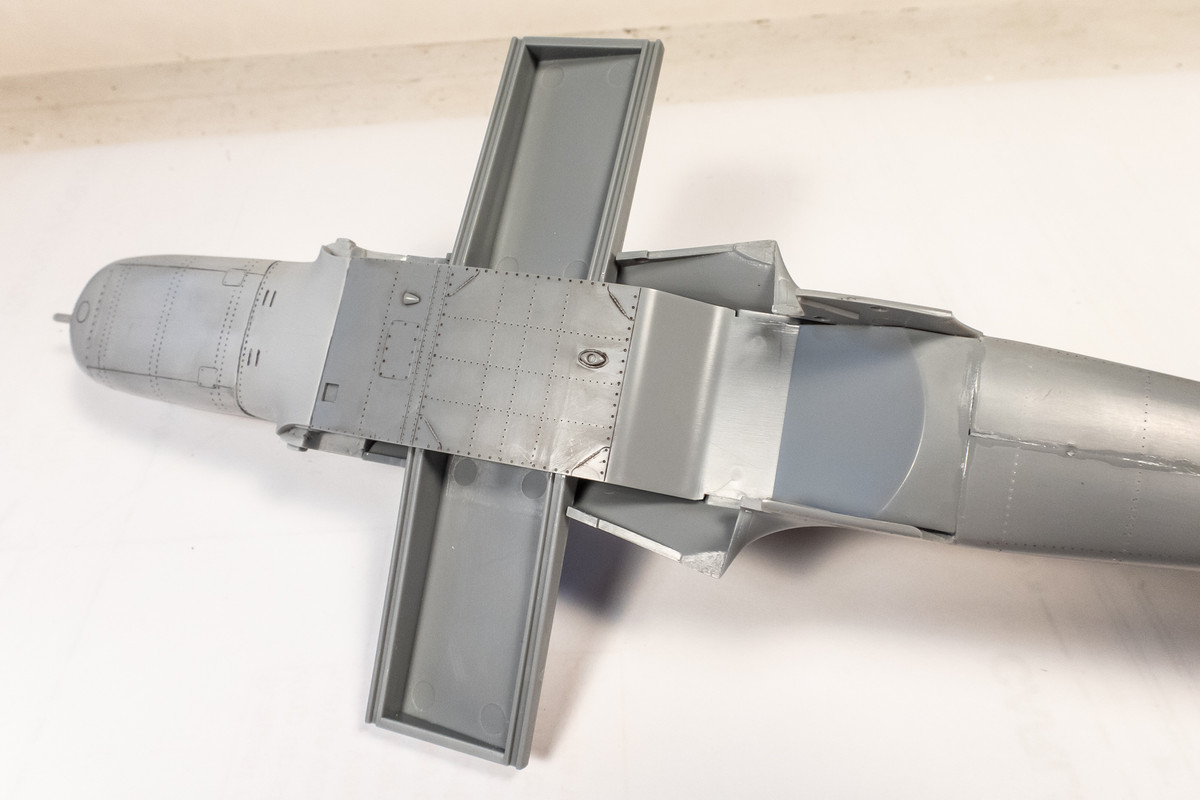
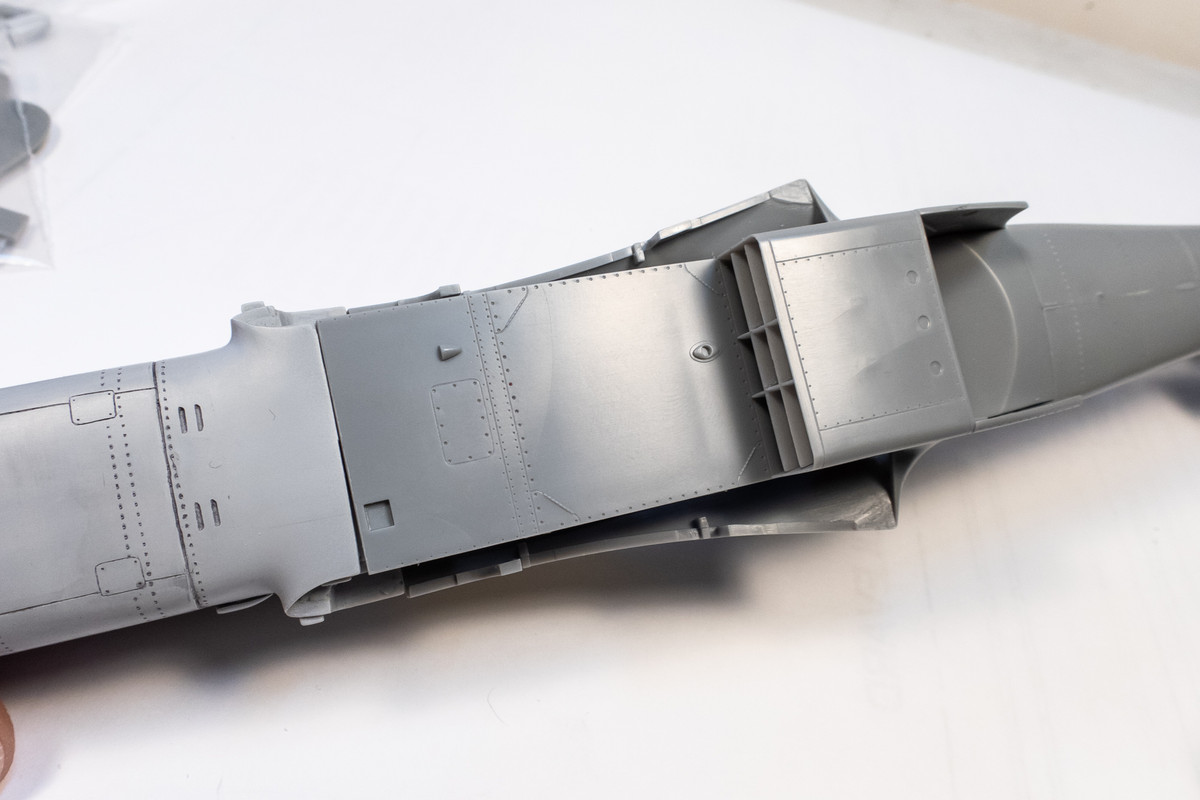
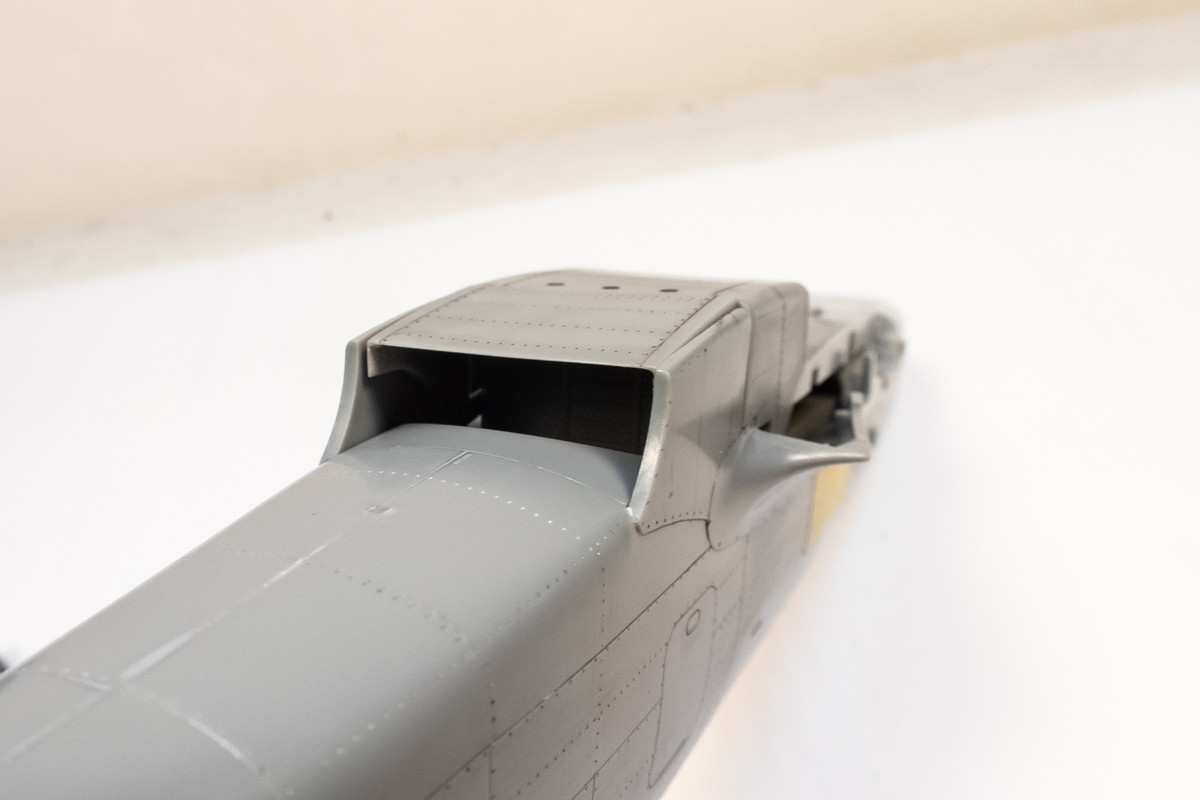
I've tinkered together the radiator/oil cooling intake. The leading edges have been thinned.
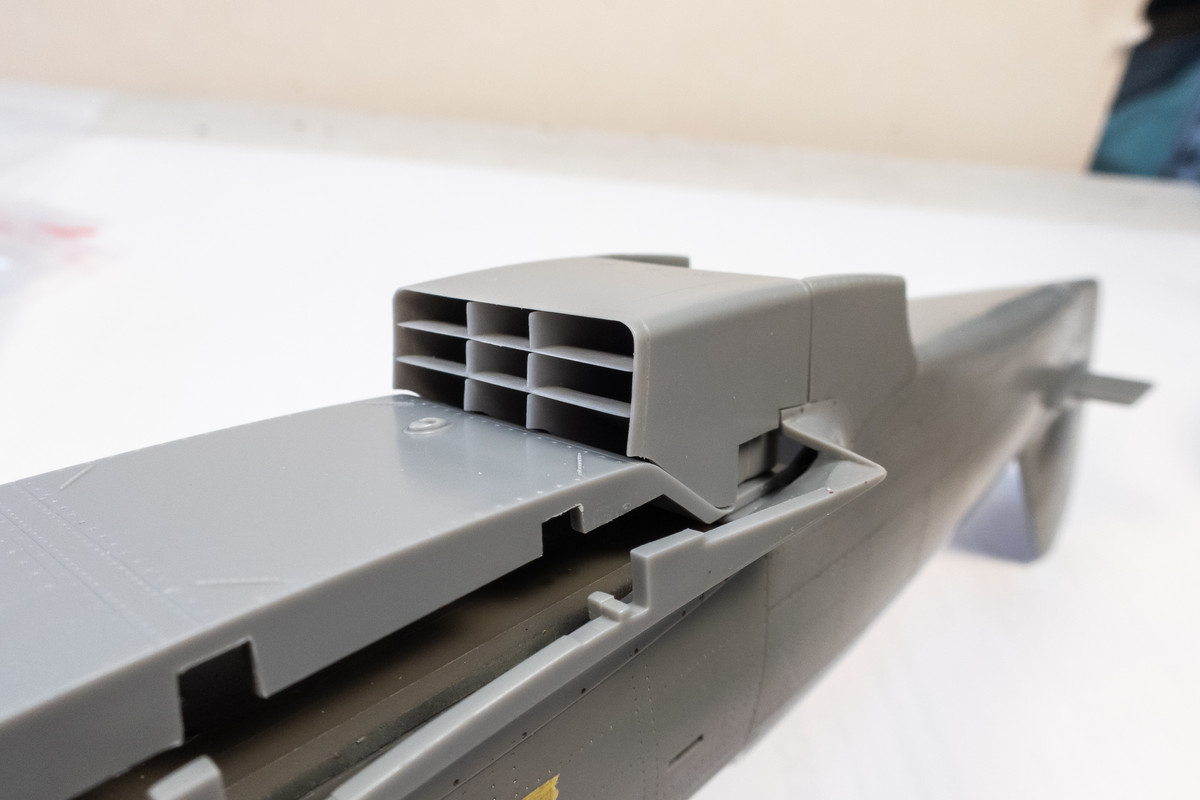
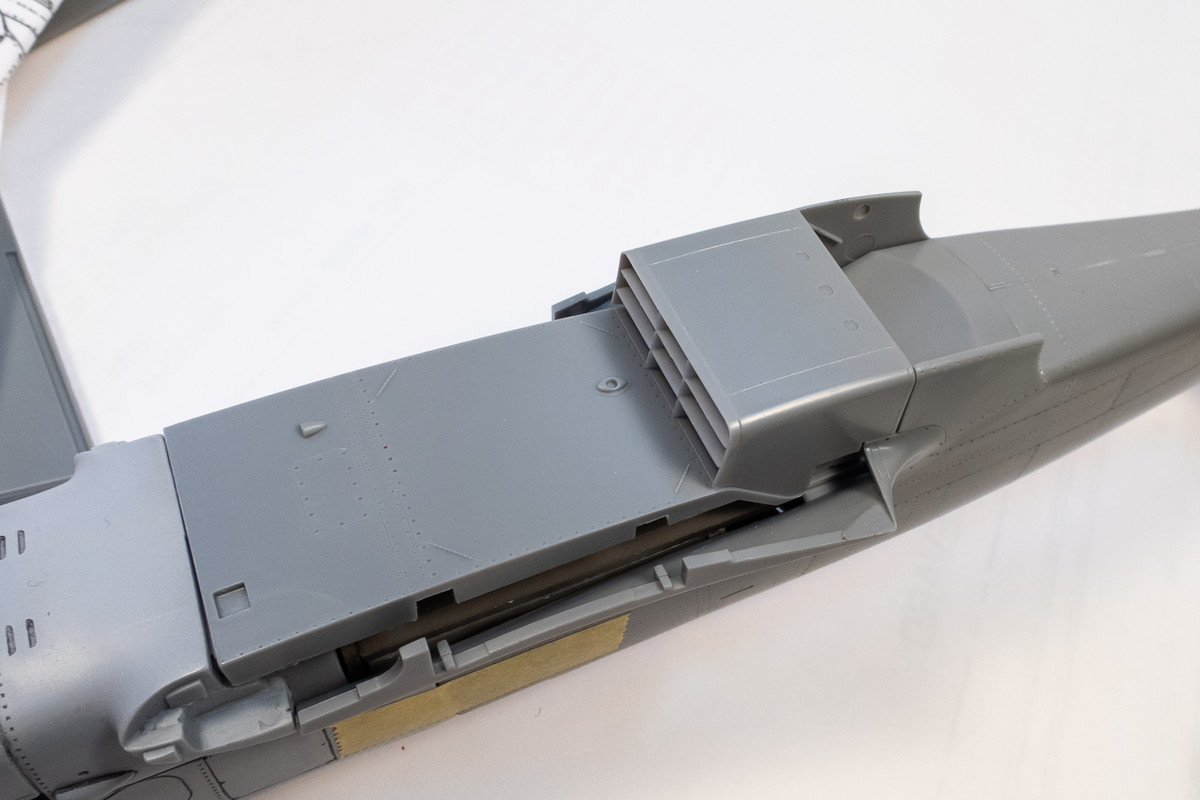
To match the rest of the aircraft, I'm going to apply rivets to this assembly. Here's the before pic...
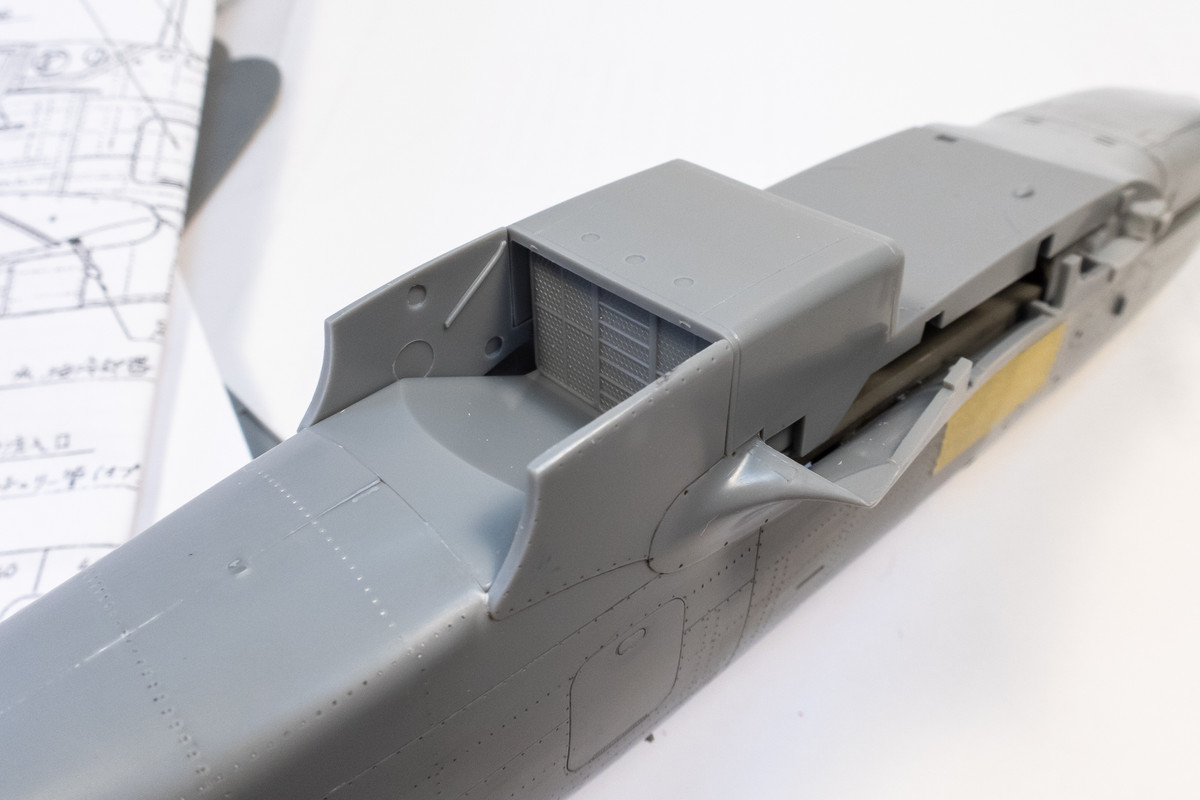
Based on my reference drawings, I'm adding a panel line to the rectangular housing.
Here's the area after the panel line addition and rivets.
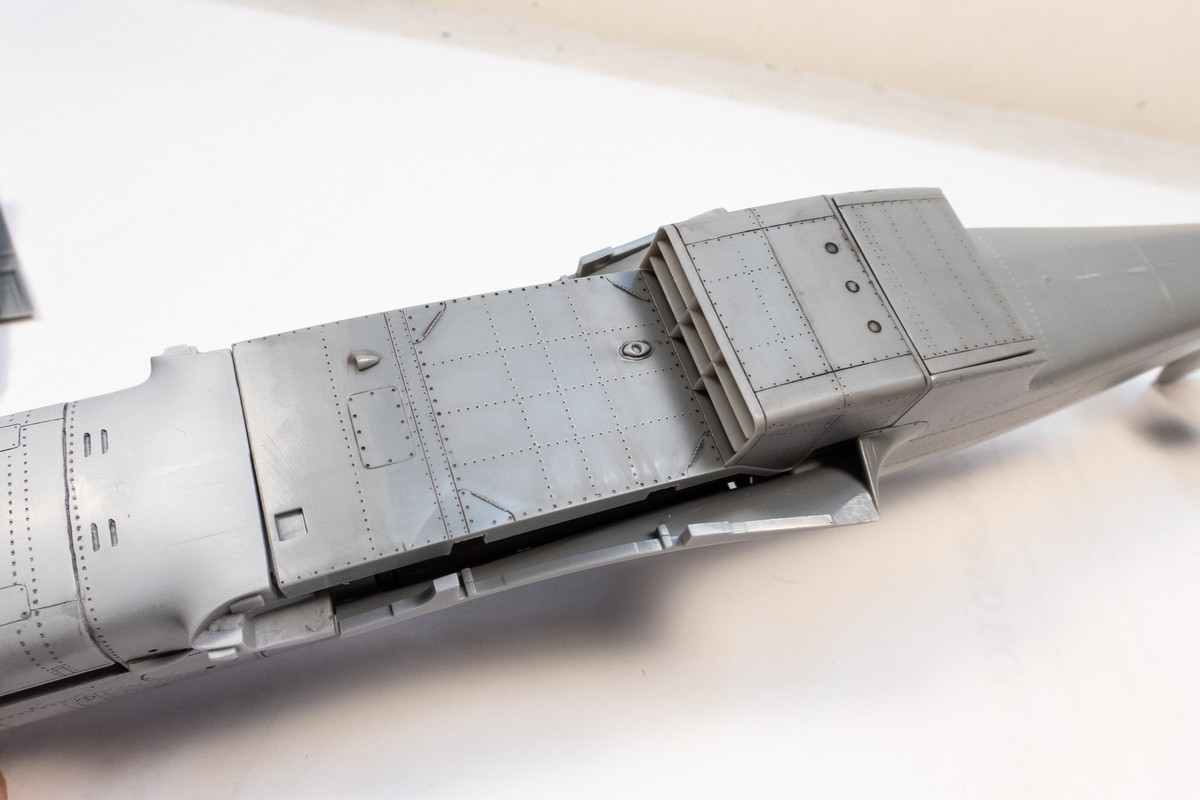
Mulling over how to thin the trailing edges... it might be do-able with some careful sculpting.
Re: 1//32 Hasegawa Ki-61-1 Tei Hien
Posted: Sat Apr 22, 2023 10:18 pm
by Stikpusher
I’m sure that you’ll figure out a way to thin down those trailing edges John. Everything that you’ve added is looking great and really improving the overall appearance.
Re: 1//32 Hasegawa Ki-61-1 Tei Hien
Posted: Fri Apr 28, 2023 7:19 pm
by jkim
Thanks Carlos!
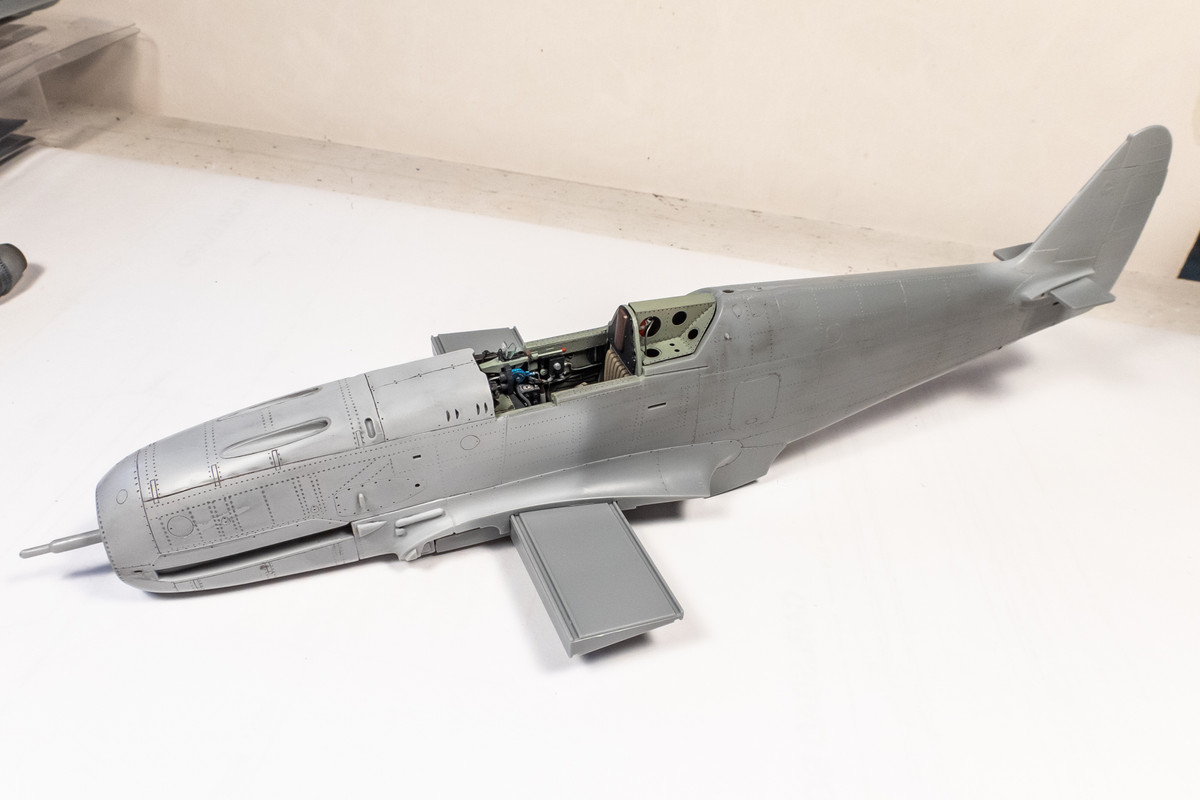
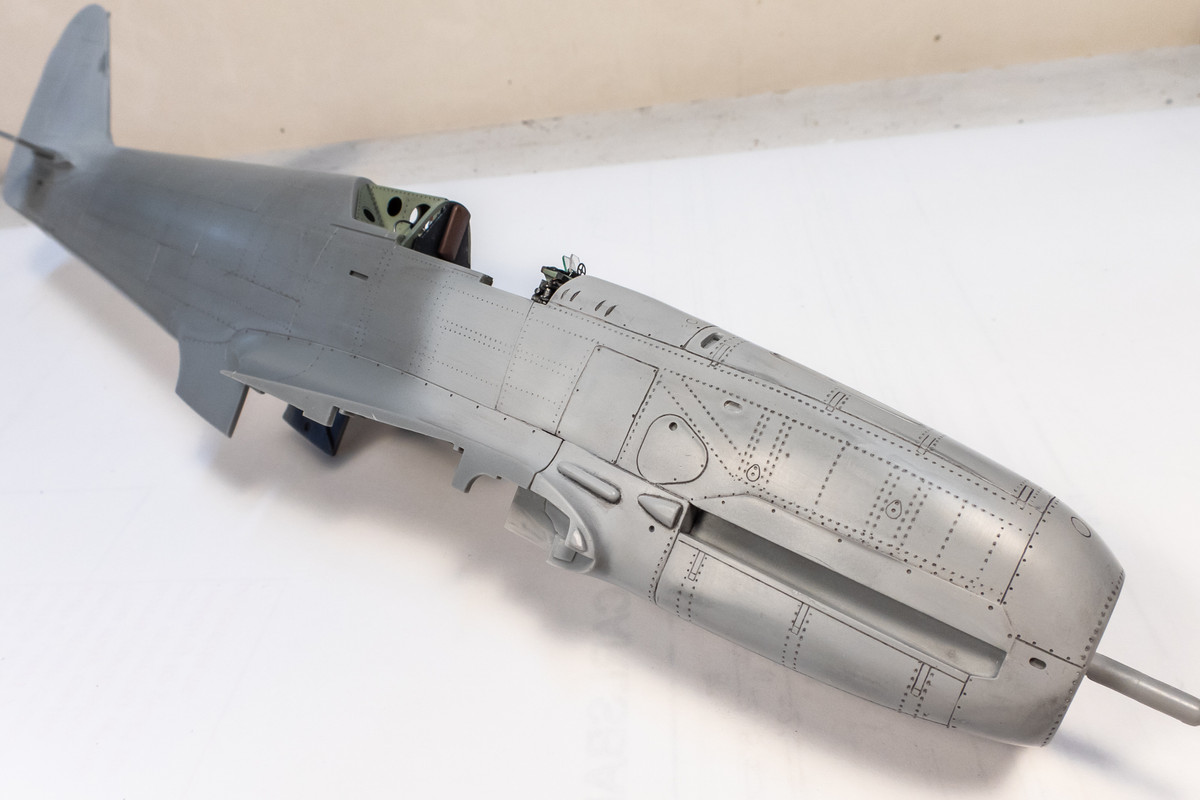
It's time to start gluing the fuselage components together.
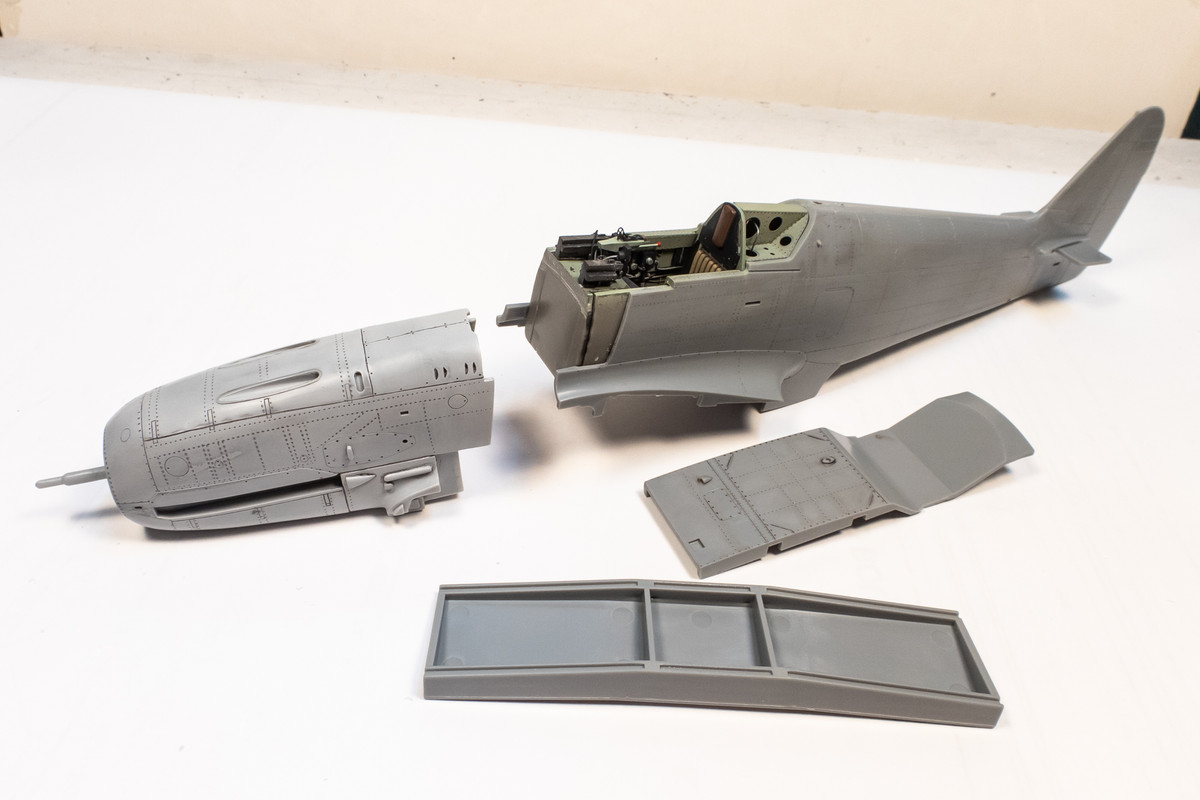
First up is the Wolfpack resin nose. I've test fitted it multiple times and am ready to glue into place using Black CA glue.
The starboard side butts up together very nicely.
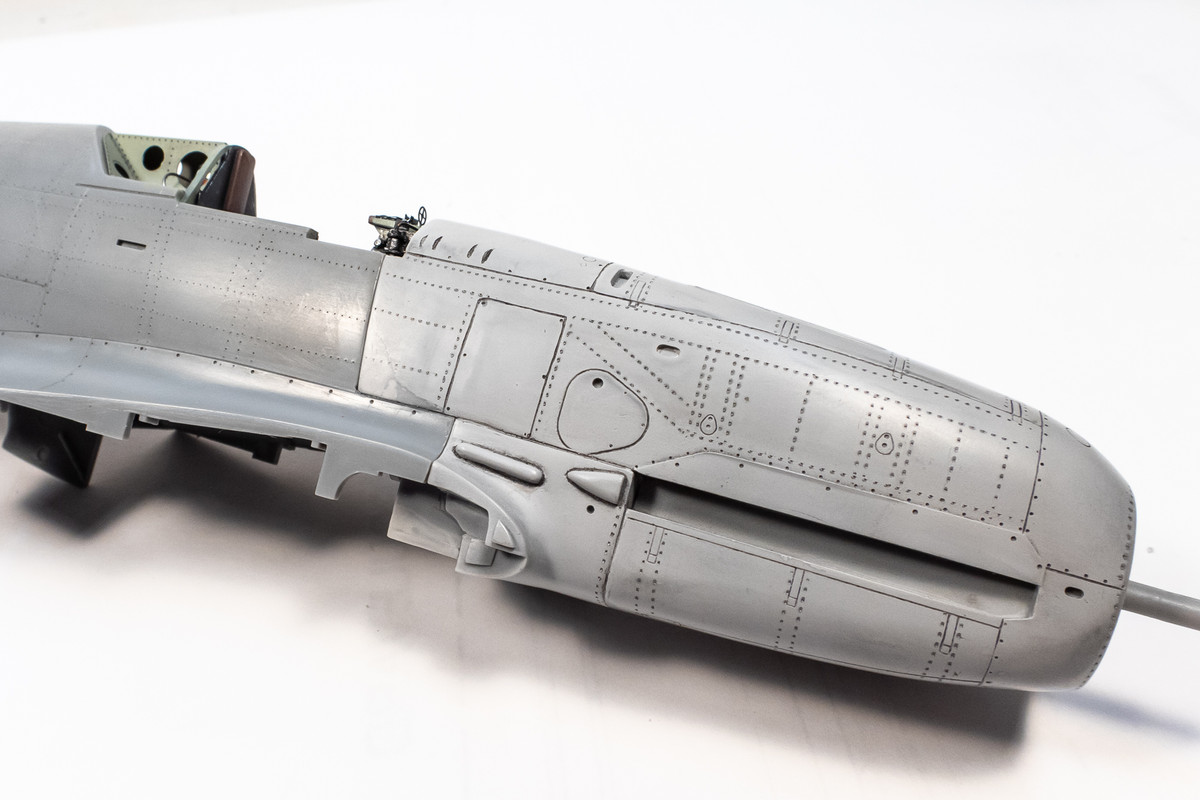
There is a bit of a gap on the port side. I've filled this using more Black CA glue. To minimize the sanding, I used a cotton bud moistened with CA glue debonder to level the glue gap.
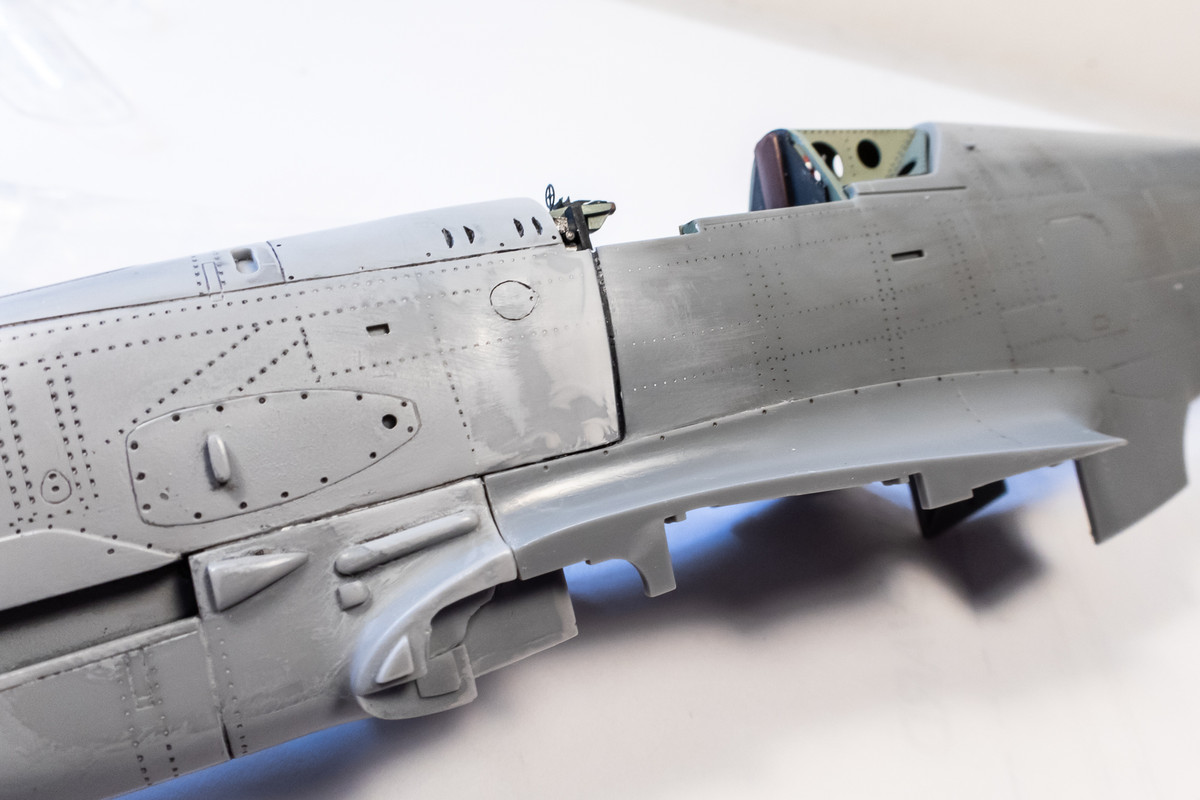
Thin CA was seeped into the other contact joints and the gaps were touched up with Mr Surfacer 1000. This usually takes a few iterations and in the process, the panel lines and rivets were cleaned up as well. This is what the joint currently looks like with a thin coat of Mr Primer Surfacer 1000.

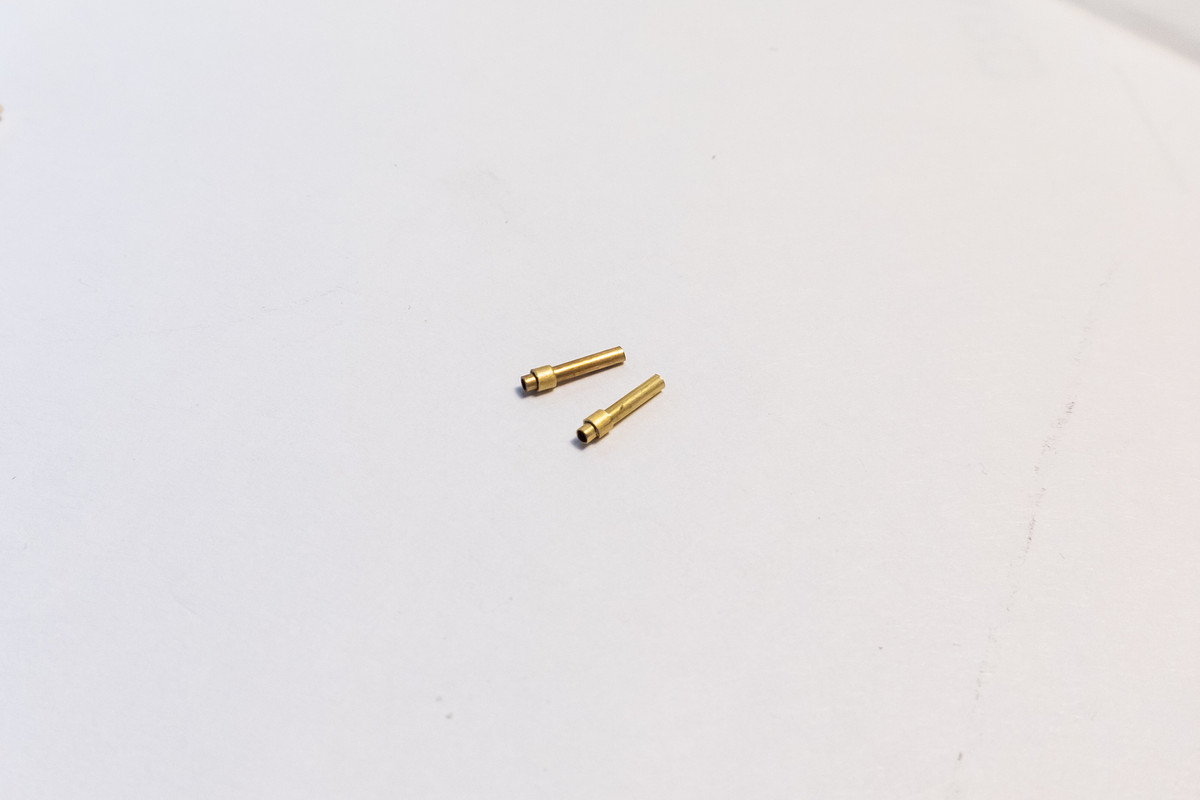
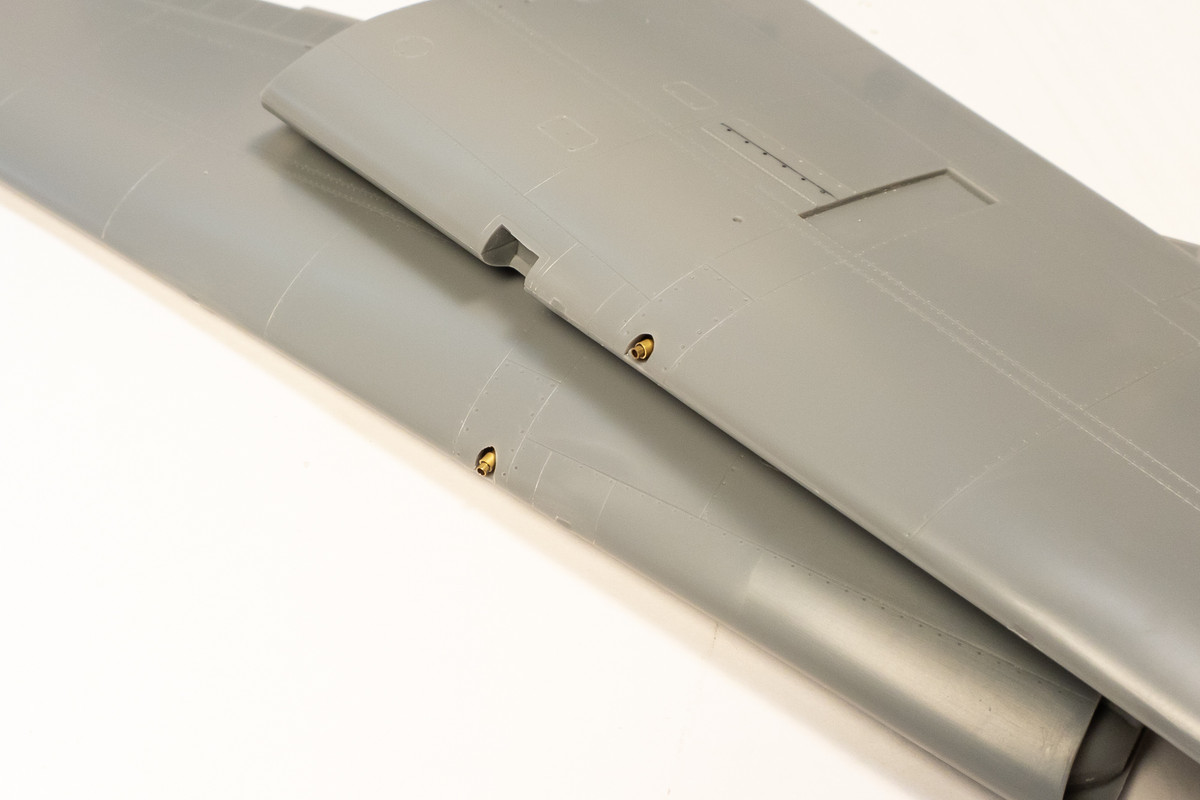
Another task that I was able to complete while waiting for the putty to dry was fabricating the wing gun barrels using brass tubing.
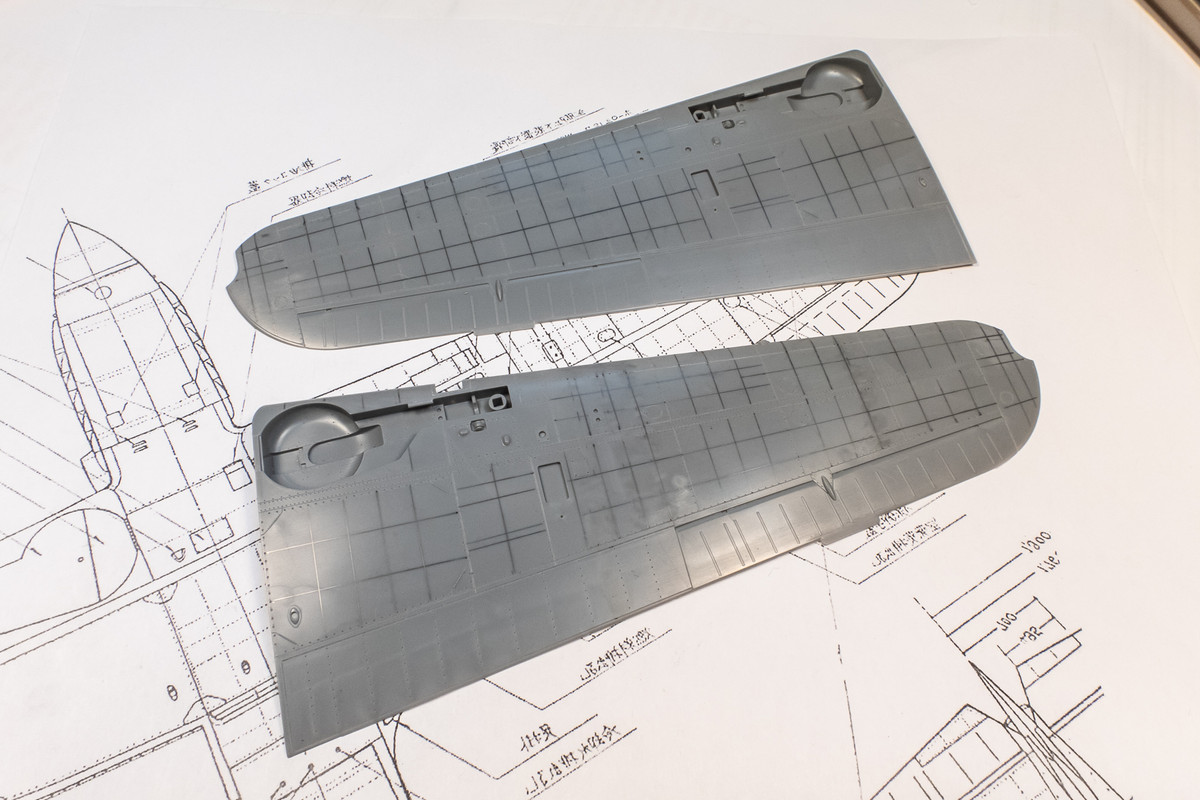
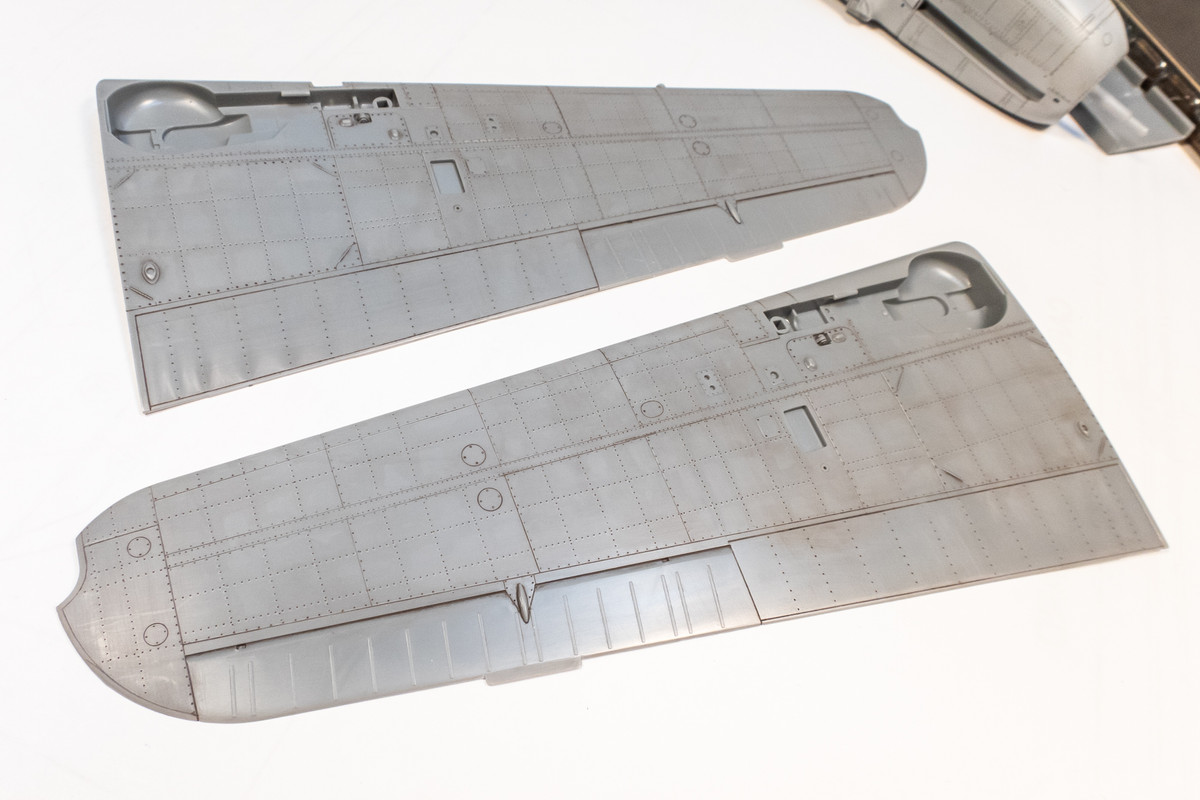
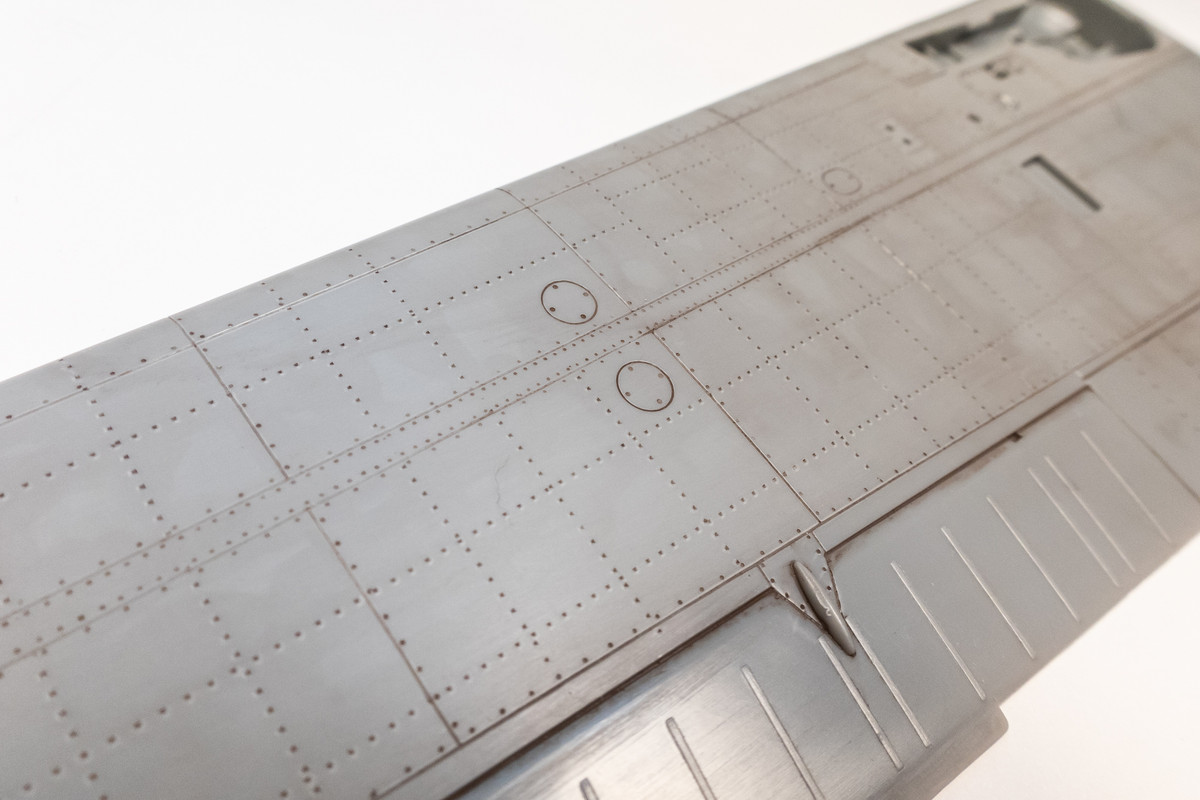
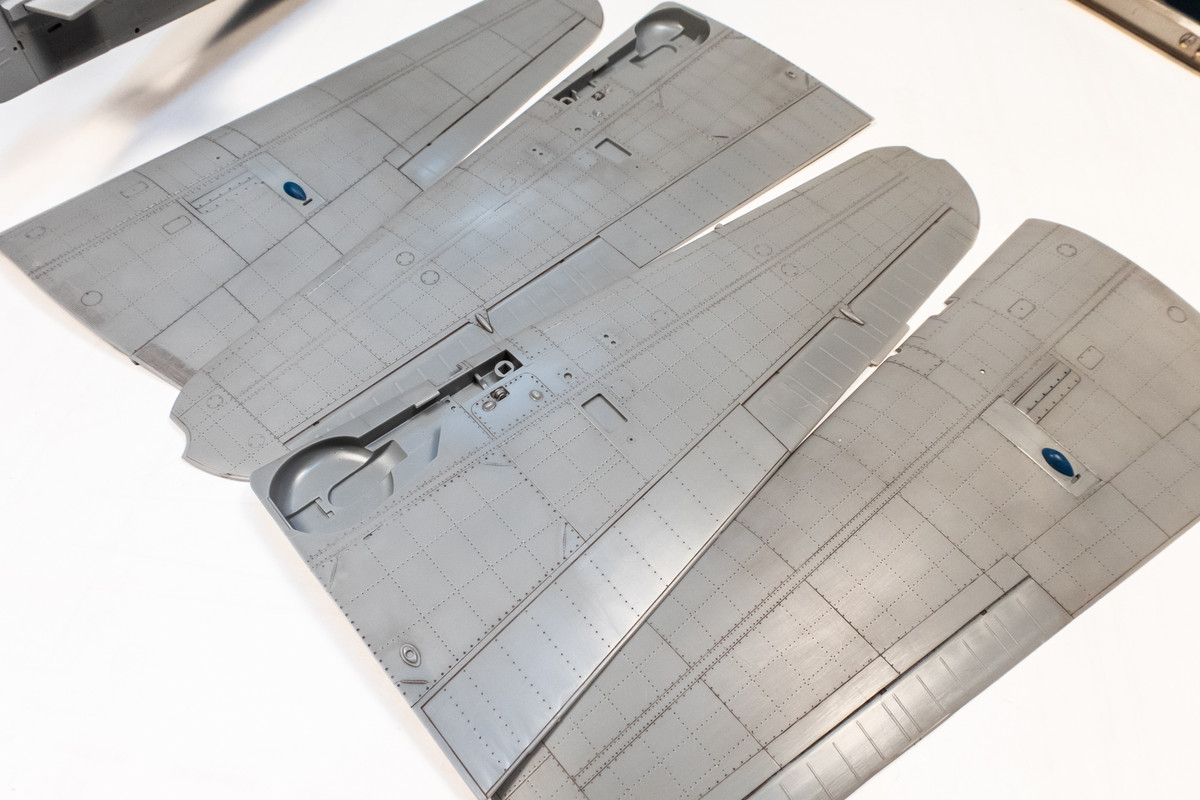
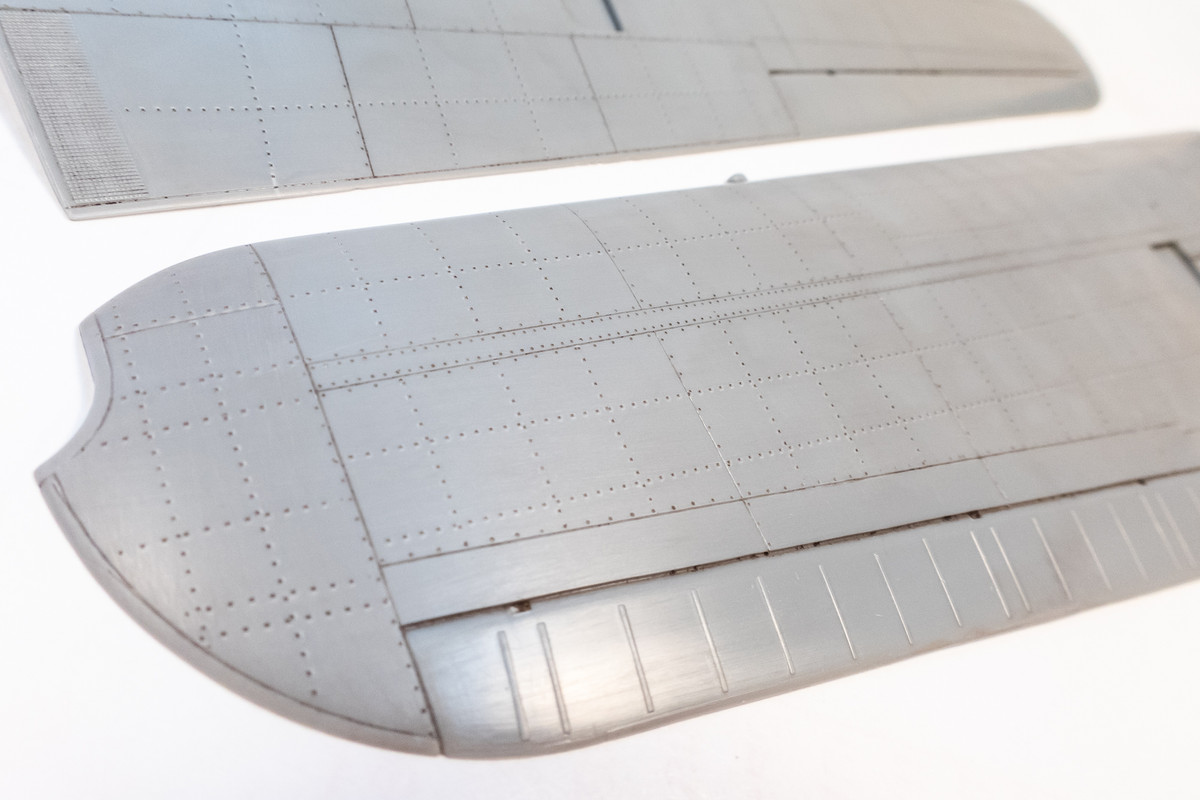
I decided to rivet the wing tops at this time. Rivet lines were laid out using a soft leaded pencil.
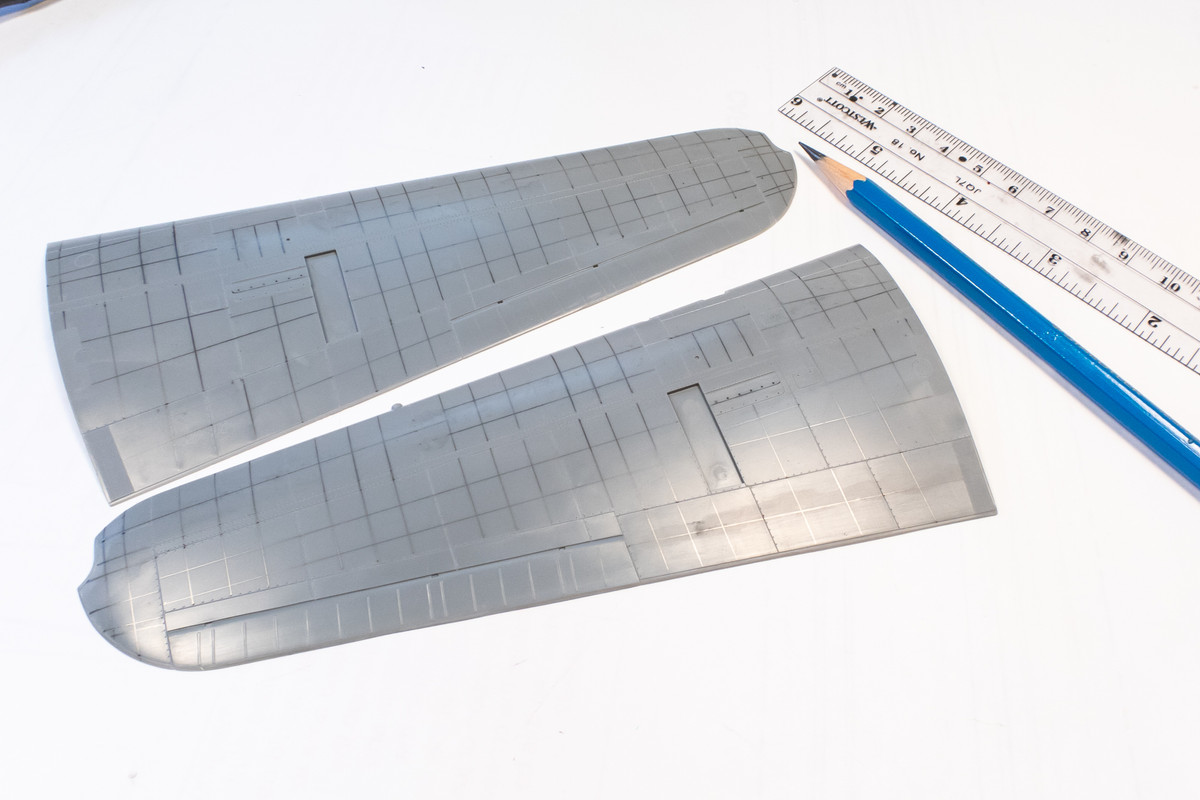
The Galaxy rivet tool in 1.00mm pitch was used to punch the rivets along the drawn lines.
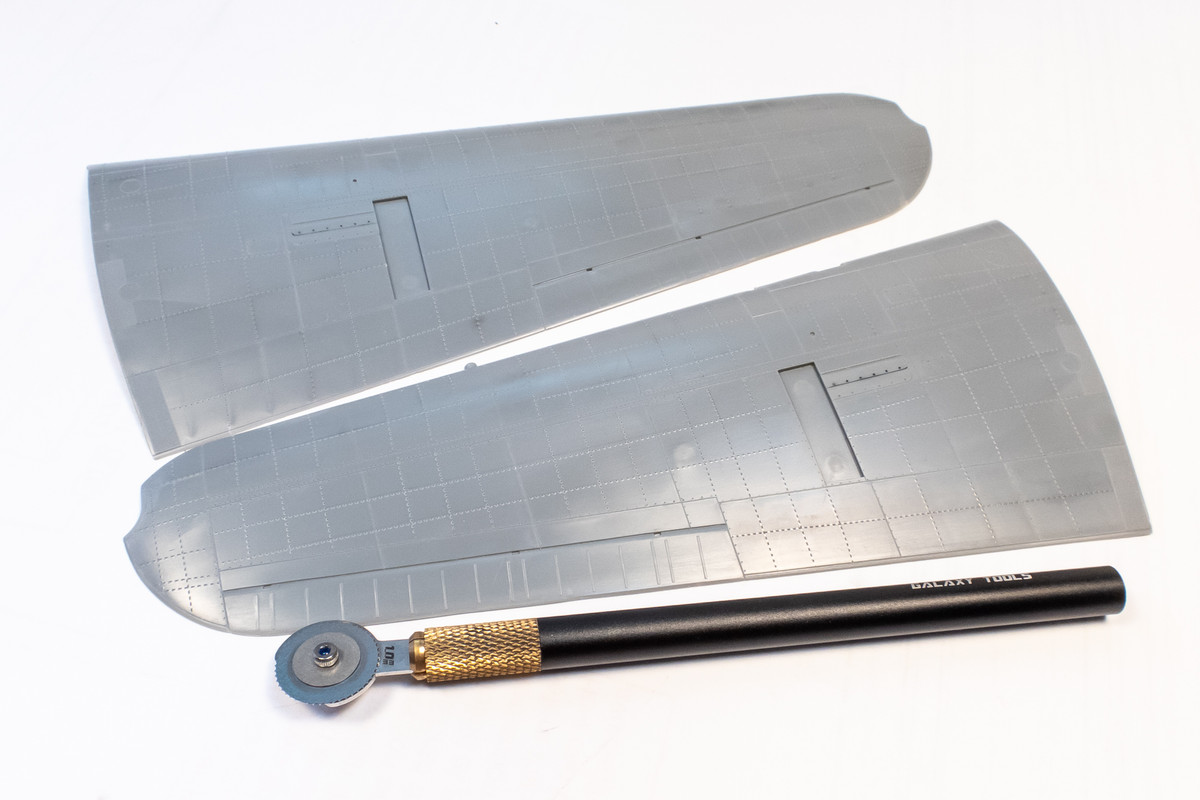
The riveting process creates small mounds of plastic around each rivet hole.
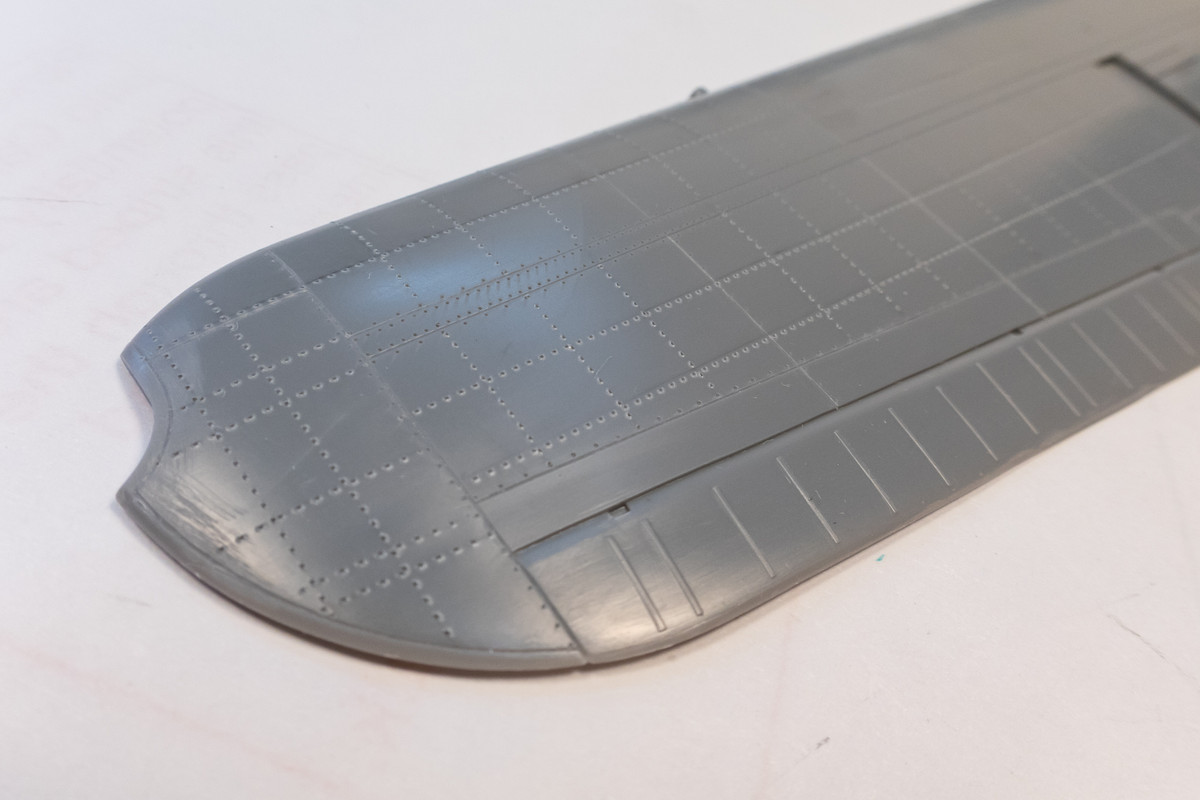
I choose to sand these mounds away, leaving just the hole.

After a little more work on the resin/fuselage joint, I'll be ready to glue the wing spar and the fuselage bottom into place.
Re: 1//32 Hasegawa Ki-61-1 Tei Hien
Posted: Sat Apr 29, 2023 12:03 am
by Stikpusher
John, I truly enjoy watching your step by step work coupled with your in depth explanation of your methods of construction. This project is another slow feast to watch and learn from.
Re: 1//32 Hasegawa Ki-61-1 Tei Hien
Posted: Sat Apr 29, 2023 3:21 am
by tempestjohnny
Stikpusher wrote: ↑Sat Apr 29, 2023 12:03 am
John, I truly enjoy watching your step by step work coupled with your in depth explanation of your methods of construction. This project is another slow feast to watch and learn from.

Re: 1//32 Hasegawa Ki-61-1 Tei Hien
Posted: Mon May 01, 2023 2:01 pm
by Medicman71
Very nice! I started using the black superglue and I love it!
Re: 1//32 Hasegawa Ki-61-1 Tei Hien
Posted: Wed May 03, 2023 6:35 pm
by jkim
Re: 1//32 Hasegawa Ki-61-1 Tei Hien
Posted: Thu May 04, 2023 4:25 am
by tempestjohnny
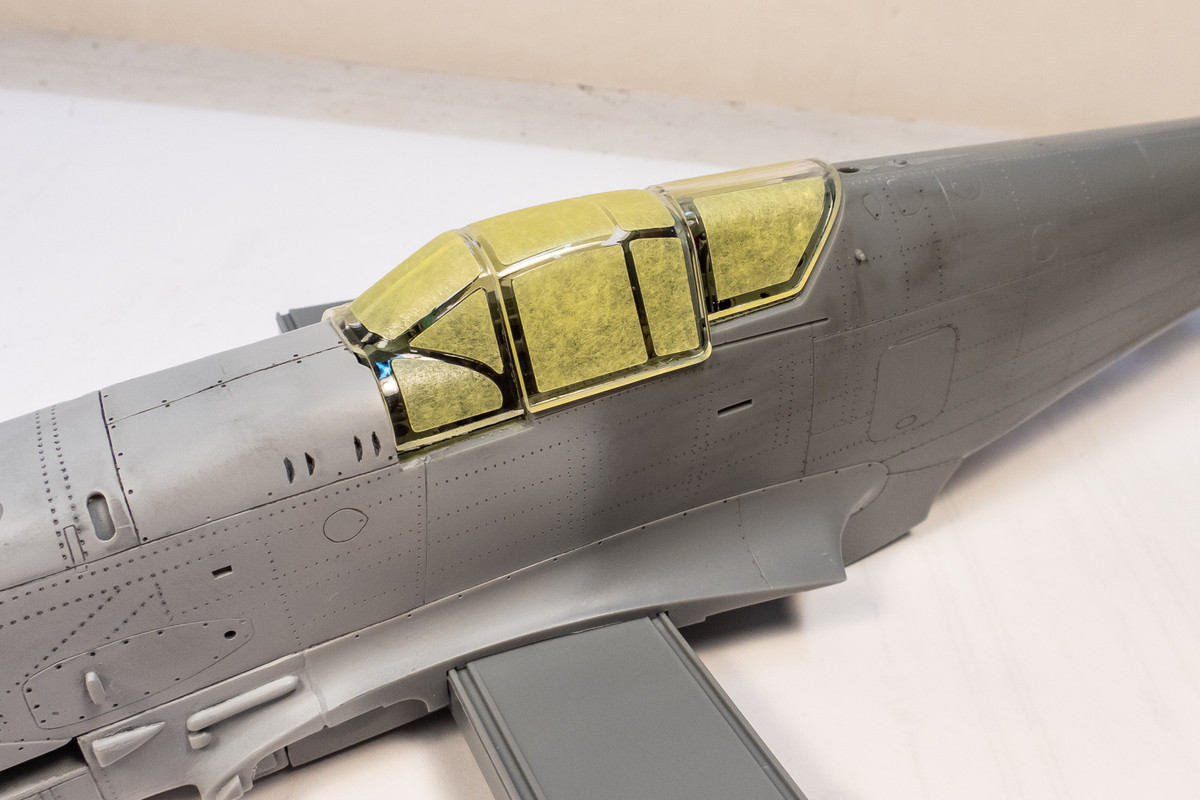
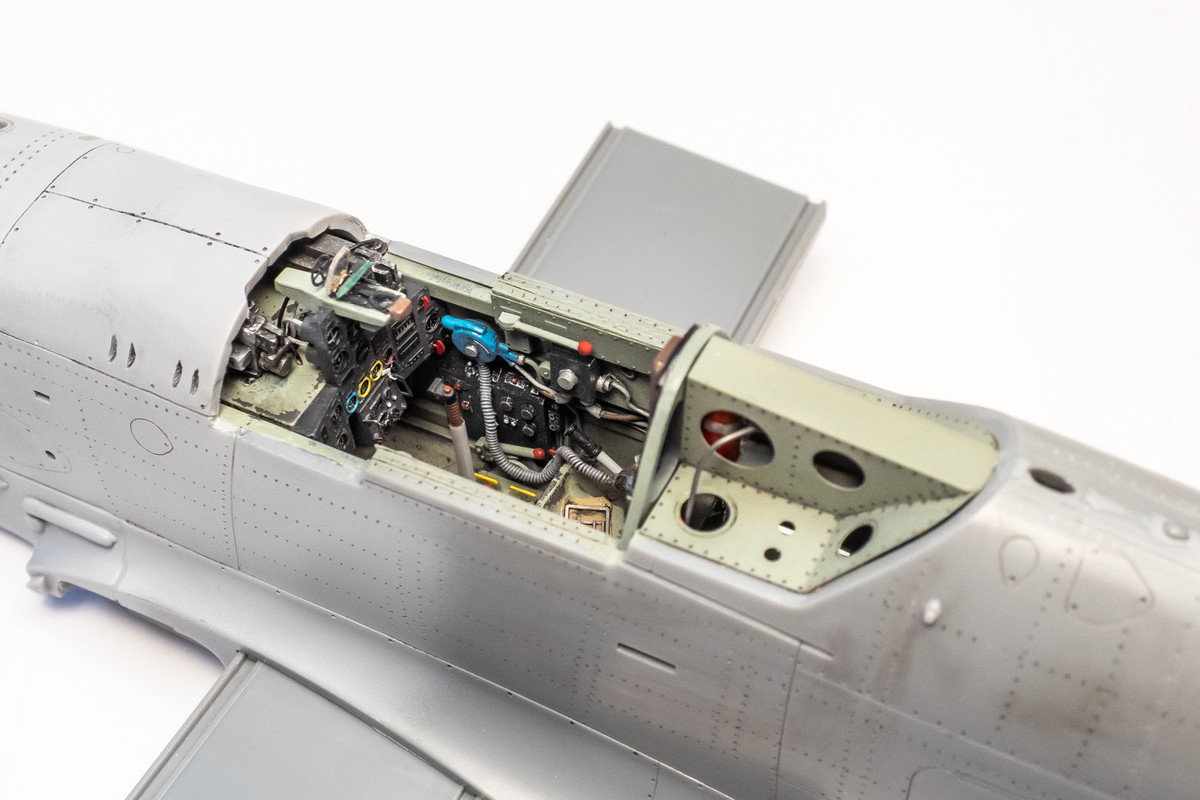
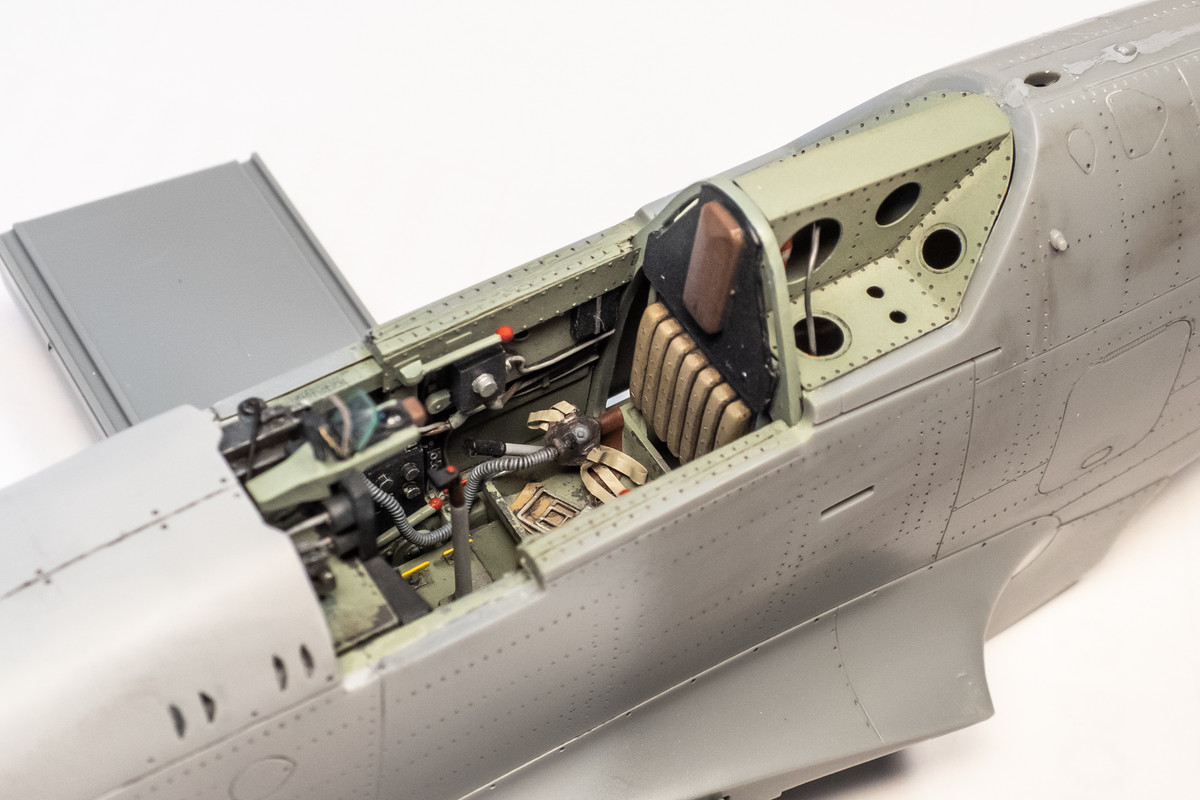
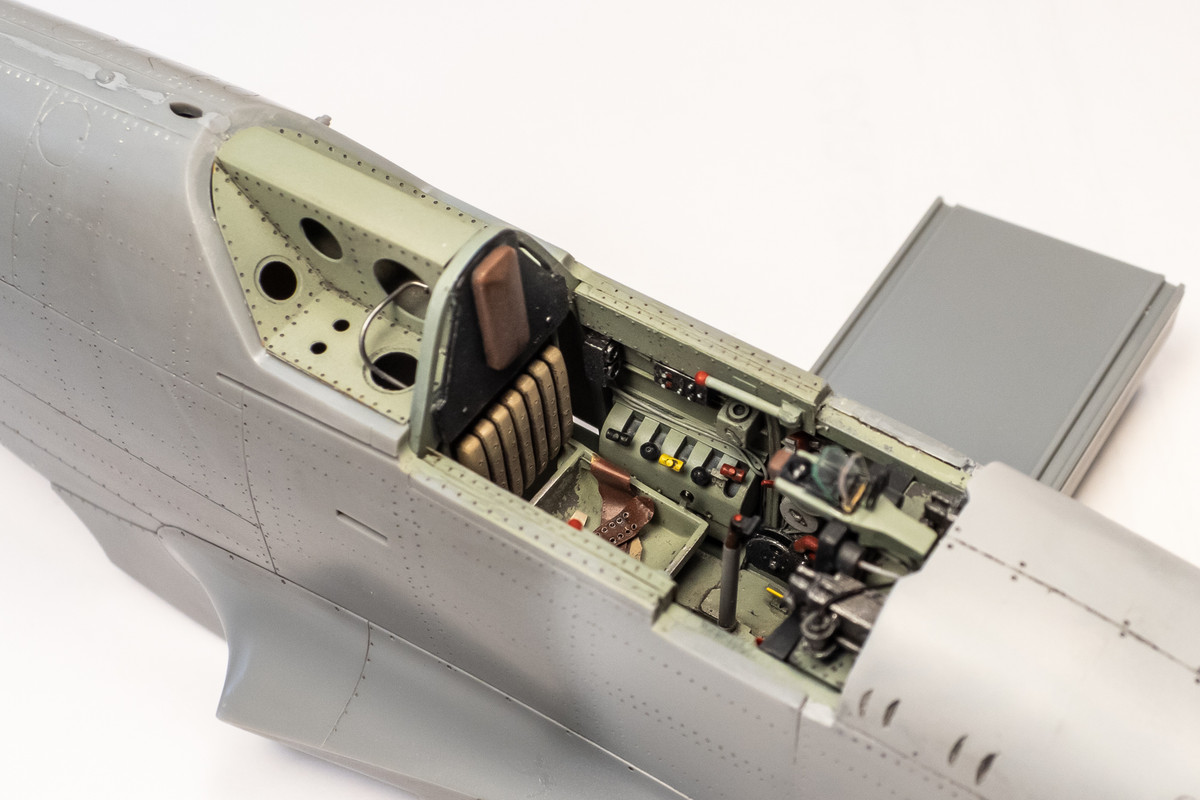
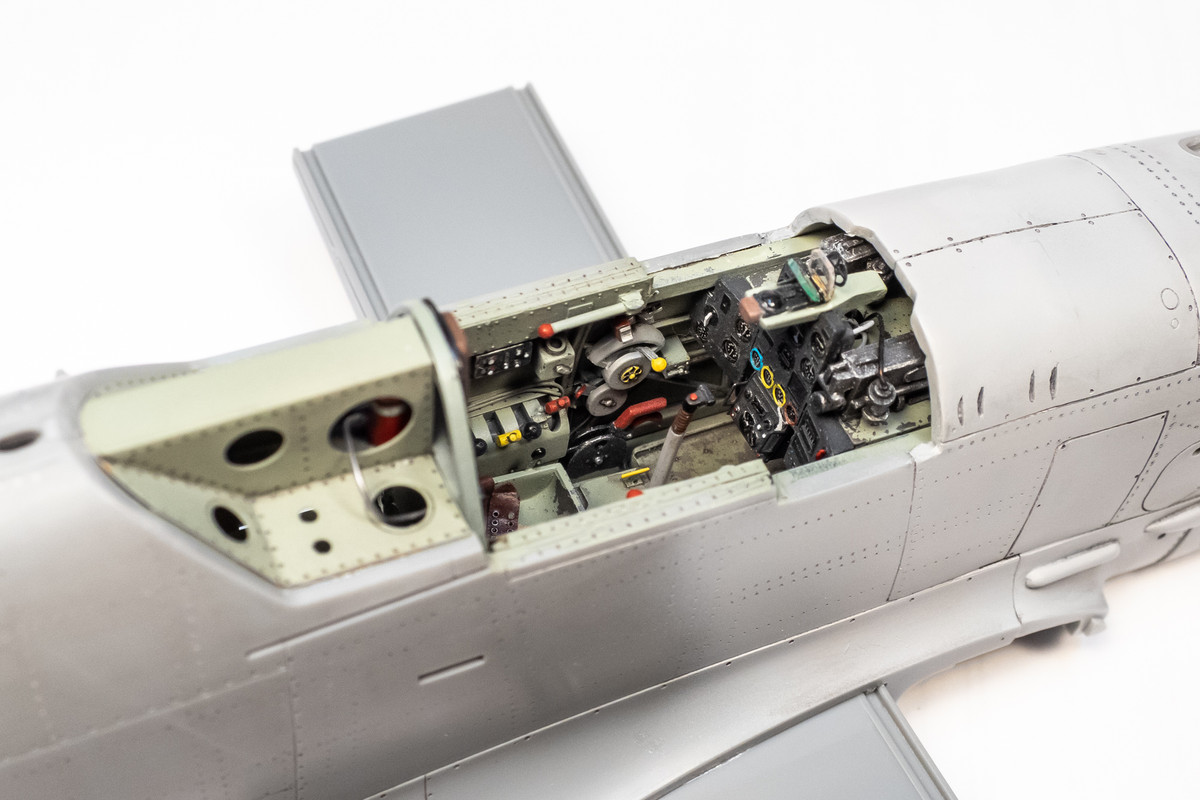
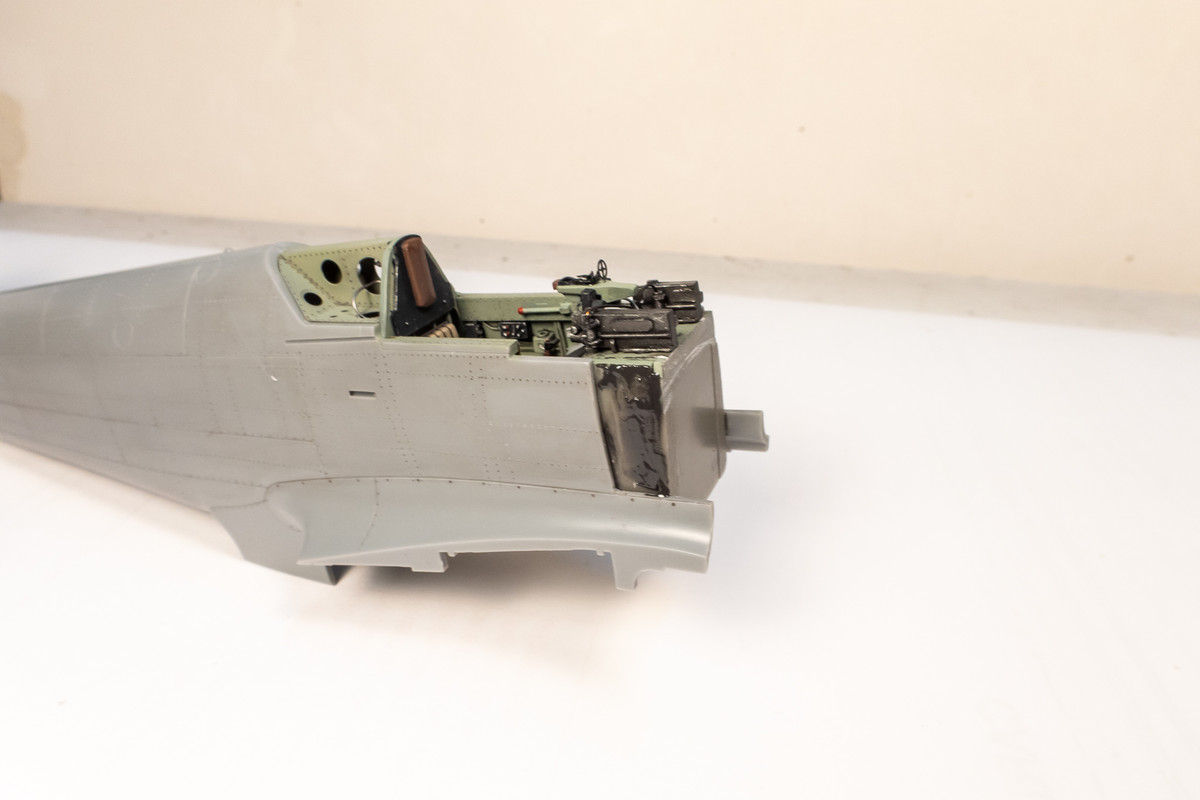
That cockpit

Re: 1//32 Hasegawa Ki-61-1 Tei Hien
Posted: Thu May 04, 2023 7:42 am
by keavdog
Very nice John. I hope that cockpit is visible when she's all buttoned up.
Re: 1//32 Hasegawa Ki-61-1 Tei Hien
Posted: Sun May 07, 2023 8:34 pm
by BlackSheep214