1/48 Tamiya F-14A Jolly Rogers

Post your work in progress of your aircraft builds in here.
User avatar
jkim
Elite Member
Posts: 4073
Joined: Mon Apr 10, 2017 4:03 pm

Re: 1/48 Tamiya F-14A Jolly Rogers

Post by jkim »

With the nose wheel well complete, the forward fuselage can finally be put back together again.
Image

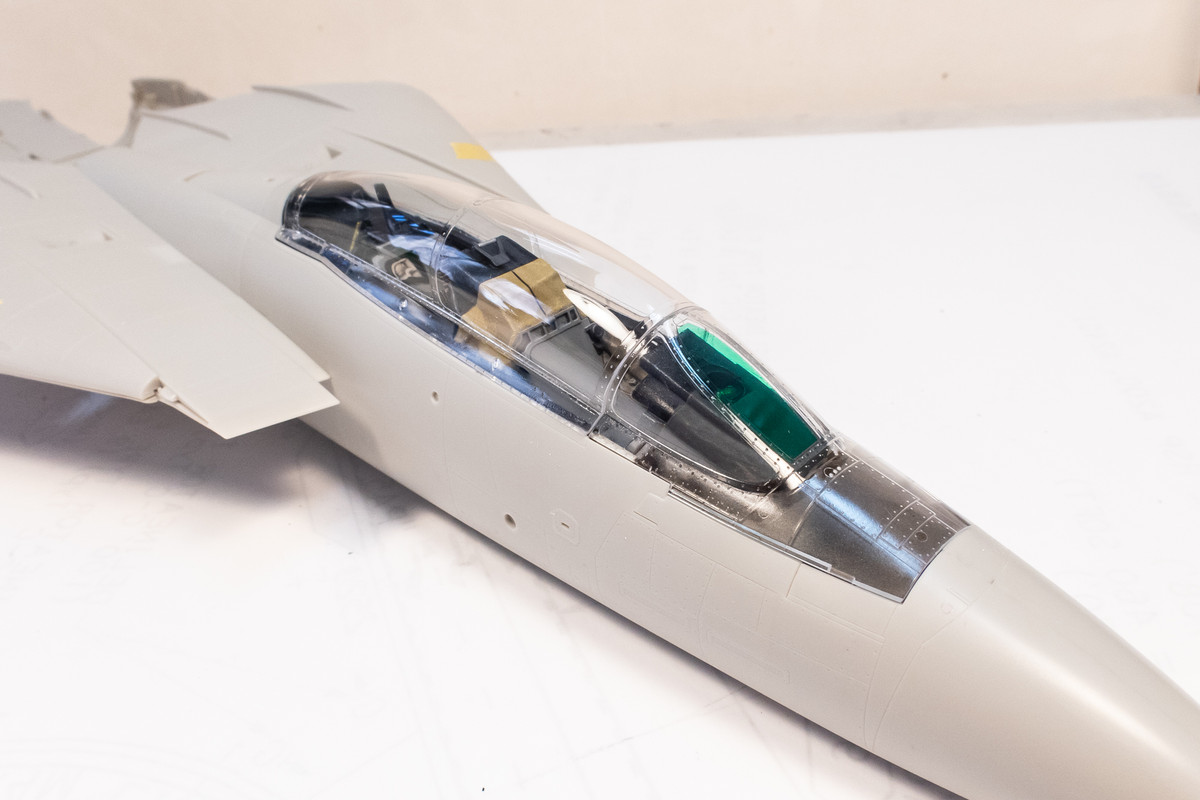
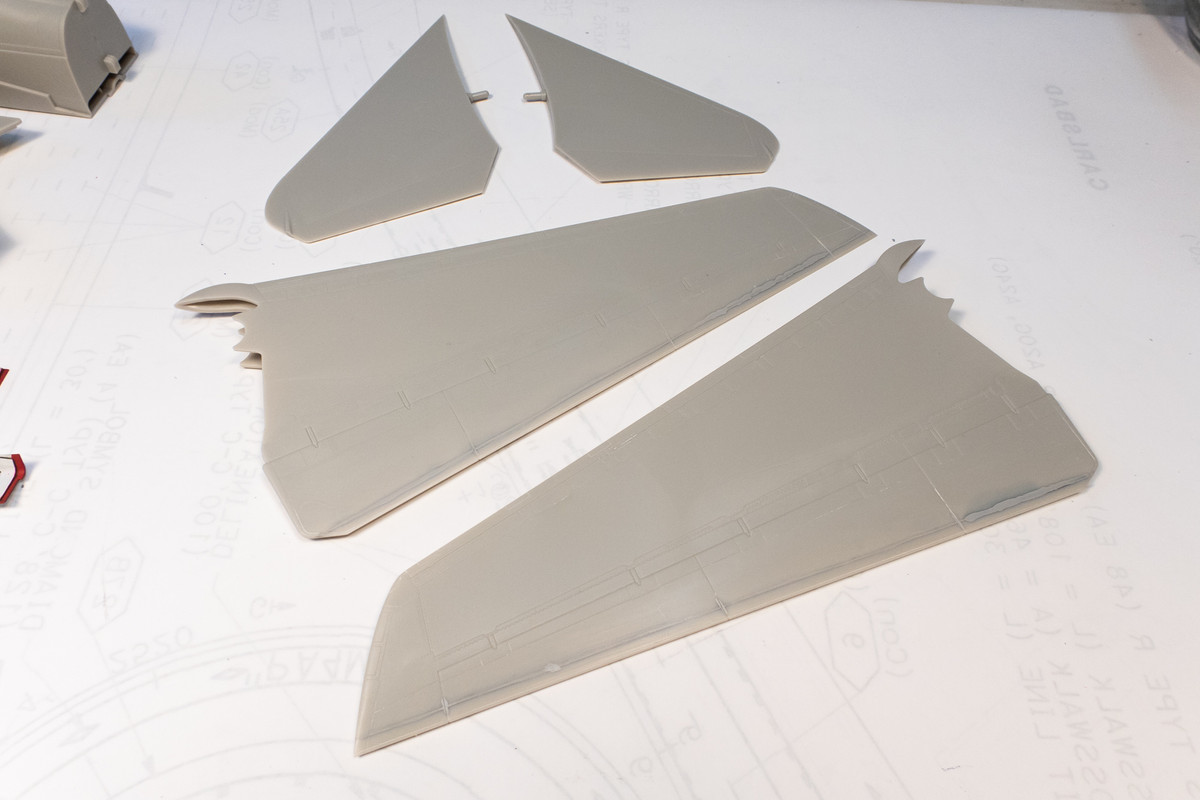
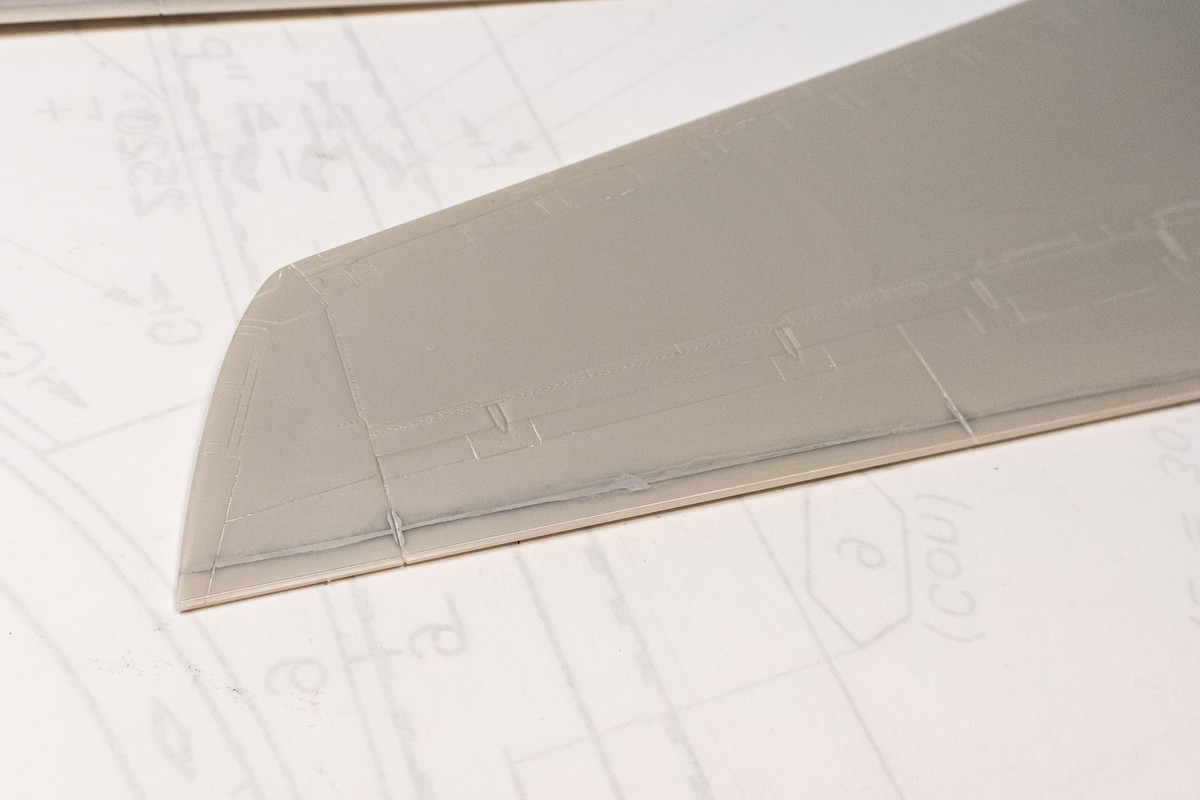
The seams have been sanded and given a dab of Mr Surfacer where needed.
Image
Image

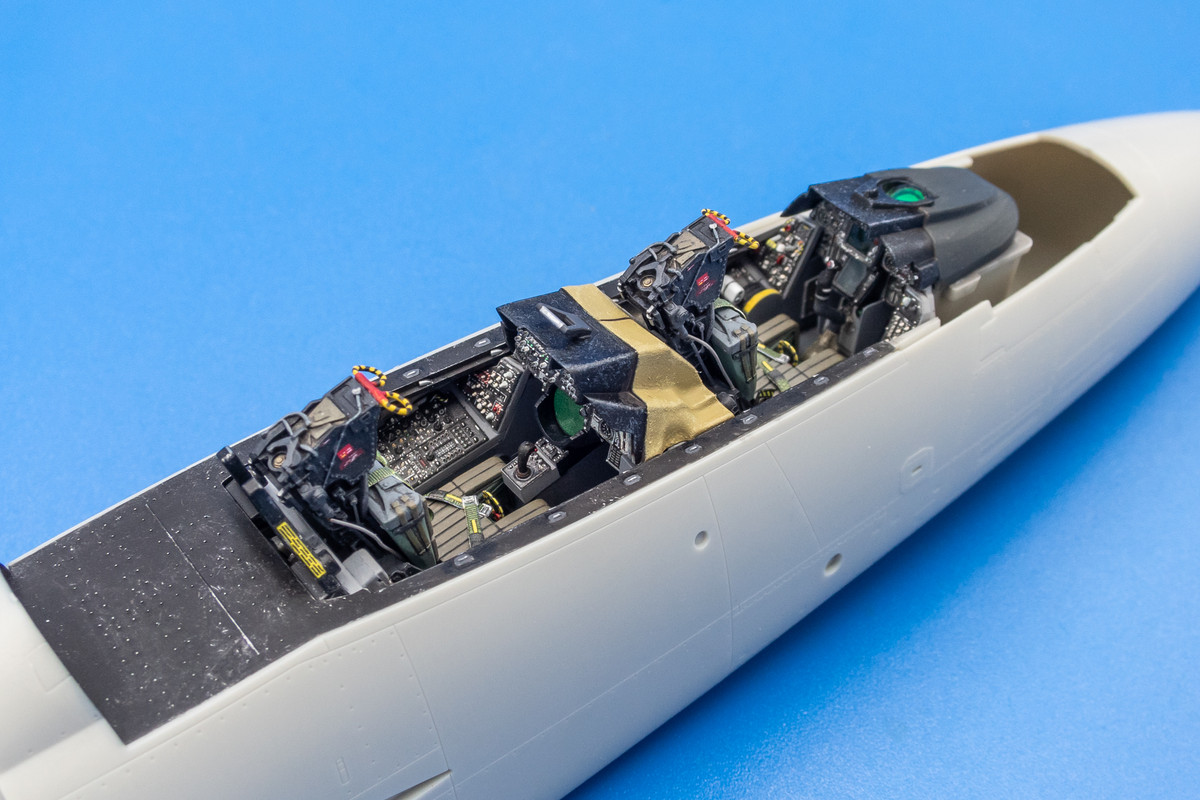
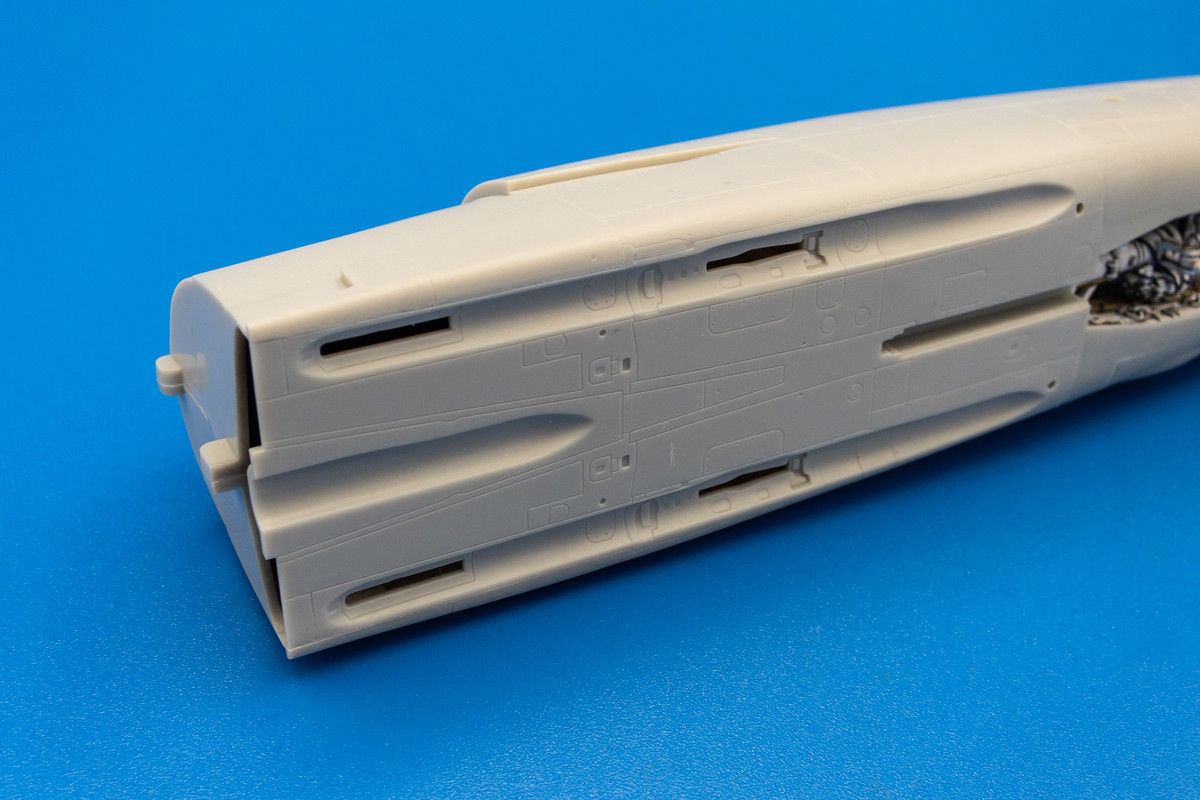
I've glued in the forward fuselage bottom at this time as well. Fit, not surprisingly, is excellent.
Image

The nose strut has not been glued into place yet. It can rotate on its mounting pins and be safely tucked into the well to minimize breakage.
Image
Image

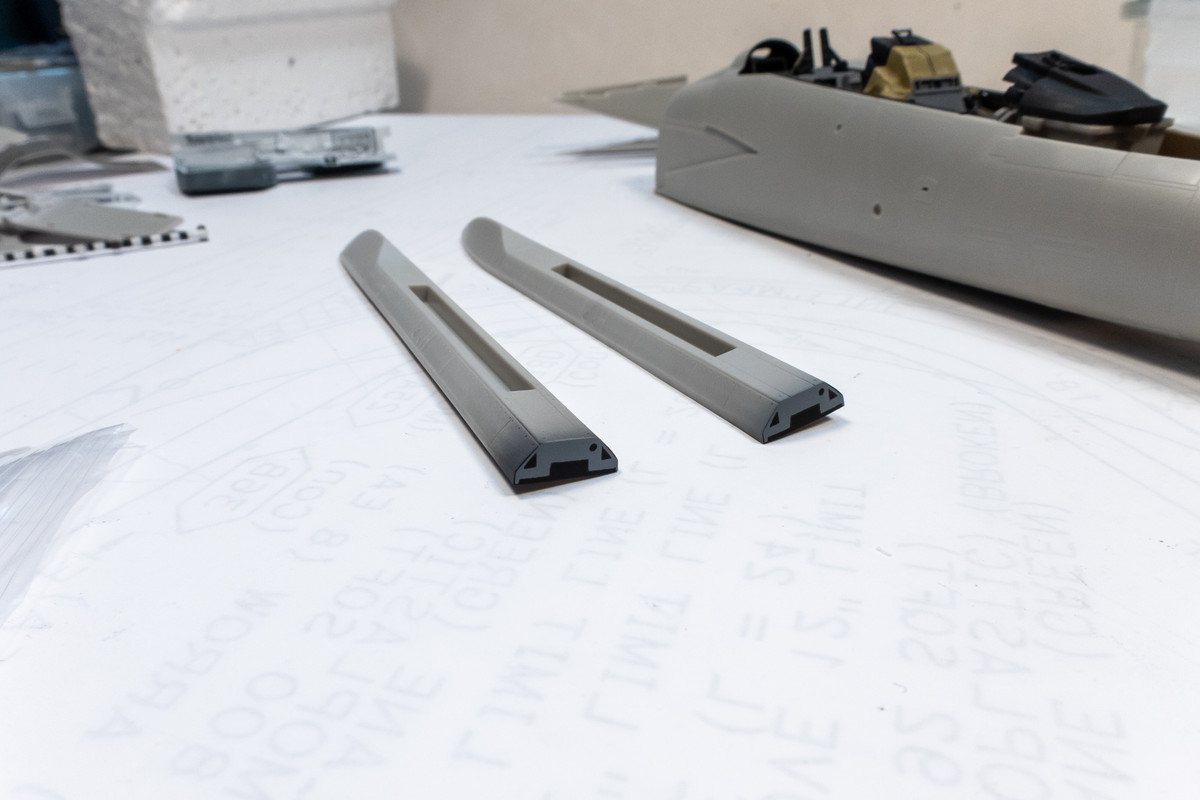
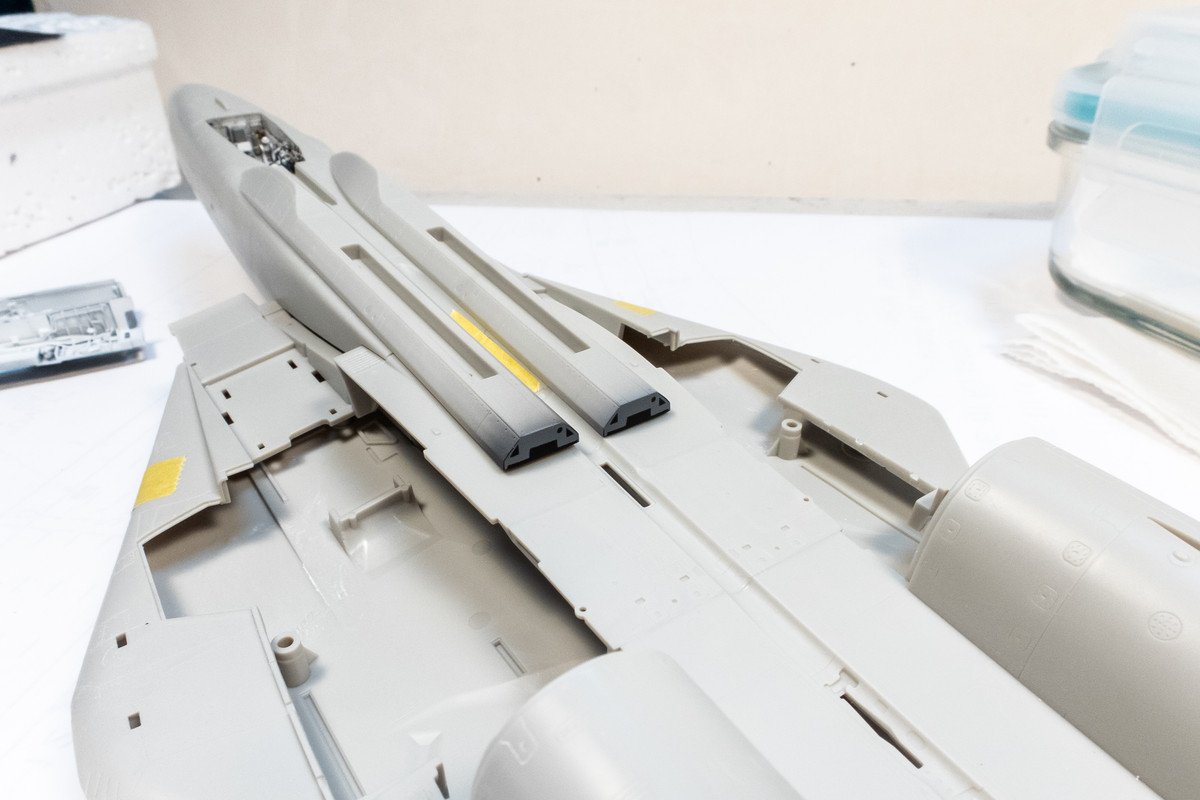
A bit of visual trickery using paint... the AIM-54A pylons apparently have some detail on the trailing end according to the Quickboost resin version.I just mimicked the detail by painting. Hopefully, no will look too closely!
Image
Image

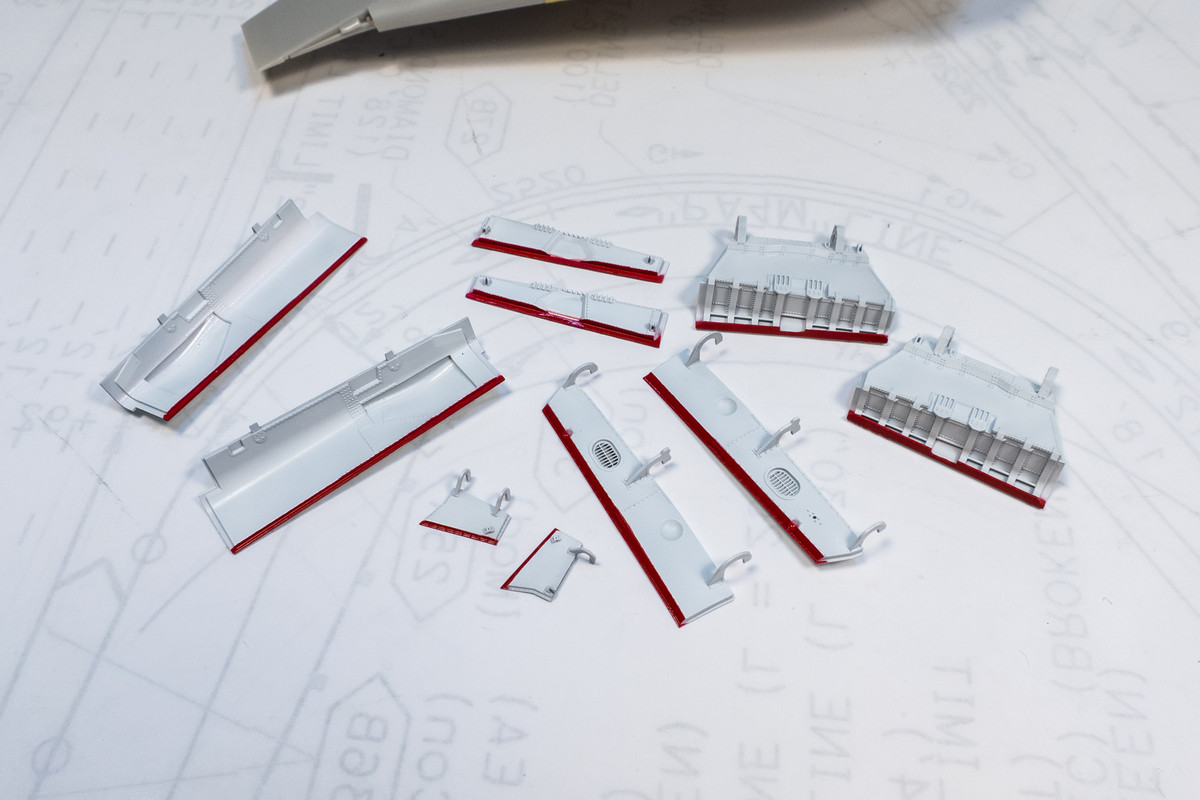
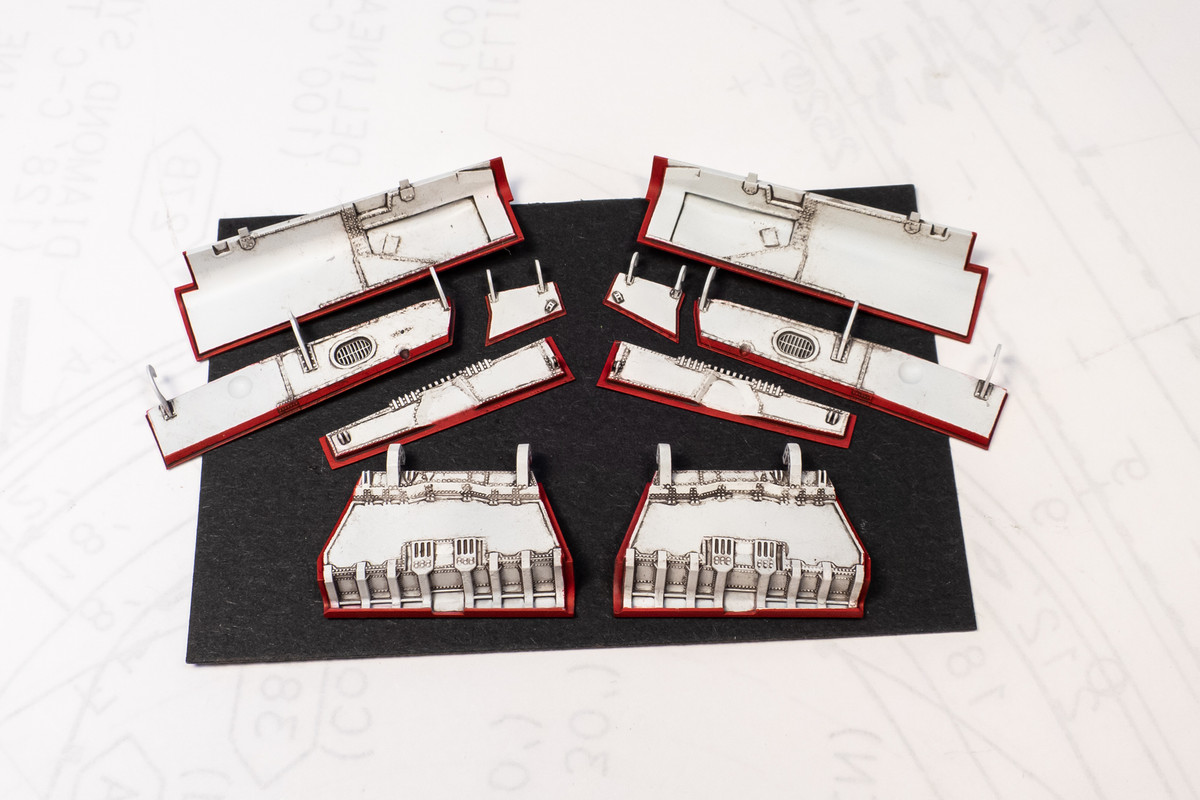
I've still not started painting the main wheel wells yet but I I decided to start adding the red edges to all of the gear doors. Due to complex shapes, I find it easier to paint one edge at a time. The hinges on the MMC doors are very thin and fragile and I've broken one off of the smaller nose doors. I won't repair it until painting is done.
Image
John aka JKim
-----------<><
Image
User avatar
BlackSheep214
Elite Member
Posts: 12984
Joined: Sun Apr 06, 2014 8:47 pm

Re: 1/48 Tamiya F-14A Jolly Rogers

Post by BlackSheep214 »

Heh...I remember painting door edges on 1/72 scale Tomcat kit. Enough to drive you crazy without too much red paint getting g on the white doors.
“Who controls the skies, controls the fate of this Earth”

Author unknown- 352nd Fighter Group, Blue-Nosed Bastards of Bodney

“Send one plane it’s a sortie; send two planes it’s a flight; send four planes it’s a test of airpower. - Richard Kohn
User avatar
tempestjohnny
Elite Member
Posts: 3775
Joined: Sat Oct 15, 2016 4:51 am
Location: Naples. FL

Re: 1/48 Tamiya F-14A Jolly Rogers

Post by tempestjohnny »

BlackSheep214 wrote: Wed Jul 31, 2024 8:57 am Heh...I remember painting door edges on 1/72 scale Tomcat kit. Enough to drive you crazy without too much red paint getting g on the white doors.
In 72nd scale I use a red sharpie for the edges
User avatar
cbaltrin
Addicted Member
Posts: 1564
Joined: Mon Dec 26, 2022 9:10 pm
Location: Detroit

Re: 1/48 Tamiya F-14A Jolly Rogers

Post by cbaltrin »

Amazing work on those wheel wells -- just wow...
Big Joe: 'You just keep those Tigers busy and we'll take care of the rest.'
Oddball: 'The only way I got to keep them Tigers busy is to let them shoot holes in me...'

My Stash https://www.scalemates.com/profiles/mat ... 53&p=stash
User avatar
jkim
Elite Member
Posts: 4073
Joined: Mon Apr 10, 2017 4:03 pm

Re: 1/48 Tamiya F-14A Jolly Rogers

Post by jkim »

Thanks guys!

The clear parts have been polished and dipped in Future.  The center panel of the windscreen was tinted bluish green using a mix of Tamiya Clear Green and a dash of Clear Blue and sprayed from the inside.
Image

Clear parts fit well but there is a slight gap along the windscreen part on the front starboard edge. It is along the refuel probe door, which was a separate part so I don't know if it is my fault or Tamiya's fault. I can eliminate the gap by slightly forcing the windscreen down or a little bit of putty.
Image
Image

The canopy rails and the rear deck insert were painted black and glued into the canopy.
Image

The clear parts were then masked using Eduard masks.
Image

If I can't get the clear parts to sit flush without glue, they will glued shut. My preference anyway. So in preparation for the eventuality, I've glued the Eduard ejection seats into place.
Image
Image
Image
Image
John aka JKim
-----------<><
Image
User avatar
keavdog
Elite Member
Posts: 4620
Joined: Thu Jan 10, 2019 1:14 am
Location: Earth

Re: 1/48 Tamiya F-14A Jolly Rogers

Post by keavdog »

Great looking cockpit - adding the ejection seats really finishes it of nicely. Are closing up the canopy and covering up all that office detail?
Thanks,
John
User avatar
jkim
Elite Member
Posts: 4073
Joined: Mon Apr 10, 2017 4:03 pm

Re: 1/48 Tamiya F-14A Jolly Rogers

Post by jkim »

Thank you John! Yes, I am leaning towards closing the canopy. I prefer my aircraft models all buttoned up. The large greenhouse should give a nice view of the cockpit even when it is closed.

However... if the canopy sits perfectly flush without glue, I am open to not gluing into place.
John aka JKim
-----------<><
Image
User avatar
BlackSheep214
Elite Member
Posts: 12984
Joined: Sun Apr 06, 2014 8:47 pm

Re: 1/48 Tamiya F-14A Jolly Rogers

Post by BlackSheep214 »

Man… those cockpits seats looks good enough for me want to sit in it. :giggles:
“Who controls the skies, controls the fate of this Earth”

Author unknown- 352nd Fighter Group, Blue-Nosed Bastards of Bodney

“Send one plane it’s a sortie; send two planes it’s a flight; send four planes it’s a test of airpower. - Richard Kohn
User avatar
Stikpusher
Moderator
Posts: 20863
Joined: Sat Apr 05, 2014 8:37 pm
Location: Ceti Alpha 5

Re: 1/48 Tamiya F-14A Jolly Rogers

Post by Stikpusher »

Image

it's starting to look the part... :wink:
"Surely I have made my meaning plain? I intend to avenge myself upon you, Admiral. I have deprived your ship of power, and when I swing 'round, I intend to deprive you of your life."

FLSM
User avatar
jkim
Elite Member
Posts: 4073
Joined: Mon Apr 10, 2017 4:03 pm

Re: 1/48 Tamiya F-14A Jolly Rogers

Post by jkim »

Thanks guys! I really like the high visibility markings on those Tomcats in the 70's and 80's. Looking forward to that stage in the build where I start putting the markings on.

In the meantime, I've painted the gear doors and given them a dark brown pastel wash. These came with the MCC wheel well set and are much more detailed than the kit parts.
Image

I've started gluing together the main airfoil features such as the vertical rudders, stabilizers and wings. The most significant puttying area so far has been the glue joint on the wing bottoms that are just inboard of the trailing edge. Primarily filled with Mr Primer Surfacer 1000. There were some areas where the filler joint cracked, indicating a lack of glue bond. I had to bite the bullet, gouge out those areas with a scriber and fill with Black CA glue.
Image
Image
John aka JKim
-----------<><
Image
Post Reply

Return to “Aircraft Work in Progress”