1/48 Tamiya F-14A Jolly Rogers
-
BlackSheep214

- Elite Member
- Posts: 12984
- Joined: Sun Apr 06, 2014 8:47 pm
Re: 1/48 Tamiya F-14A Jolly Rogers
Brown pastel wash looks better than black…. I’ll have to remember that…
“Who controls the skies, controls the fate of this Earth”
Author unknown- 352nd Fighter Group, Blue-Nosed Bastards of Bodney
“Send one plane it’s a sortie; send two planes it’s a flight; send four planes it’s a test of airpower. - Richard Kohn
Author unknown- 352nd Fighter Group, Blue-Nosed Bastards of Bodney
“Send one plane it’s a sortie; send two planes it’s a flight; send four planes it’s a test of airpower. - Richard Kohn
-
Stikpusher

- Moderator
- Posts: 20863
- Joined: Sat Apr 05, 2014 8:37 pm
- Location: Ceti Alpha 5
Re: 1/48 Tamiya F-14A Jolly Rogers
Yes, black is too stark in most areas or on most subjects. Dark grays or browns are better on most areas as a general rule. Save black washes for selected areas like guns, engine exhausts, etc.
"Surely I have made my meaning plain? I intend to avenge myself upon you, Admiral. I have deprived your ship of power, and when I swing 'round, I intend to deprive you of your life."
FLSM
FLSM

Re: 1/48 Tamiya F-14A Jolly Rogers
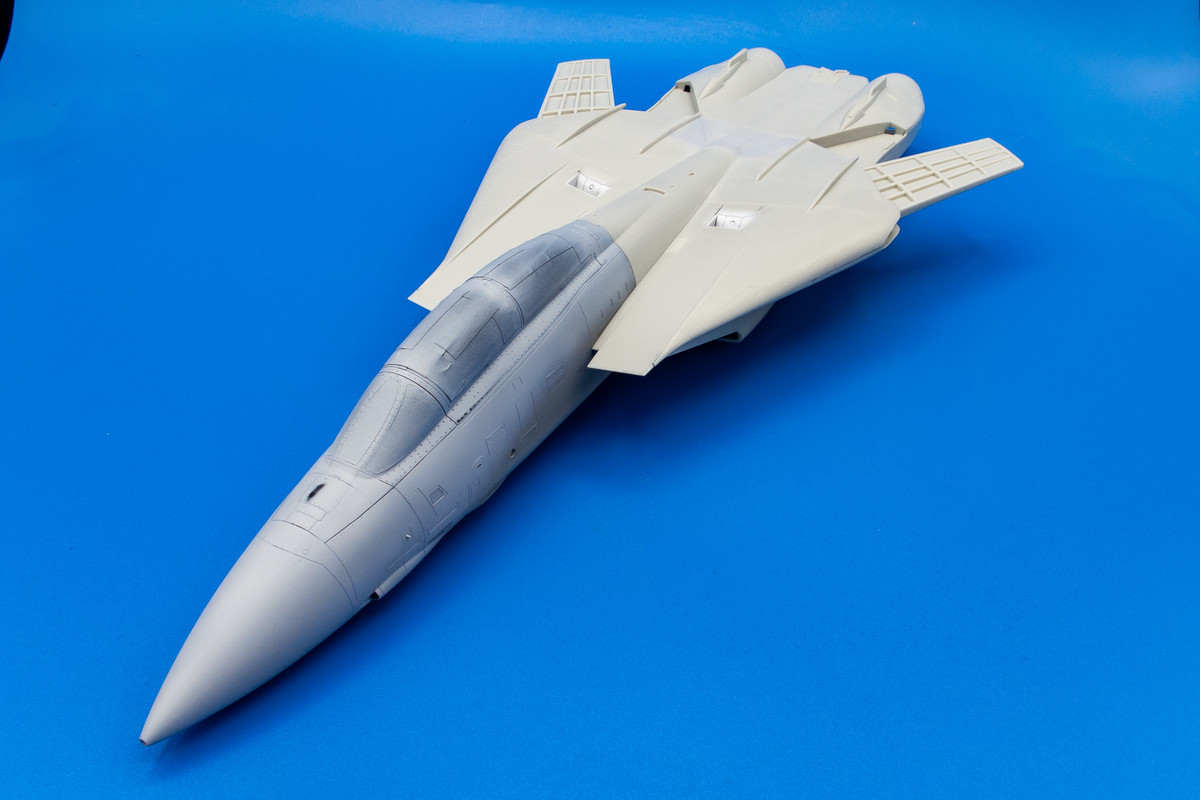
Thanks guys! As Carlos says, a black wash is probably too stark a contrast on lighter colors, especially white. For the exterior of the F-14, I'll probably mix up a couple shades... a grey for the white bottoms and a darker grey or brown for the gull grey uppers.
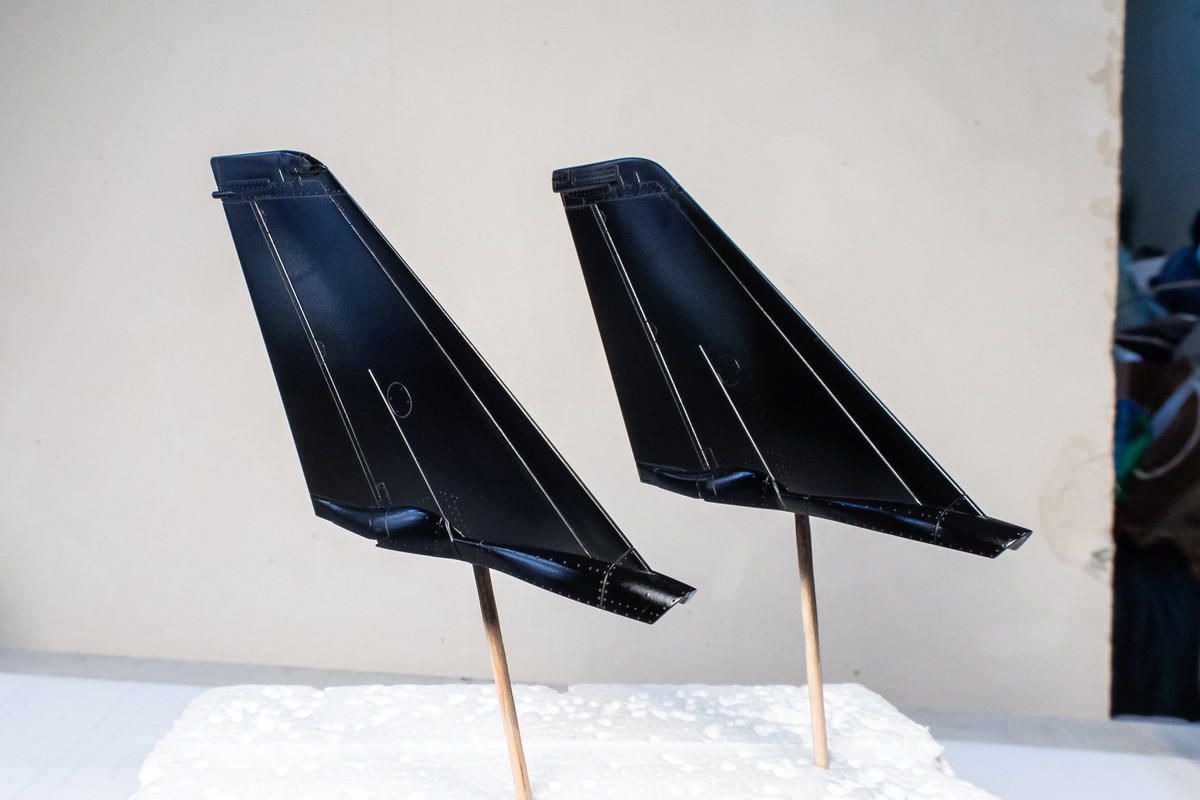
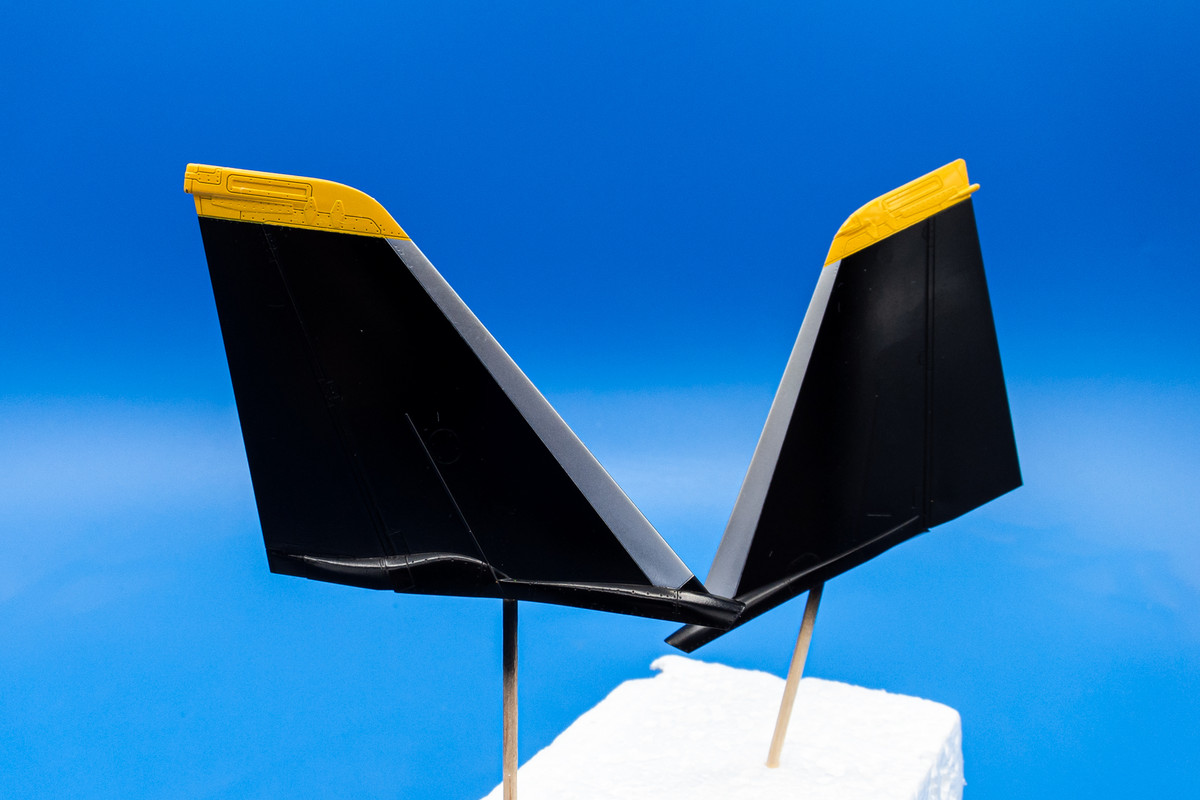
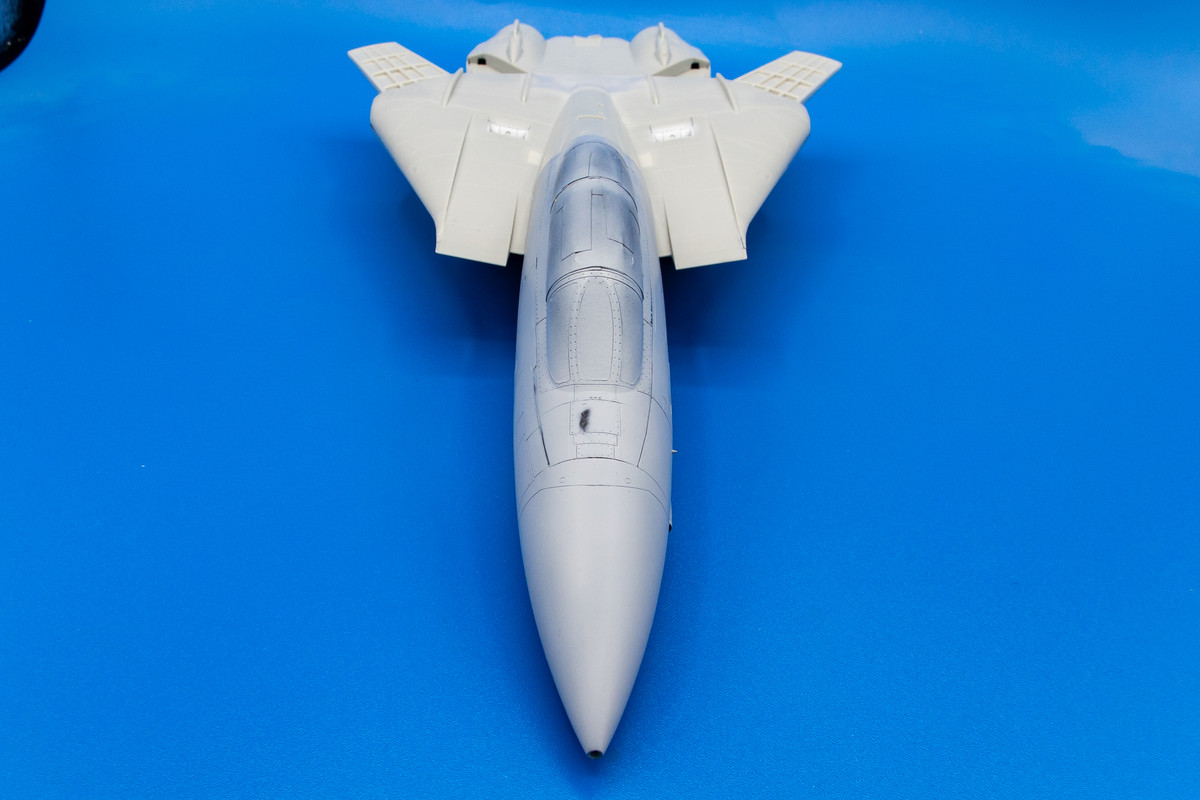
Since the fit of the vertical tail fins is very good, I've started painting them with a base coat of gloss black.
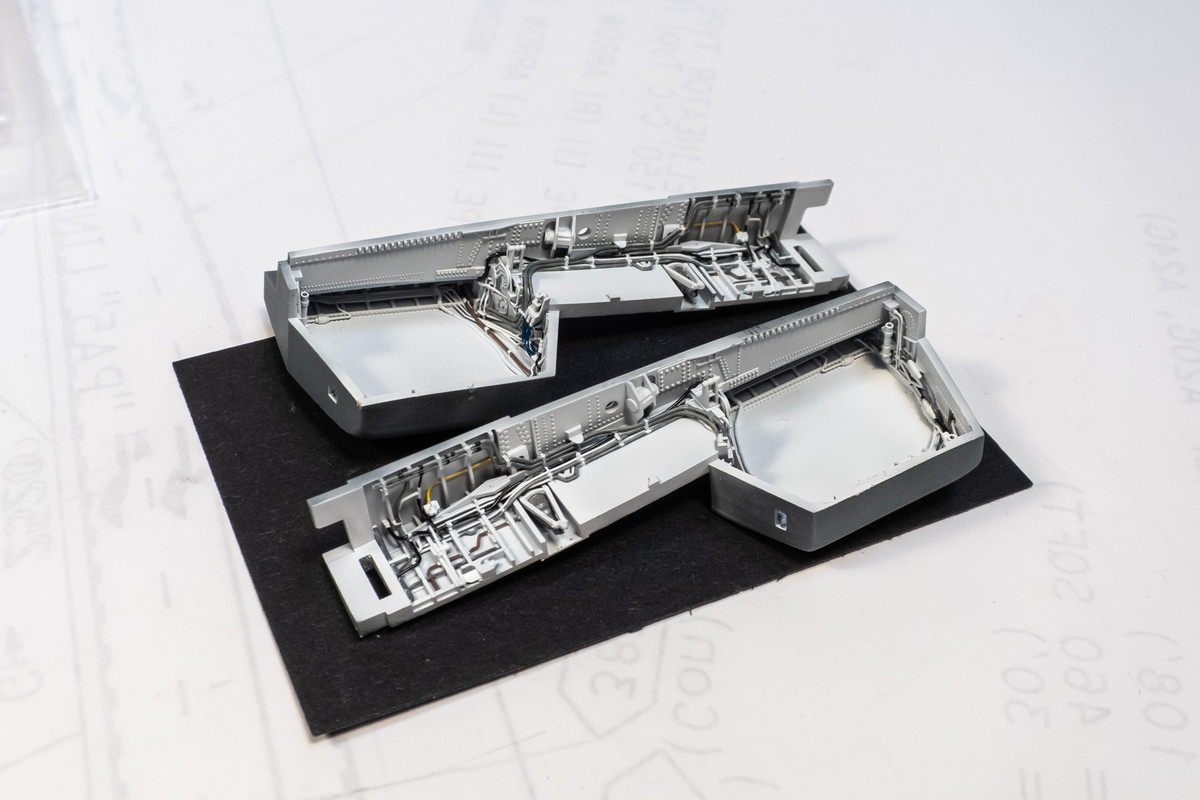
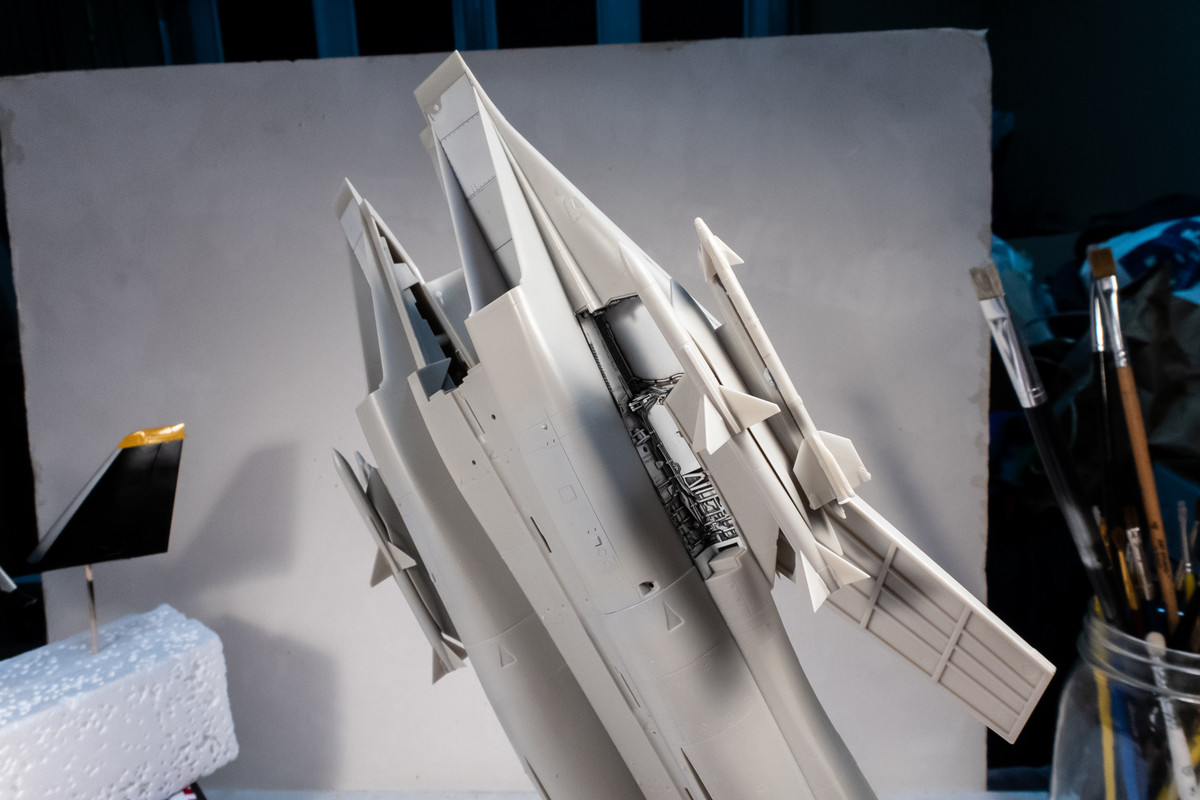
The wheel well painting is underway. Based on the Coreman book, the wheel well interiors were mostly white so that's what I'm going with here. After painting, the wells will be given a clear coat. A pastel wash after that should heighten the details and dirty things up a bit.
I couldn't get the canopy to seat flush so both the windscreen and canopy have been cemented into place.
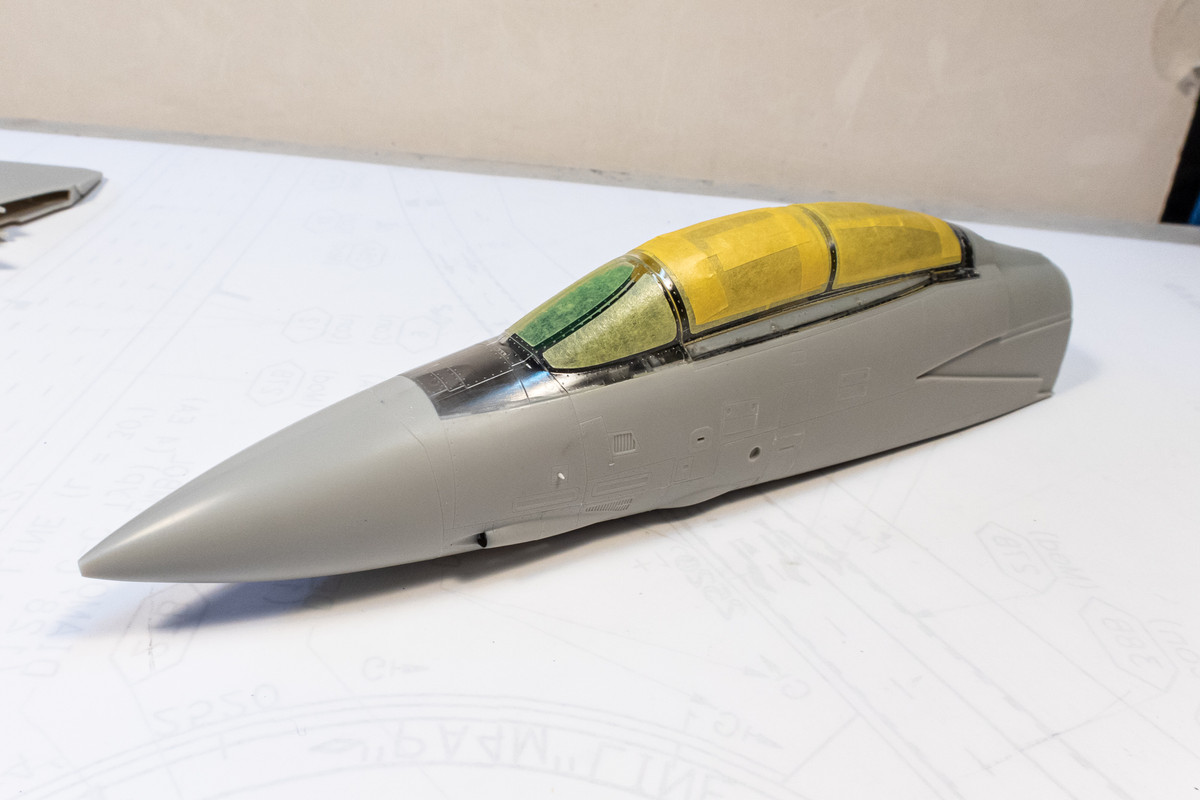
The windscreen and canopy were then given a coat of black. The canopy frames are black on the inside and outside but I'll probably spray a coat of primer over this black and then re-spray with black again to build up the opacity of the canopy frames. You want to make sure that you have enough paint on the canopy frames so that light doesn't shine through them.
Since the fit of the vertical tail fins is very good, I've started painting them with a base coat of gloss black.
The wheel well painting is underway. Based on the Coreman book, the wheel well interiors were mostly white so that's what I'm going with here. After painting, the wells will be given a clear coat. A pastel wash after that should heighten the details and dirty things up a bit.
I couldn't get the canopy to seat flush so both the windscreen and canopy have been cemented into place.
The windscreen and canopy were then given a coat of black. The canopy frames are black on the inside and outside but I'll probably spray a coat of primer over this black and then re-spray with black again to build up the opacity of the canopy frames. You want to make sure that you have enough paint on the canopy frames so that light doesn't shine through them.
John aka JKim
-----------<><

-----------<><

Re: 1/48 Tamiya F-14A Jolly Rogers
John, I really enjoy your work and gaze longingly (well, maybe not that) at it. Since I can usually jus utter a, “Wow!”, I don’t often respond. Love your work and the information you share!
To make each build less crappy than the last one. Or, put another way, "Better than the last one, not as good as the next one!"..
Re: 1/48 Tamiya F-14A Jolly Rogers
Thanks Lyle! Appreciate you checking in on this one!
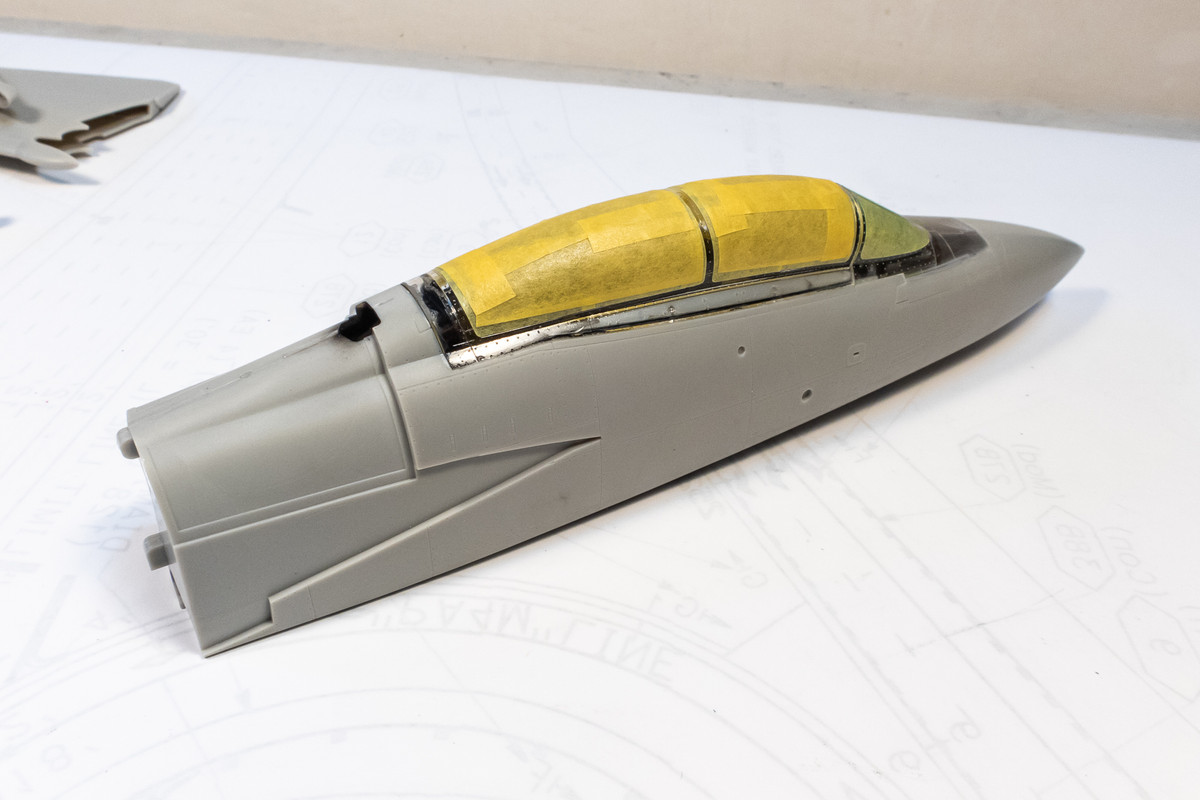
A primer coat (Mr Primer Surfacer 1000) has been sprayed over the canopy. Now I can see the glue joints that I need to fix. Keeping in mind that there will be a high contrast (black and gull grey) color demarcation along this line, the fix doesn't have to be as exact.
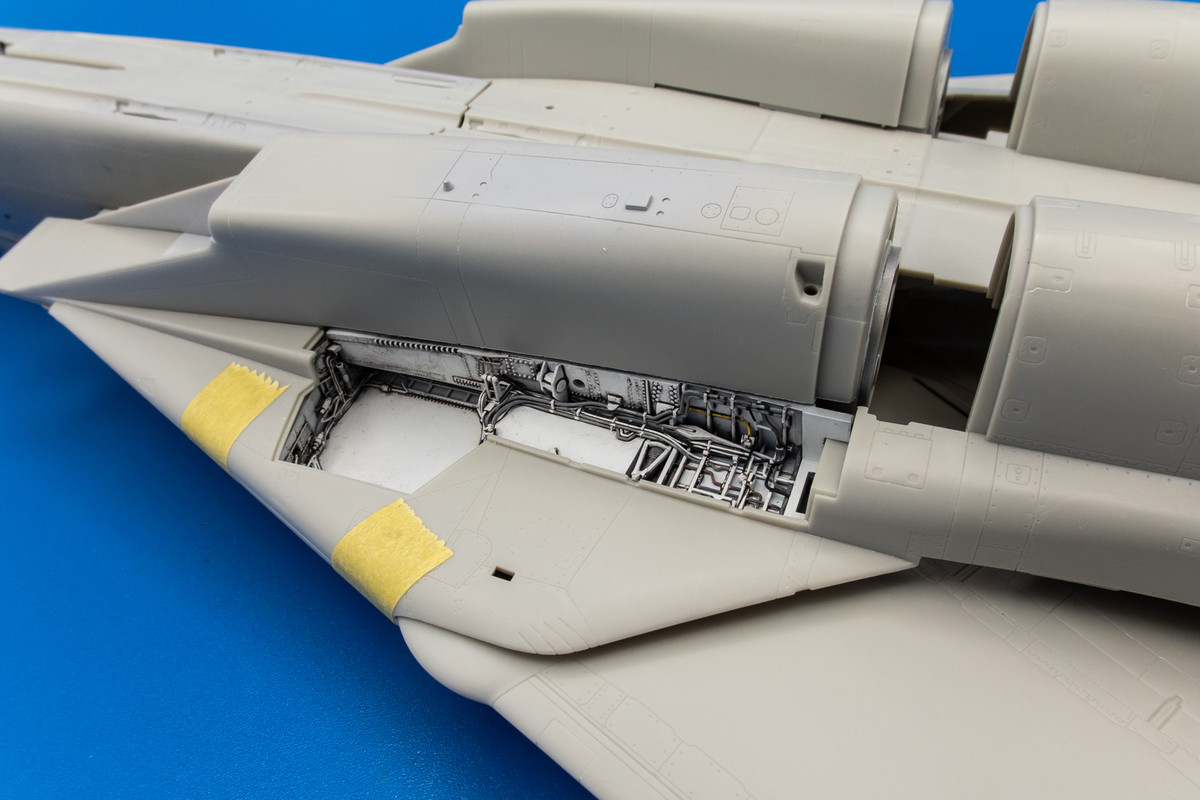
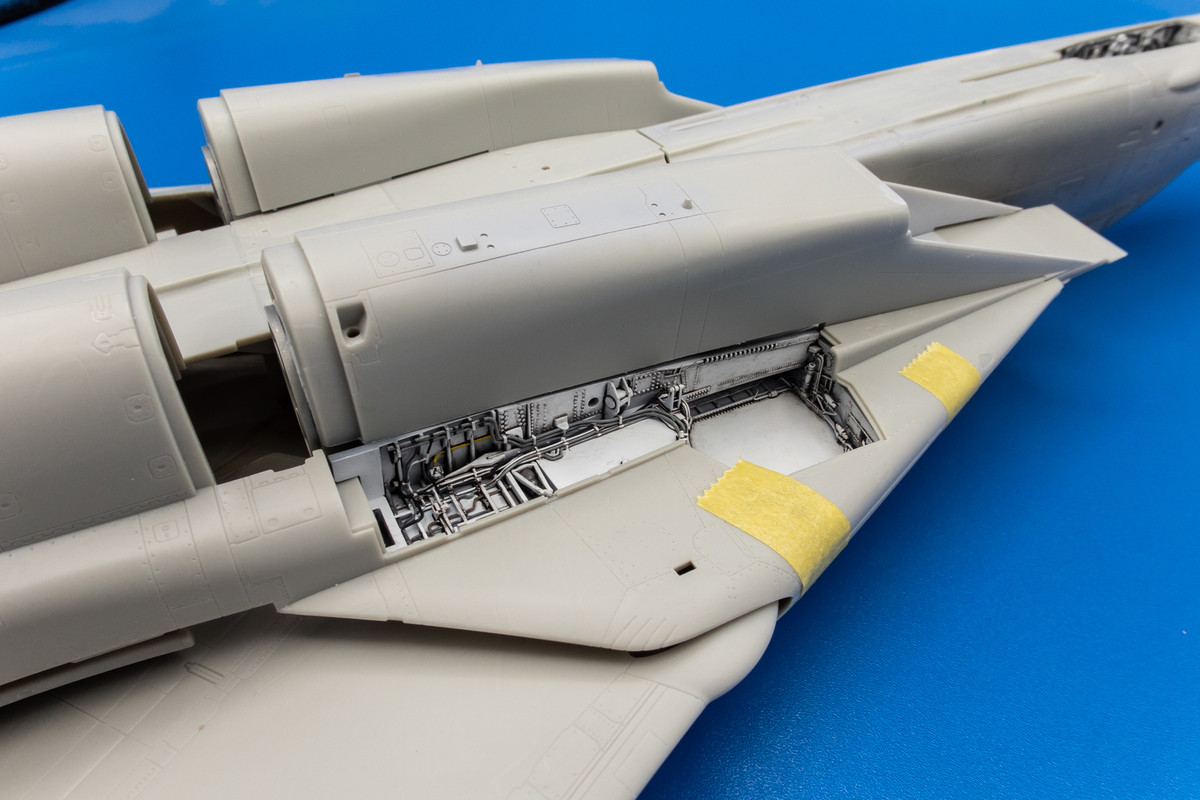
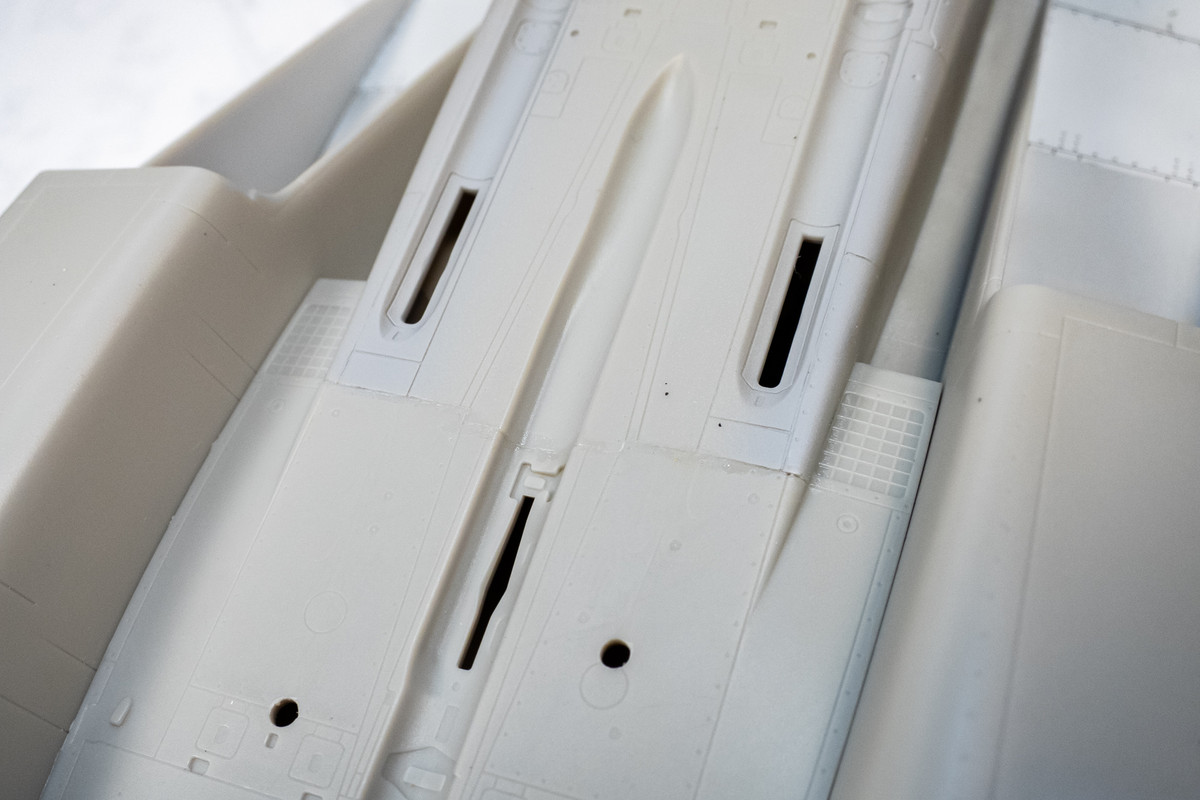
The main wheel well painting has been completed and given a flat coat. I may stain the big areas of white a little bit but it is essentially done.
A primer coat (Mr Primer Surfacer 1000) has been sprayed over the canopy. Now I can see the glue joints that I need to fix. Keeping in mind that there will be a high contrast (black and gull grey) color demarcation along this line, the fix doesn't have to be as exact.
The main wheel well painting has been completed and given a flat coat. I may stain the big areas of white a little bit but it is essentially done.
John aka JKim
-----------<><
-----------<><
Re: 1/48 Tamiya F-14A Jolly Rogers
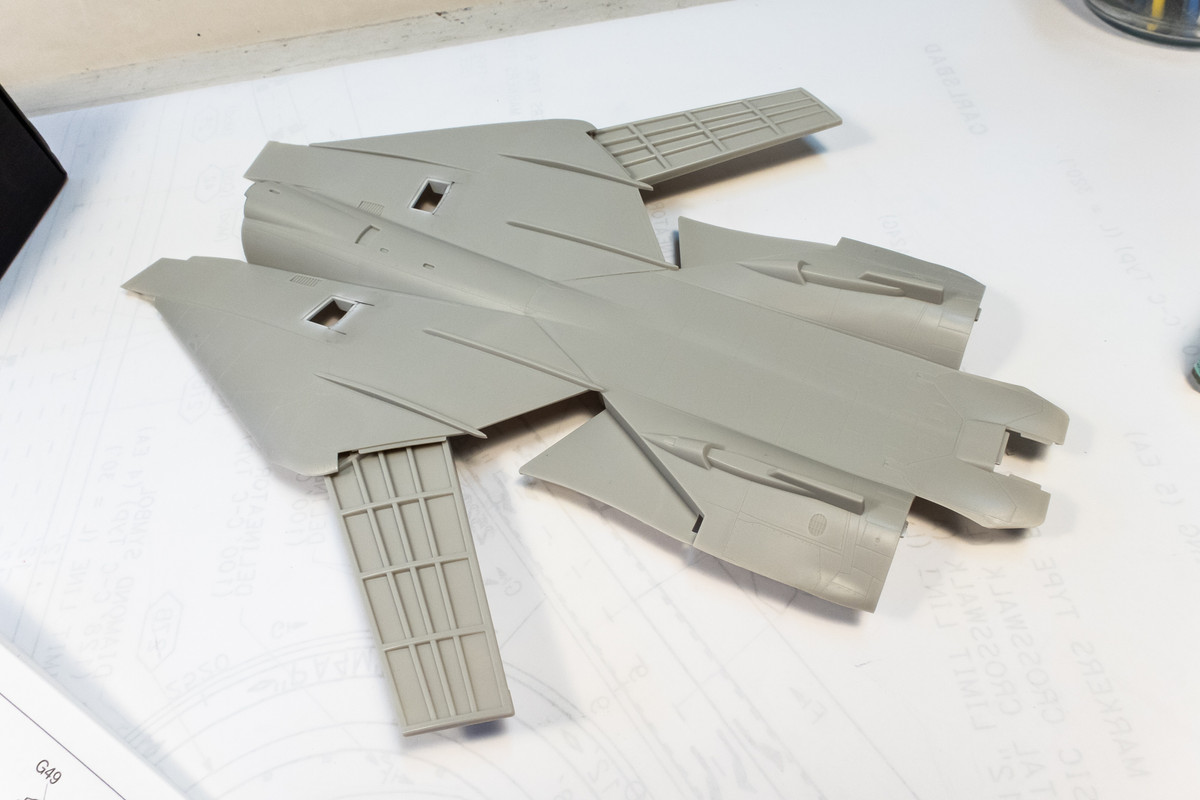
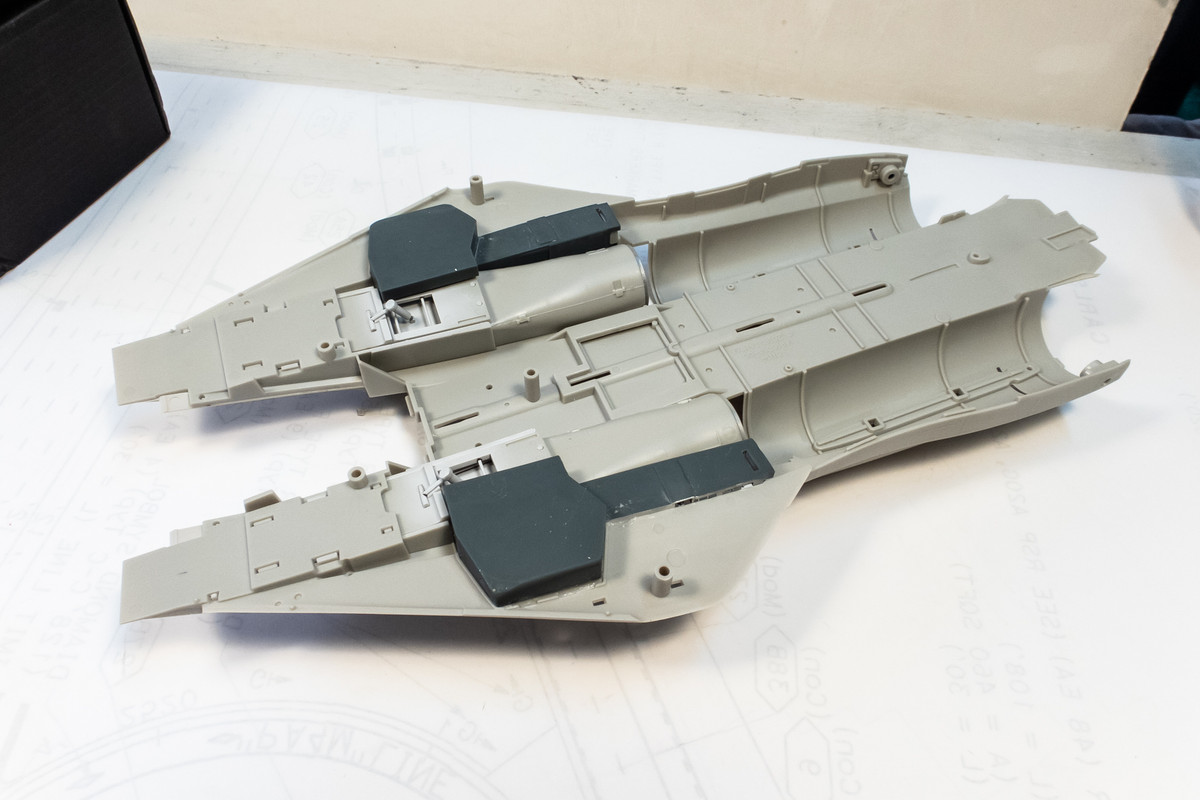
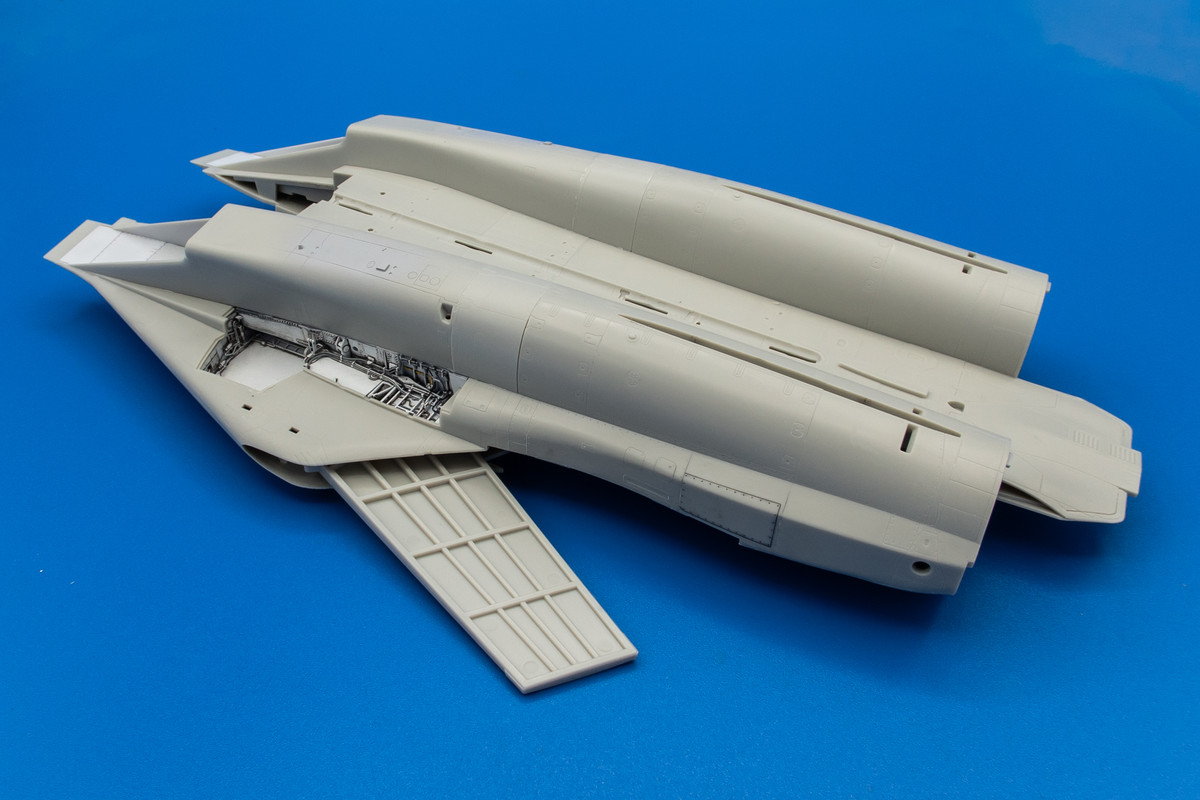
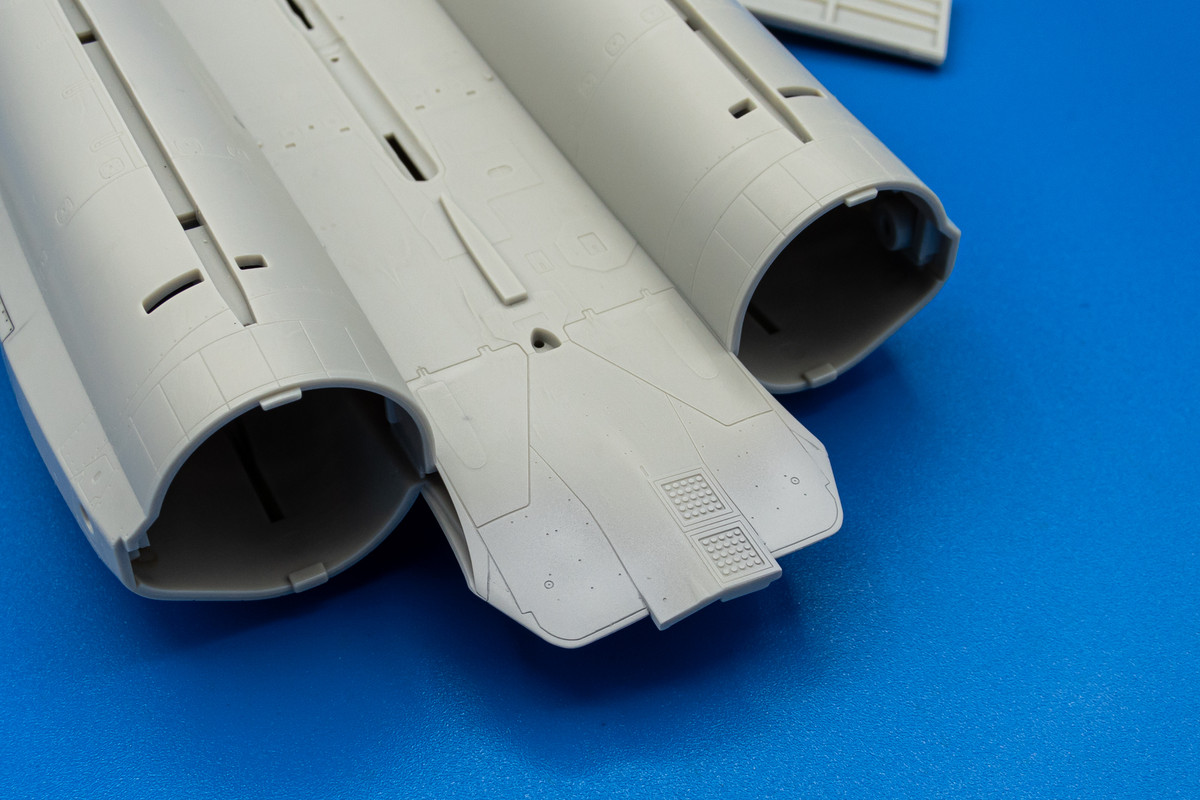
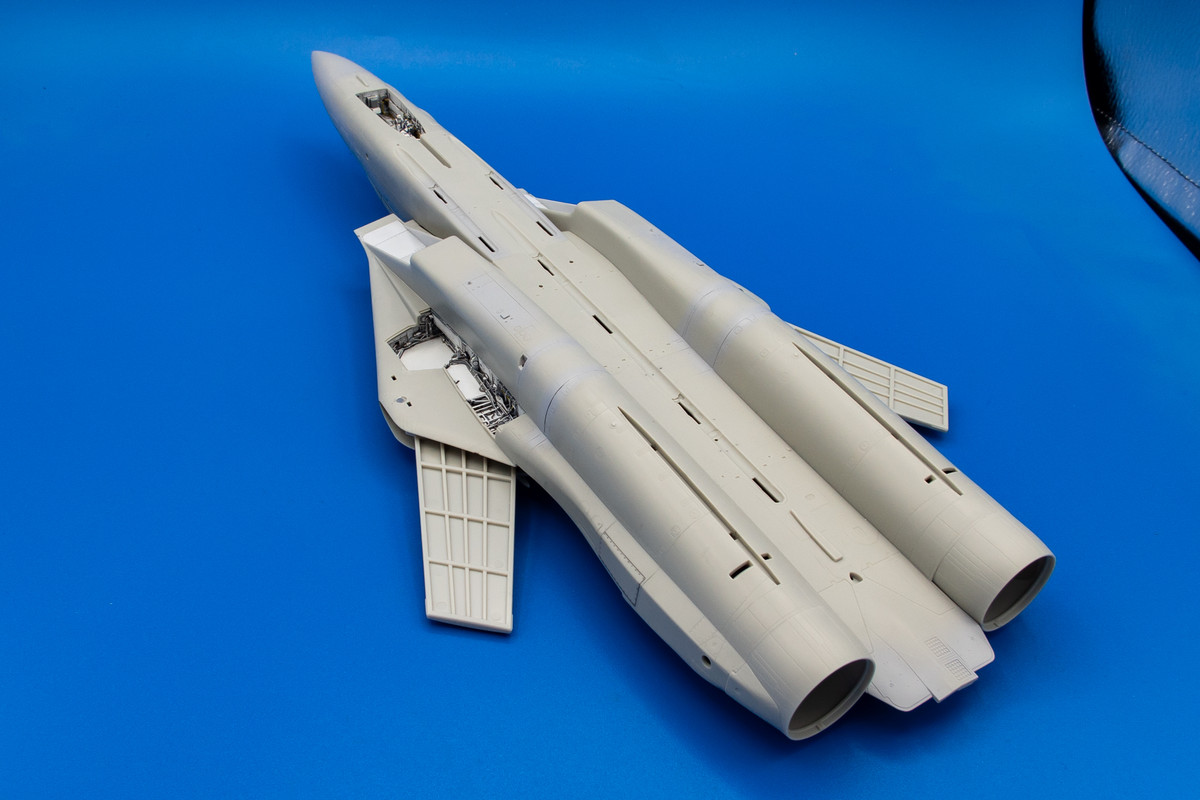
I'm getting ready to put the main fuselage together. A few things need to be completed first. The horizontal tail units are mounted via polycaps so these are glued into the fuselage interior.
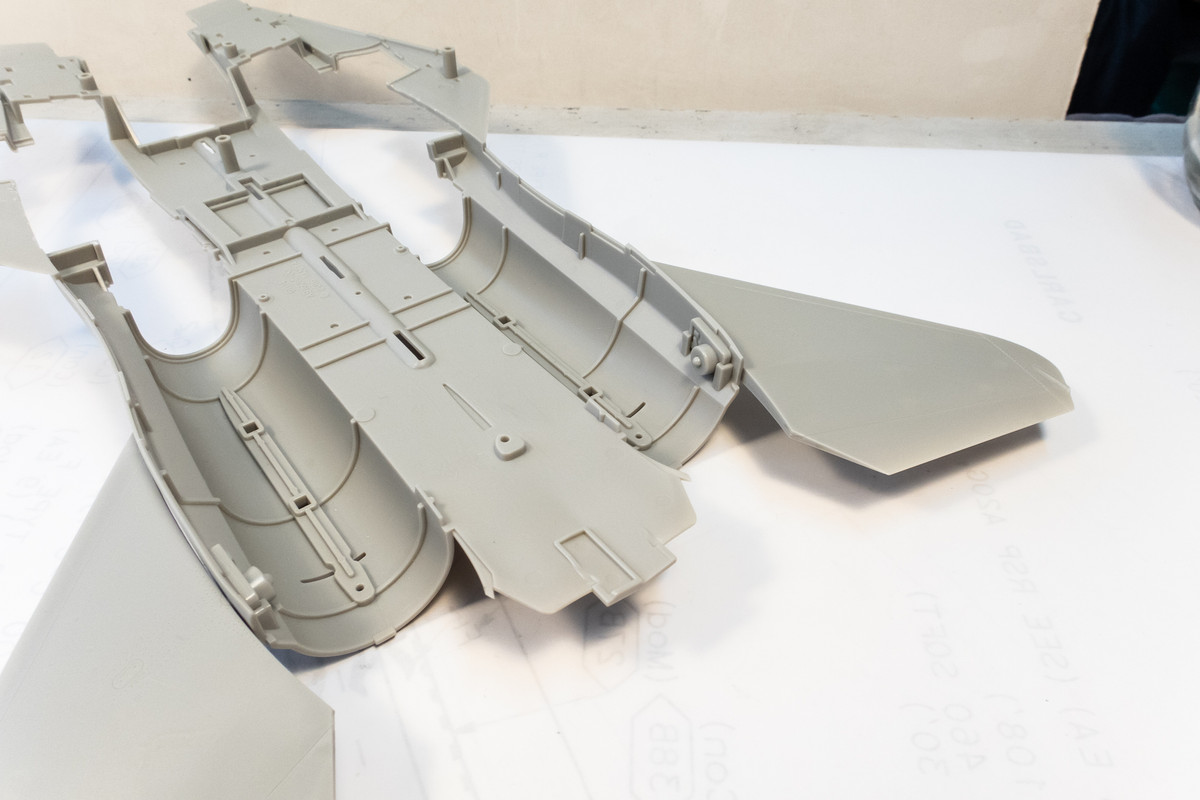
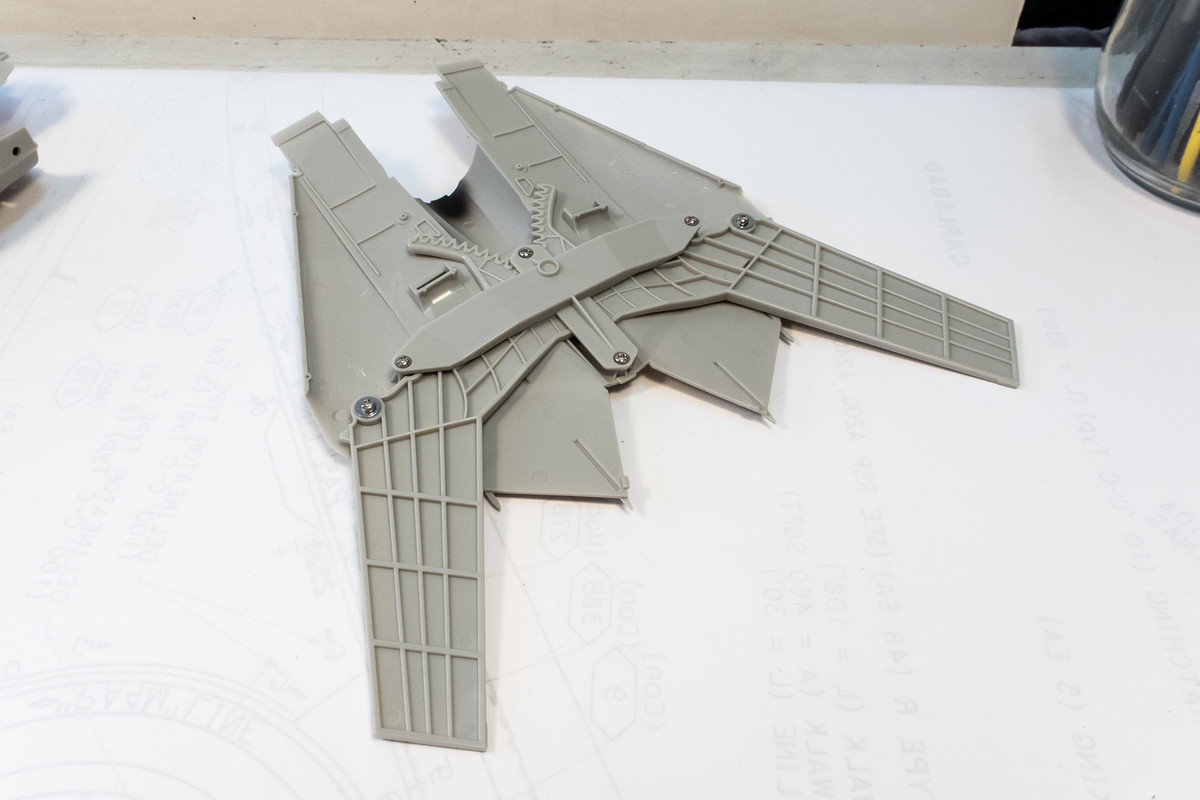
Next the wing fold mechanism is mounted into the upper fuselage half using screws.
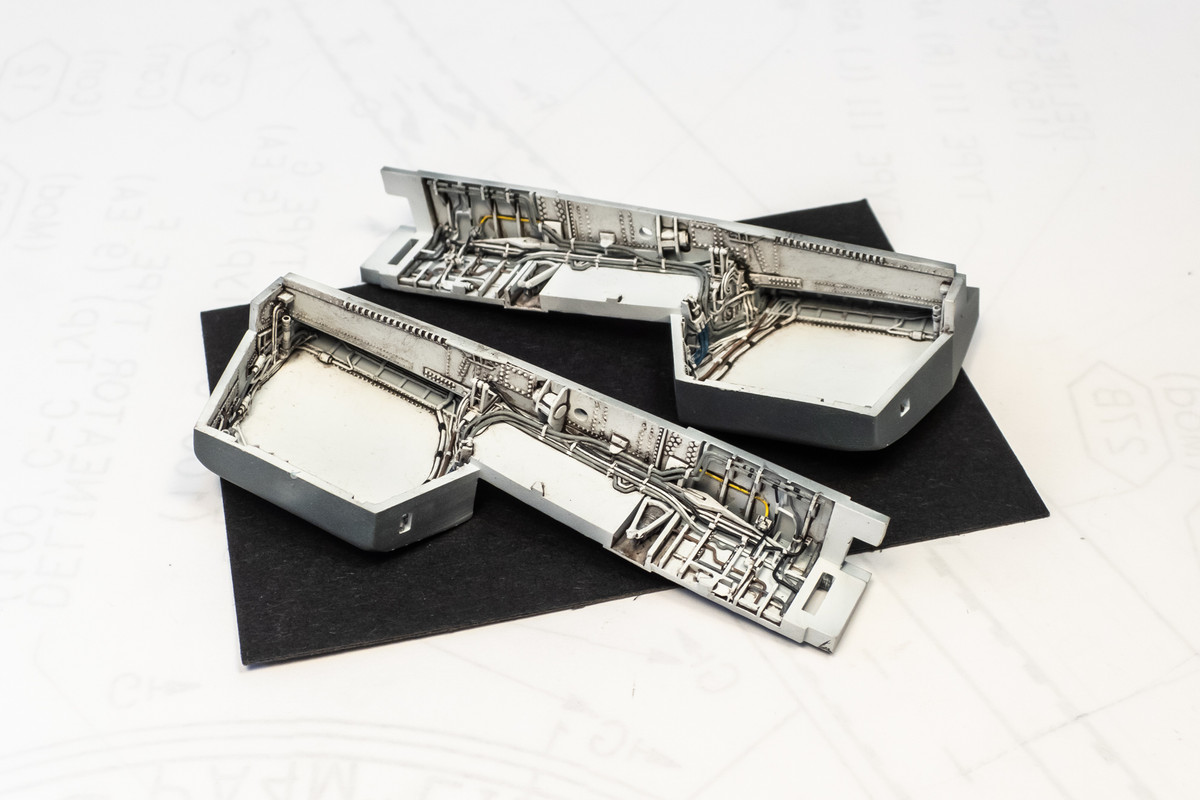
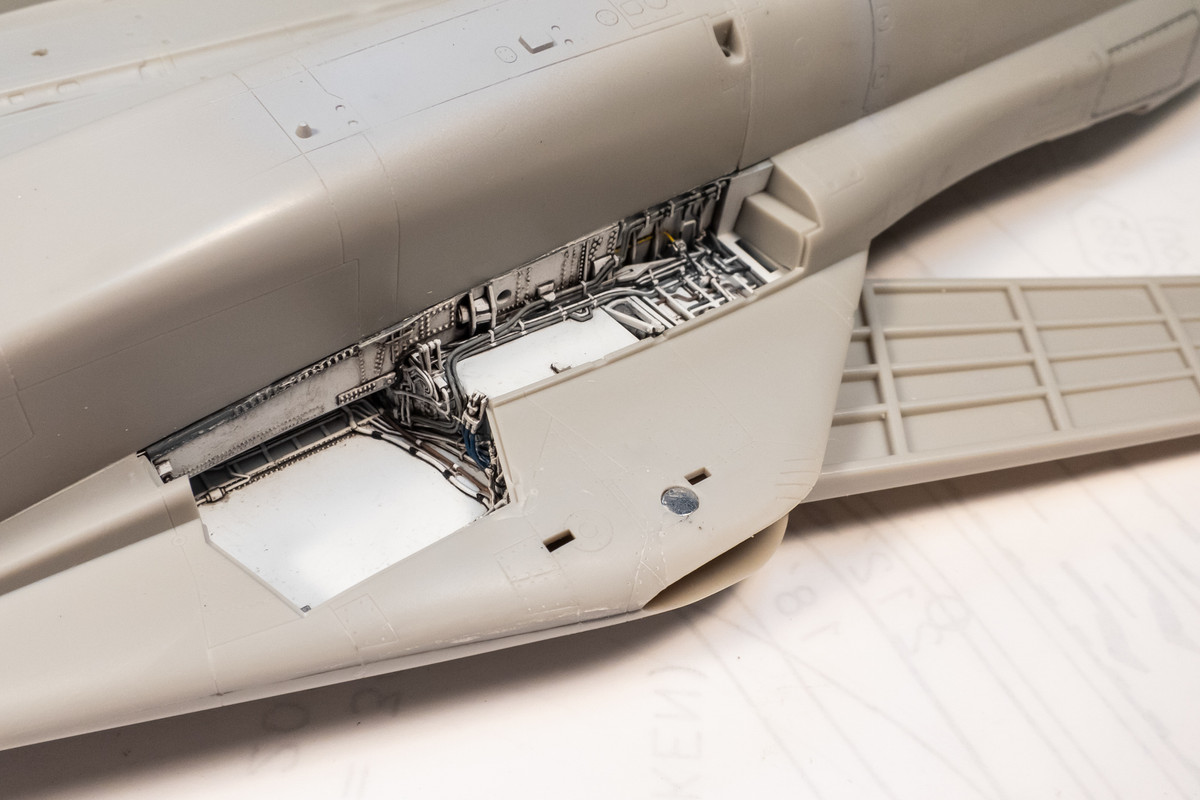
One more test fit of the MMC wheel wells to see if everything closes up correctly.
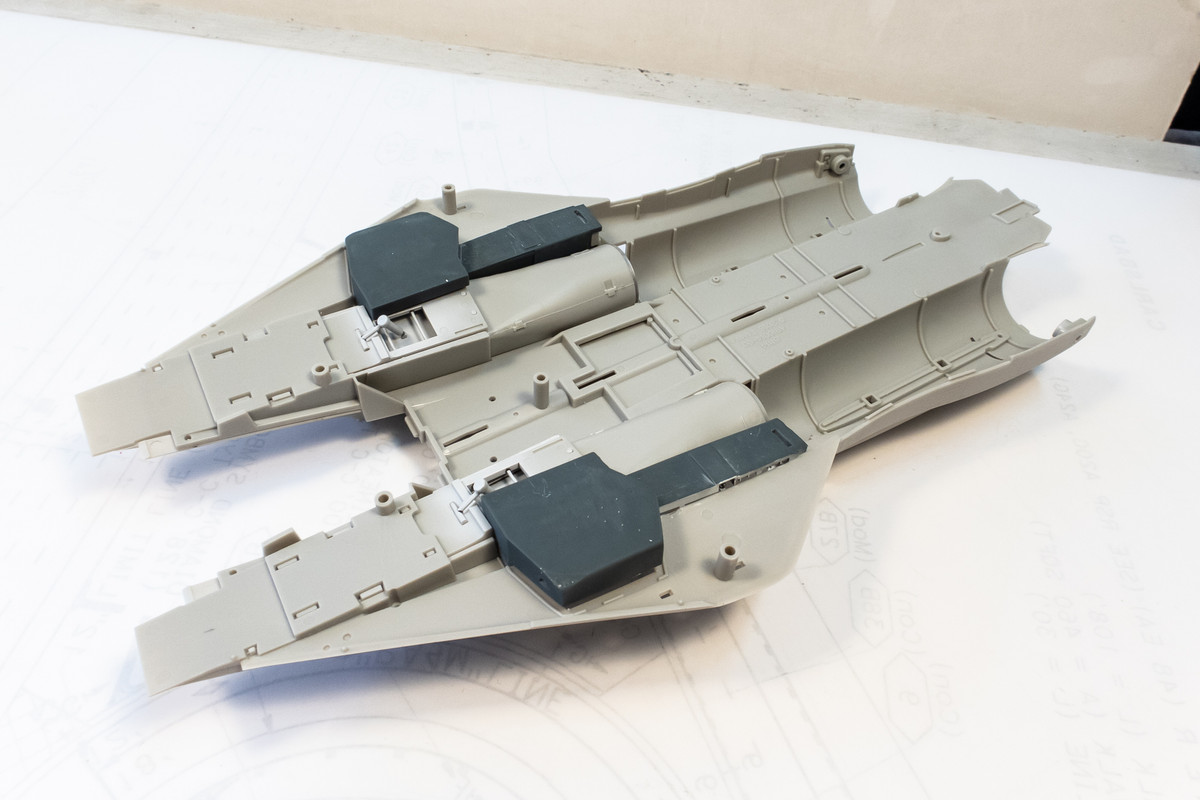
Some shimmying of parts is needed but it looks like everything should close up properly.
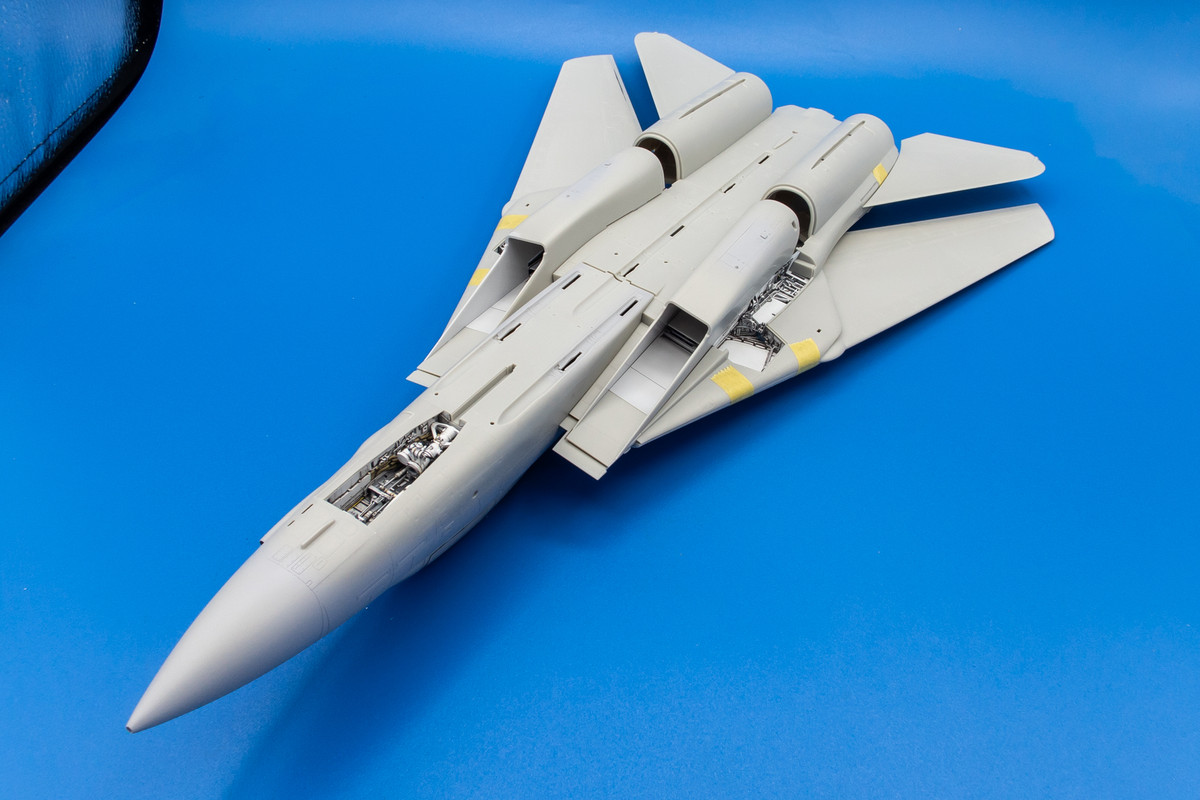
The upper rear fuselage is glued to the front half.
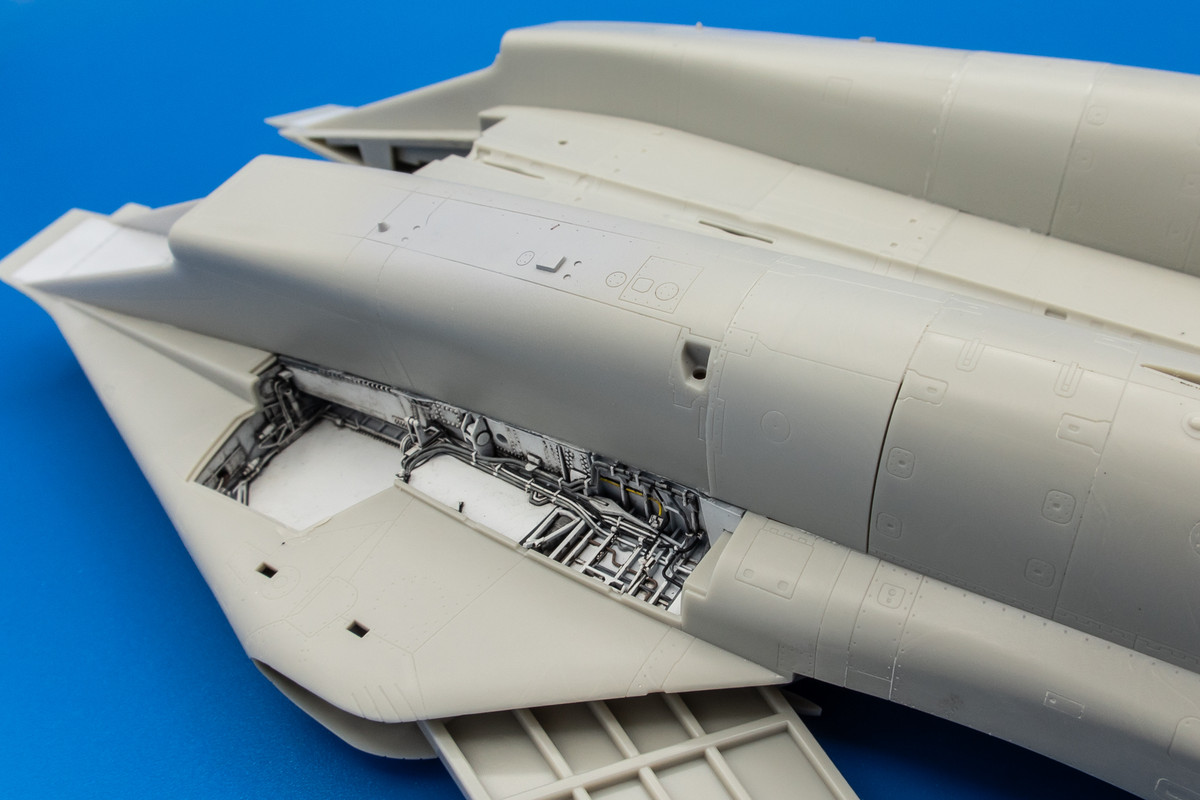
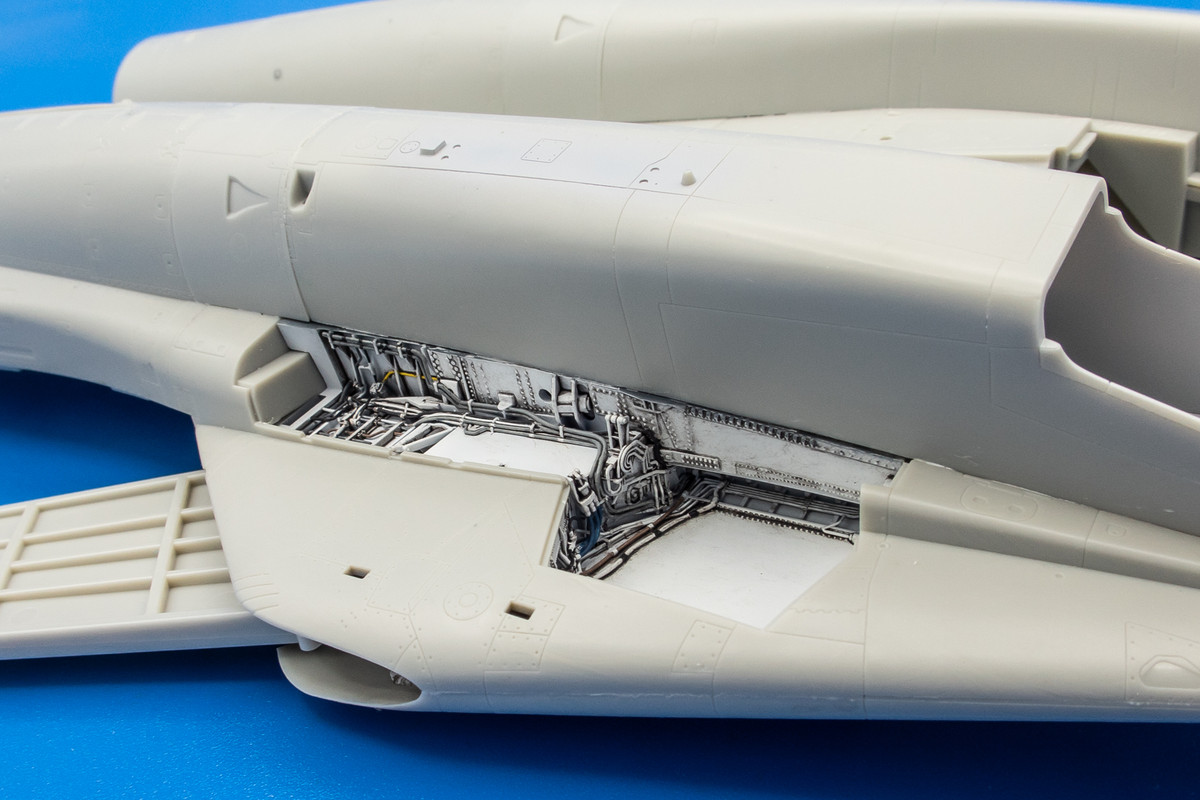
The MMC wheel wells are then cemented into position using thin CA glue.
After the wheel wells are secured, the upper and lower fuselage halves are glued together. This was a section-by-section process... letting the glue cure on one section before moving to the next section as I did not have enough hands to keep everything together at once.
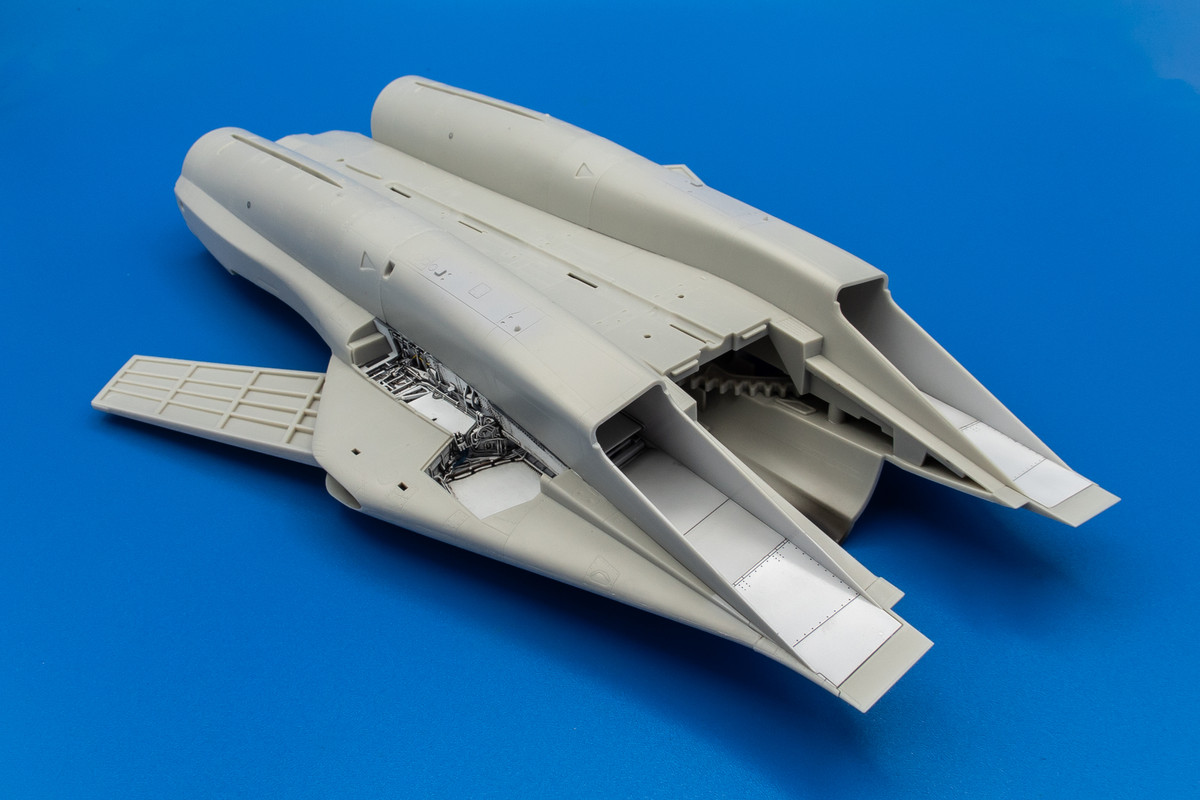
Some clean-up work is going to be required on this assembly. Uncharacteristic gaps have shown up. Most likely due to the interference caused by the MMC wheel wells. Nothing significant but there are multiple joints that will need attention so I'll start that tomorrow.
Next the wing fold mechanism is mounted into the upper fuselage half using screws.
One more test fit of the MMC wheel wells to see if everything closes up correctly.
Some shimmying of parts is needed but it looks like everything should close up properly.
The upper rear fuselage is glued to the front half.
The MMC wheel wells are then cemented into position using thin CA glue.
After the wheel wells are secured, the upper and lower fuselage halves are glued together. This was a section-by-section process... letting the glue cure on one section before moving to the next section as I did not have enough hands to keep everything together at once.
Some clean-up work is going to be required on this assembly. Uncharacteristic gaps have shown up. Most likely due to the interference caused by the MMC wheel wells. Nothing significant but there are multiple joints that will need attention so I'll start that tomorrow.
John aka JKim
-----------<><
-----------<><

Re: 1/48 Tamiya F-14A Jolly Rogers
Looks good John. Ya, sometimes the 3rd party stuff looks great but doesn't necessarily fit well.
Thanks,
John
John
Re: 1/48 Tamiya F-14A Jolly Rogers
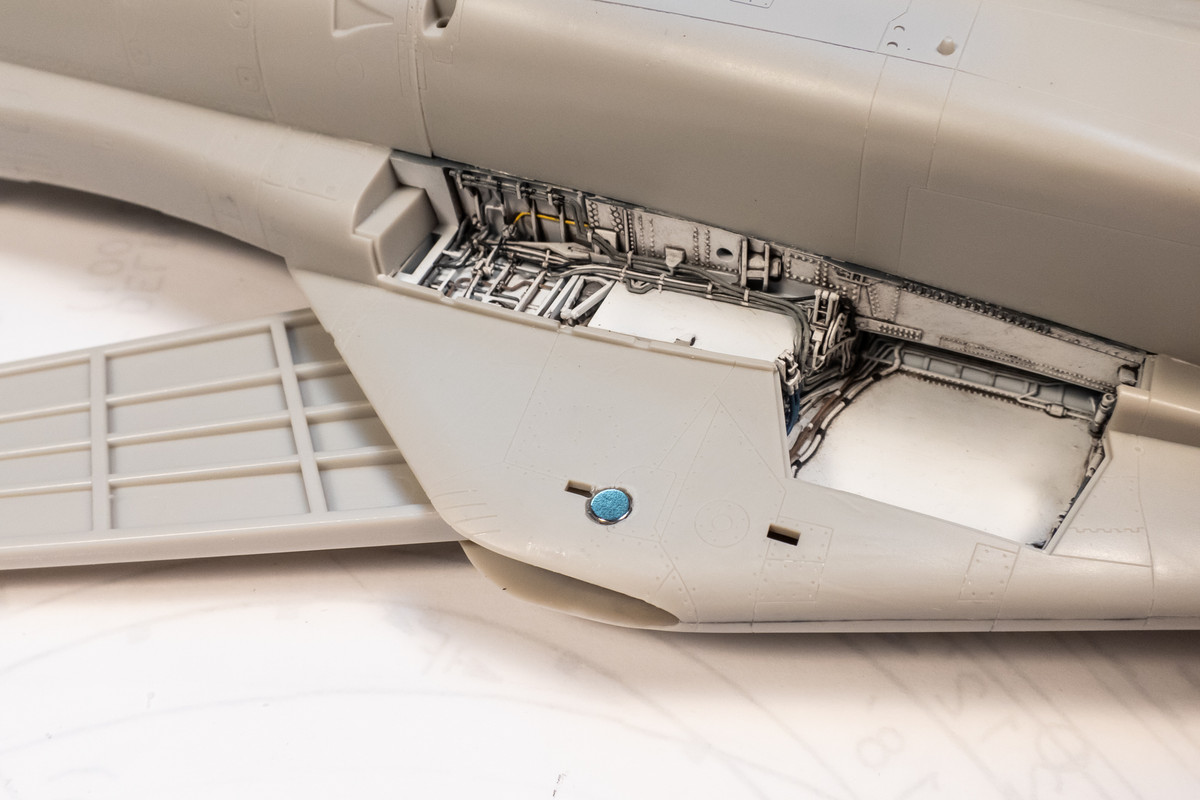
Luckily, both the Detail & Wonder and the Mini Craft Collection stuff looks great AND fits well. I'm thinking that this is one of the advantages of 3D-printing vs cast resin.
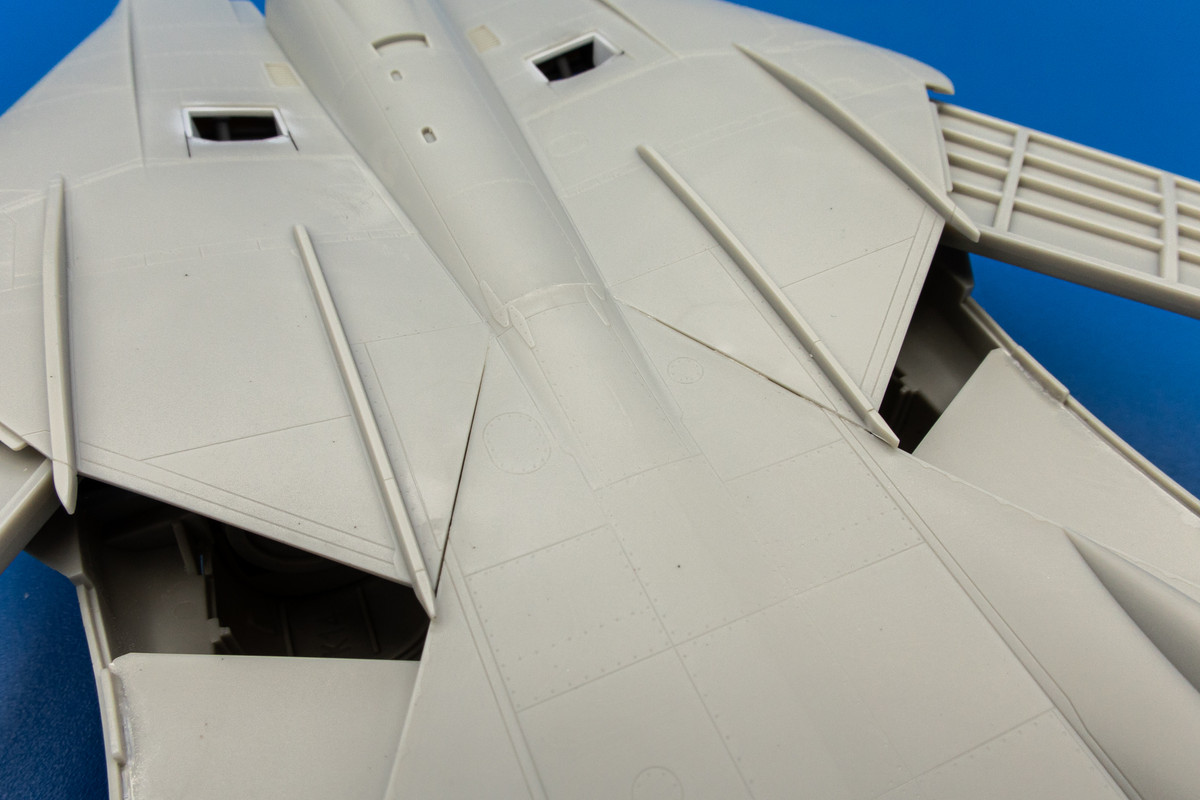
Slowly working on everyone's favorite task... fixing the glue seams. Here is the upper wing joint that I showed in the last post fixed with some CA glue and Mr Primer Surfacer 1000.
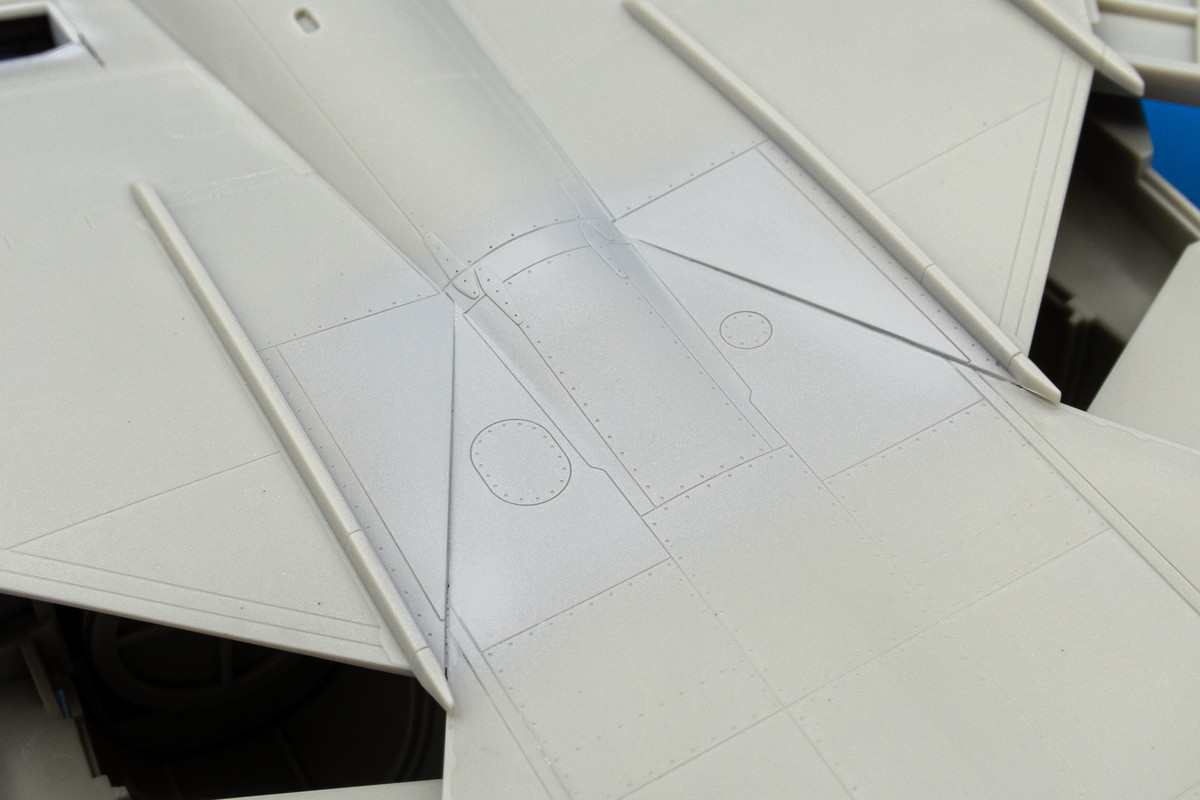
Similar work on the underside of beavertail...
John aka JKim
-----------<><
-----------<><
Re: 1/48 Tamiya F-14A Jolly Rogers
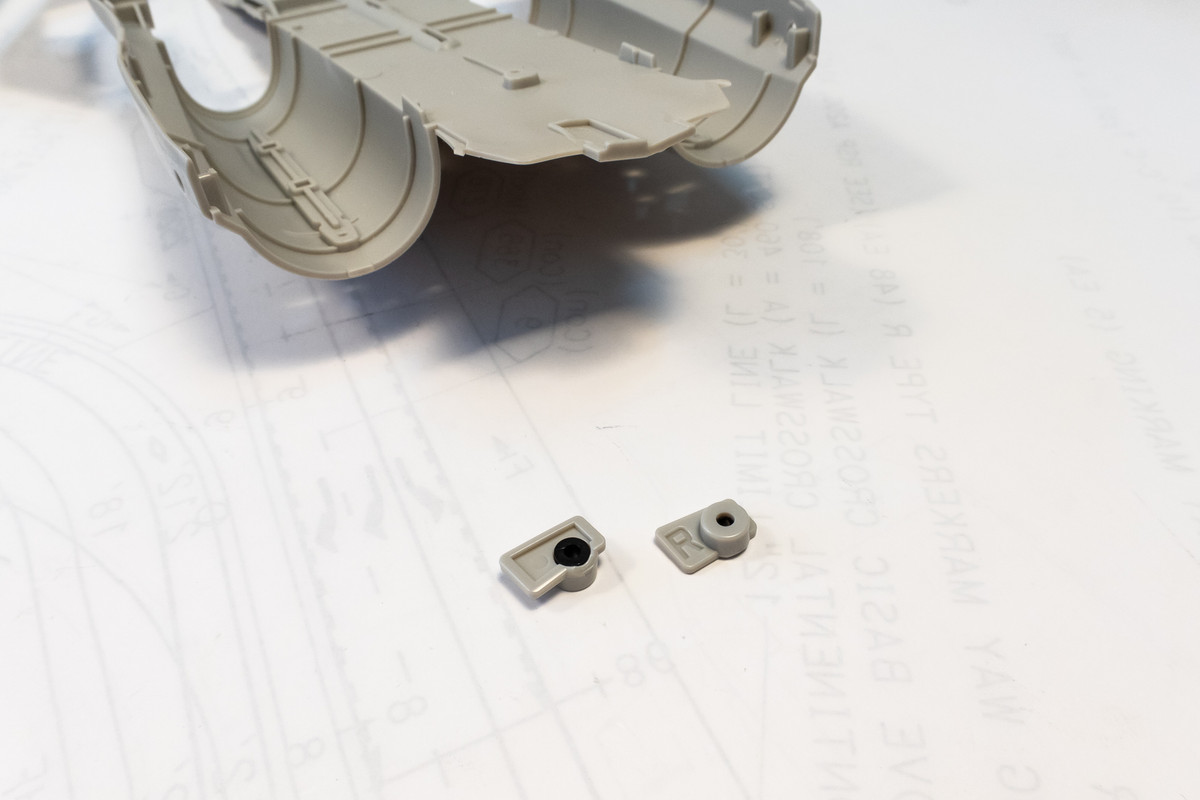
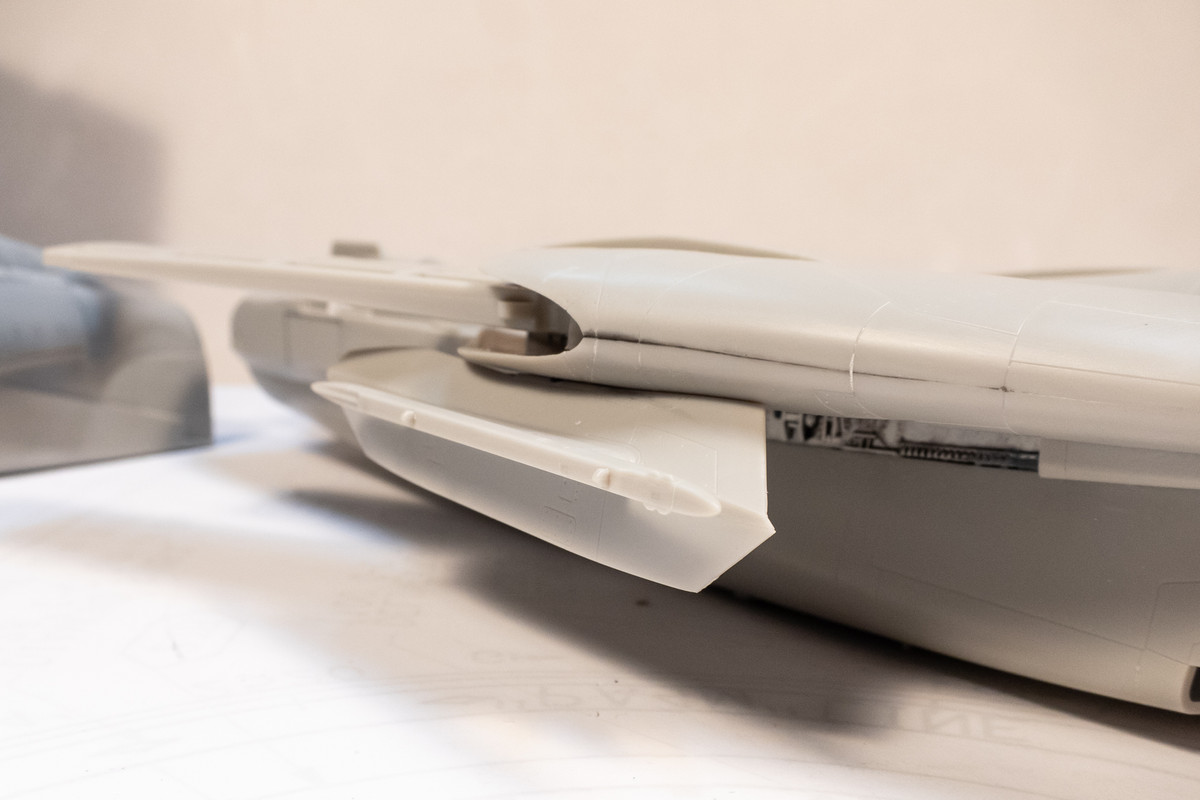
In my haste to get the main fuselage assembled, I forgot about the wing pylon and arranging a magnet connection. Of all the ordnance, the wing pylon is probably the one that would benefit most from being removable so I decided to give it a try, even though it's trickier with the fuselage top and bottom together. I used a single pair of 3mm magnets. Drilling the big hole gave me a crack on the starboard side but it was easily repaired with CA glue.
The port side went smoothly. I'm not going to bother trying to hide the magnet locations since the locating holes will remain. The pylon will cover everything up.
The single pair of magnets is more than sufficient to hold the pylon and missiles in place securely.
I had to re-paint the vertical tail fins after messing up the yellow by putting masking tape on it too early. Have you noticed that primary colors like red, blue, yellow and white take longer to dry than other colors?
John aka JKim
-----------<><
-----------<><
Re: 1/48 Tamiya F-14A Jolly Rogers
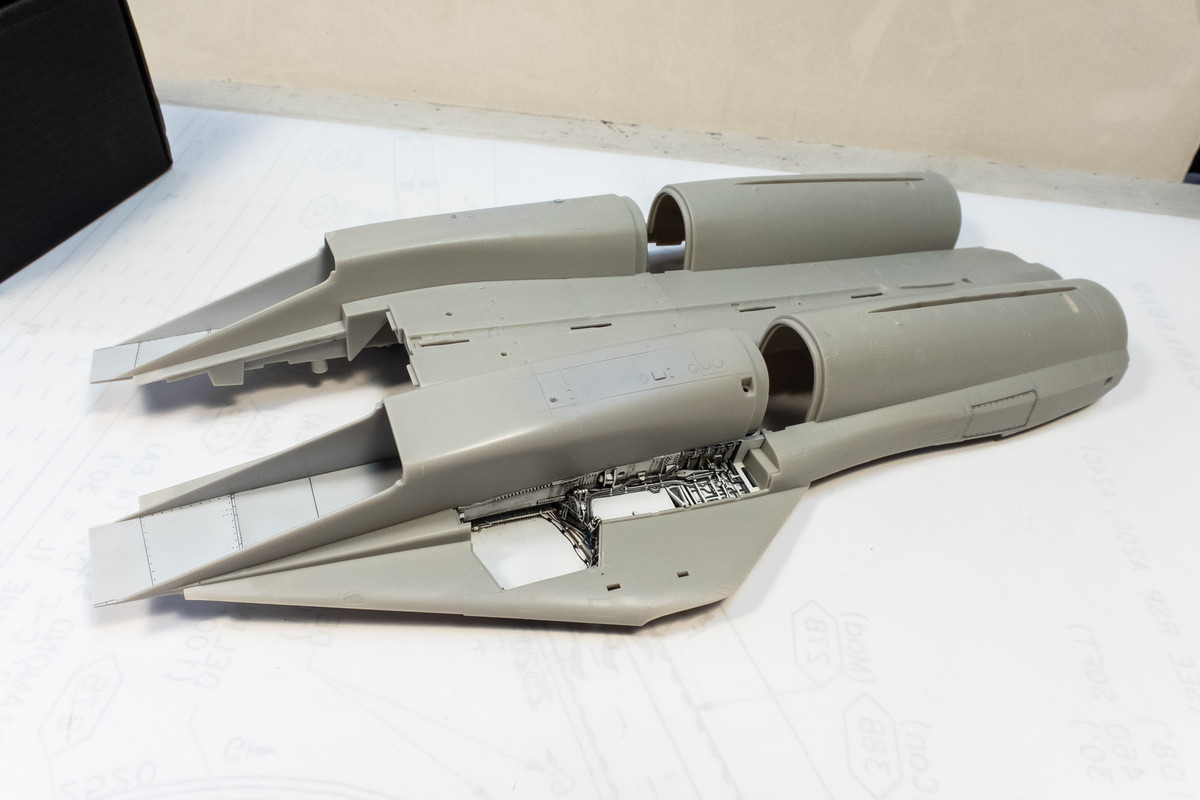
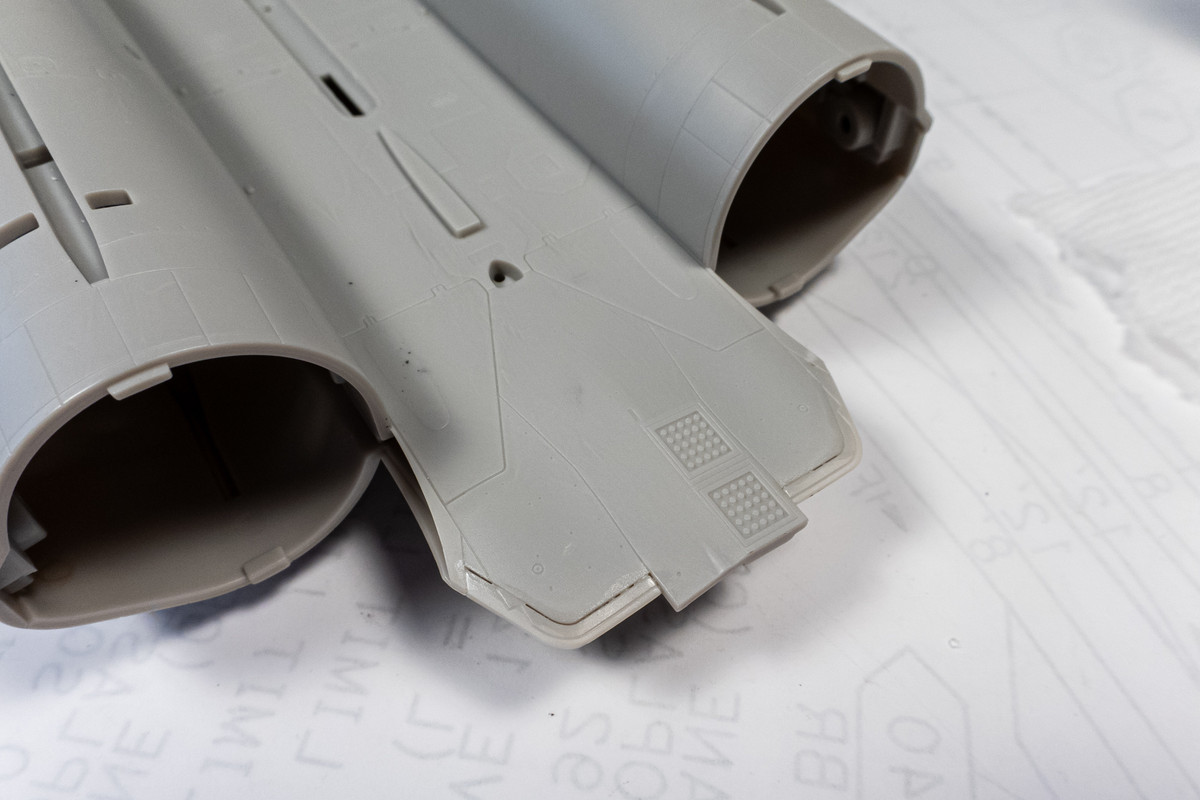
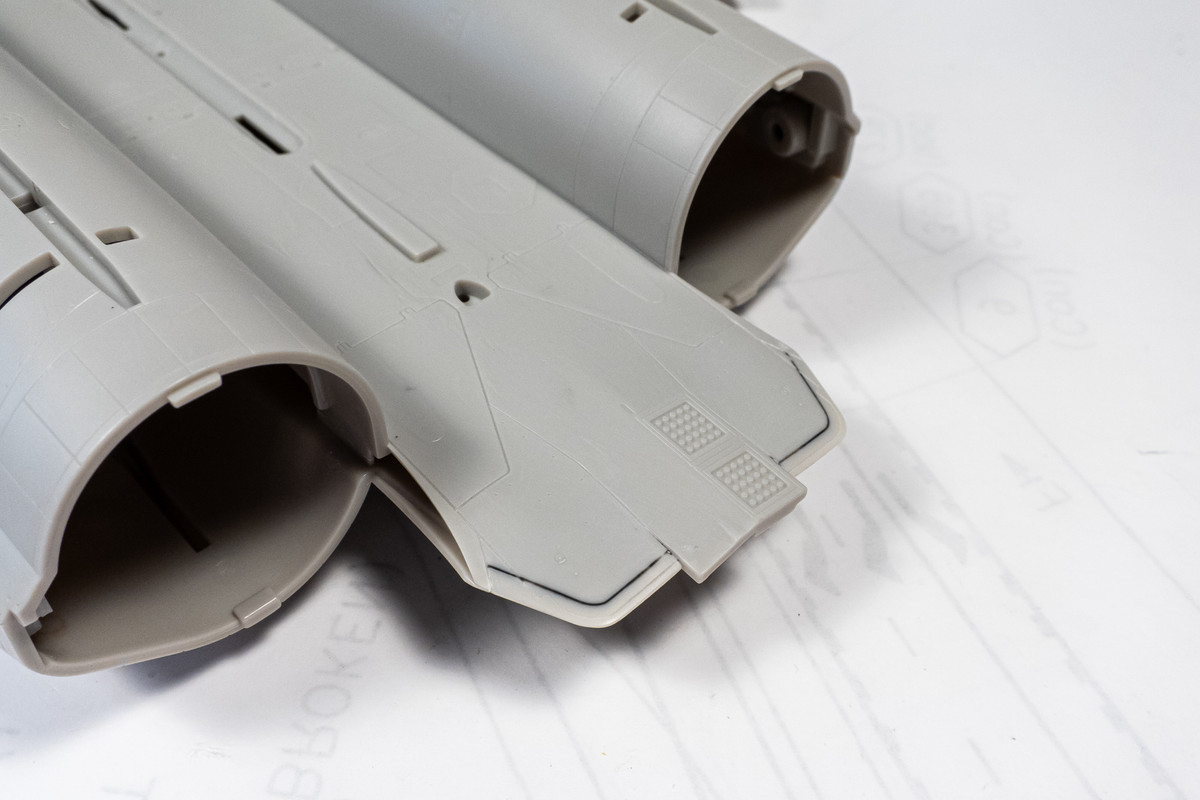
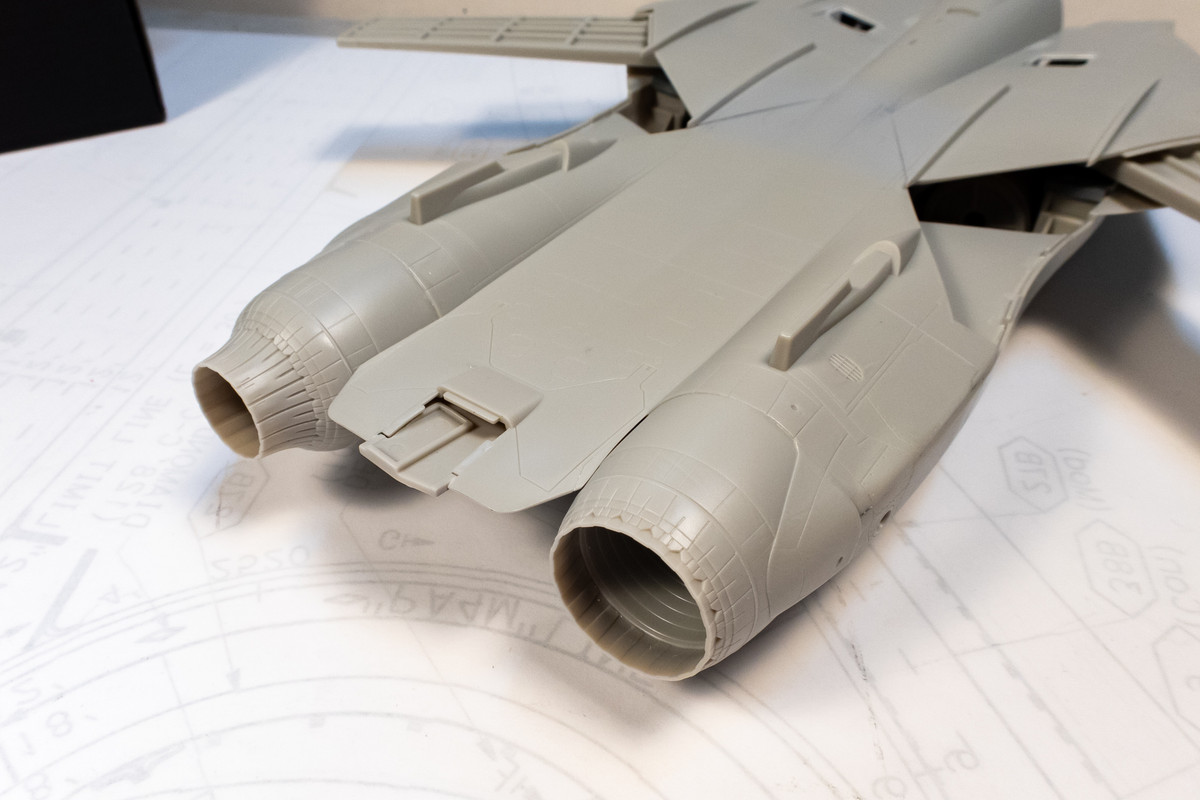
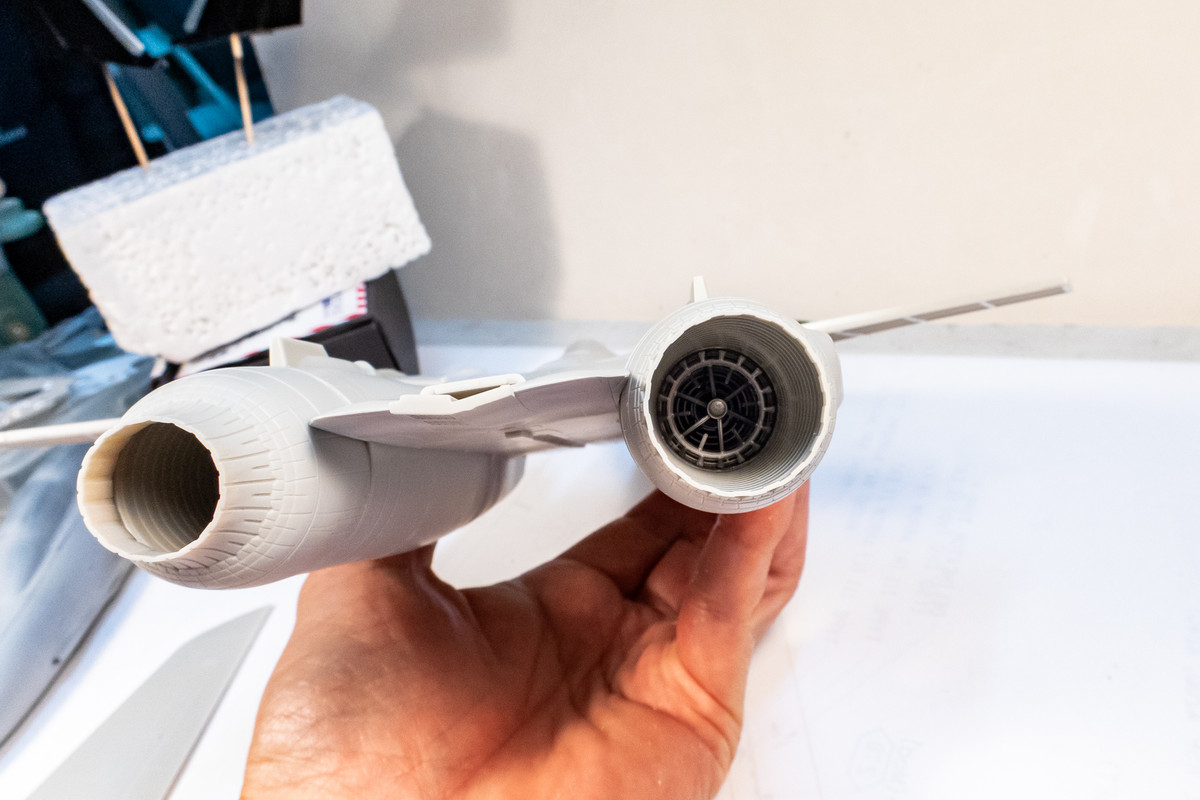
I've been playing around with the Eduard exhaust nozzles but have not been able to get a satisfactory fit. Not only are they slightly too large, it's difficult to center them because they seem to be off round as well. The kit nozzles fit so good and they are keyed and tabbed to ensure alignment... hard to say no to these.
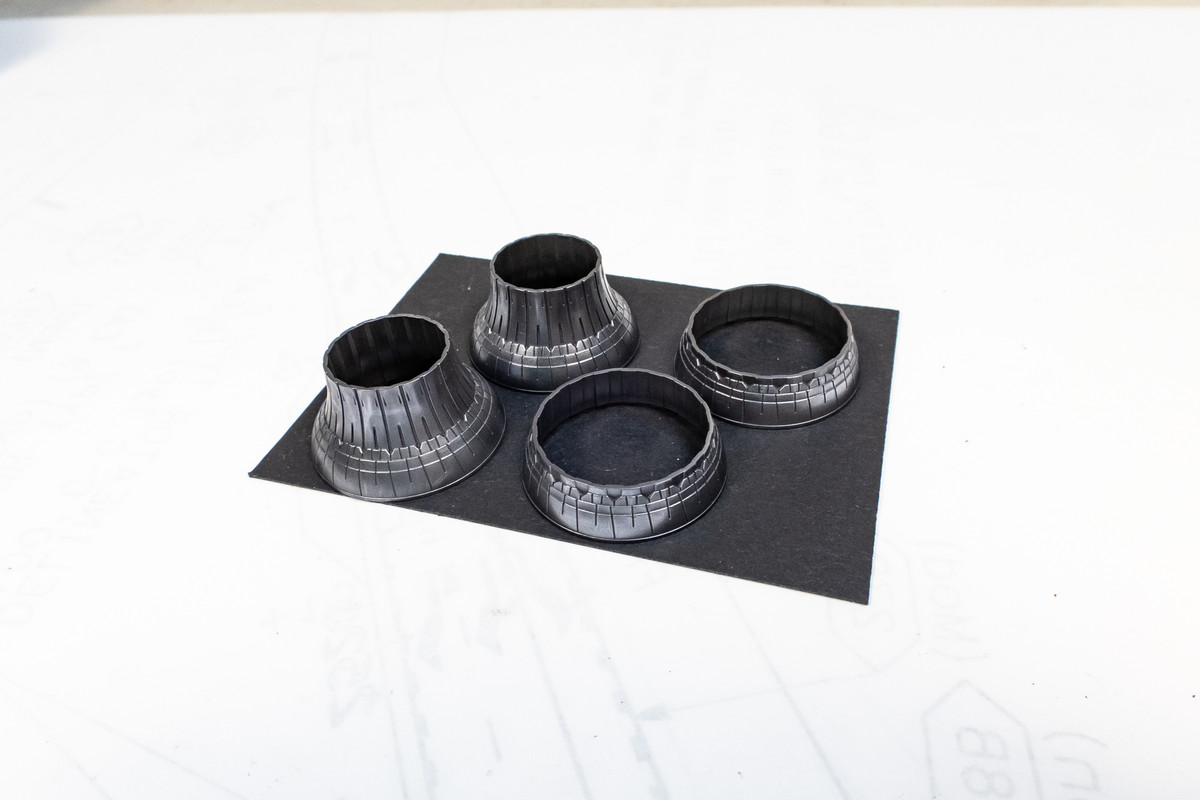
So I've decided on a hybrid approach. I used a saw to cut the kit exhaust nozzles in two.

I can then glue the Eduard afterburner cans onto the kit tubes.
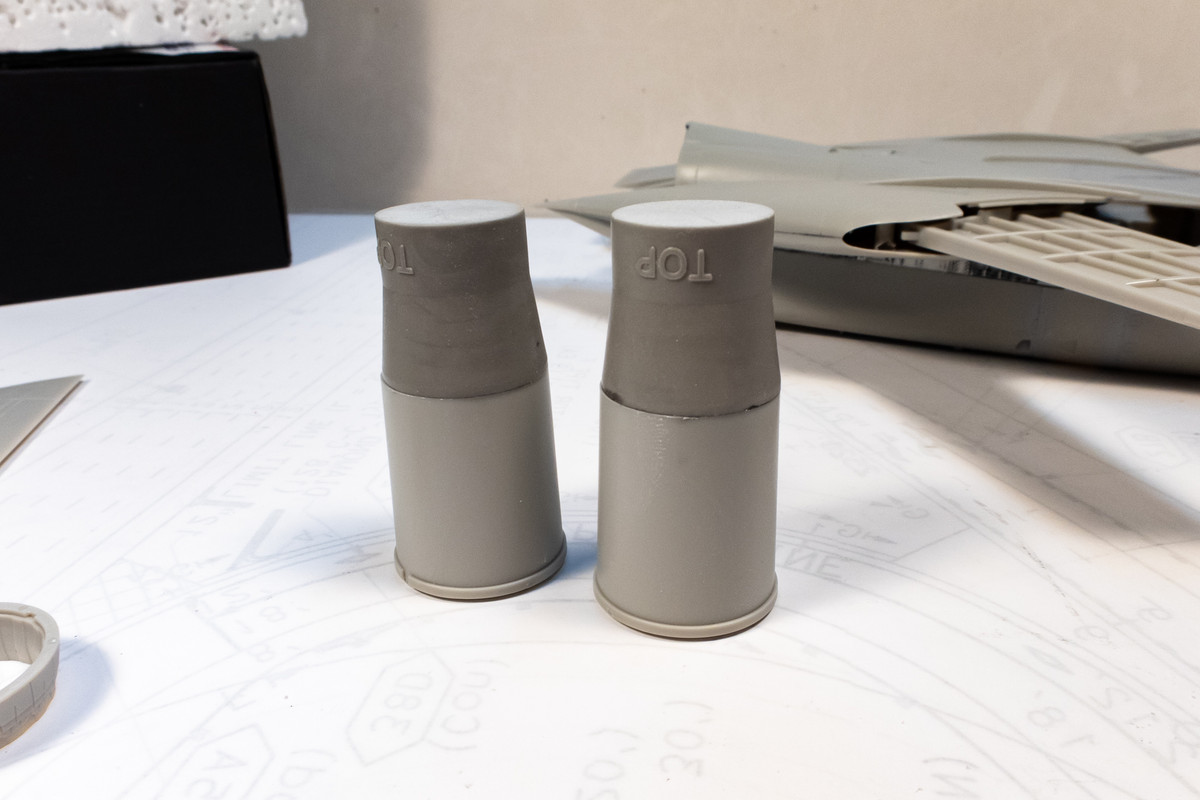
So I'll be using the kit exhaust nozzles paired with the Eduard afterburner cans.
The tubes have been painted white and then blackened with random streaks.
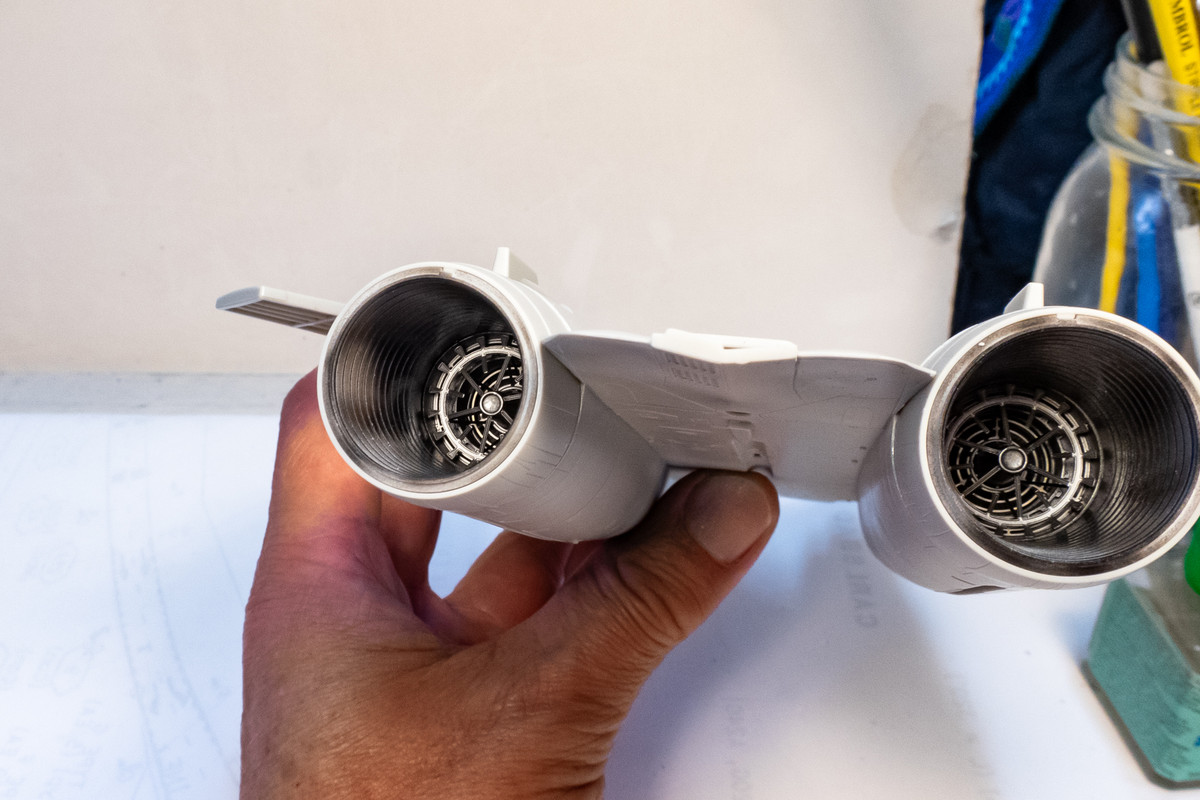
The first coat of paint (Mr Metal Iron MC-212) on the exhaust nozzles. The nozzles stay on pretty well without glue so I'm painting all four of them to allow flexibility in which ones are mounted (both open, both closed or one of each).
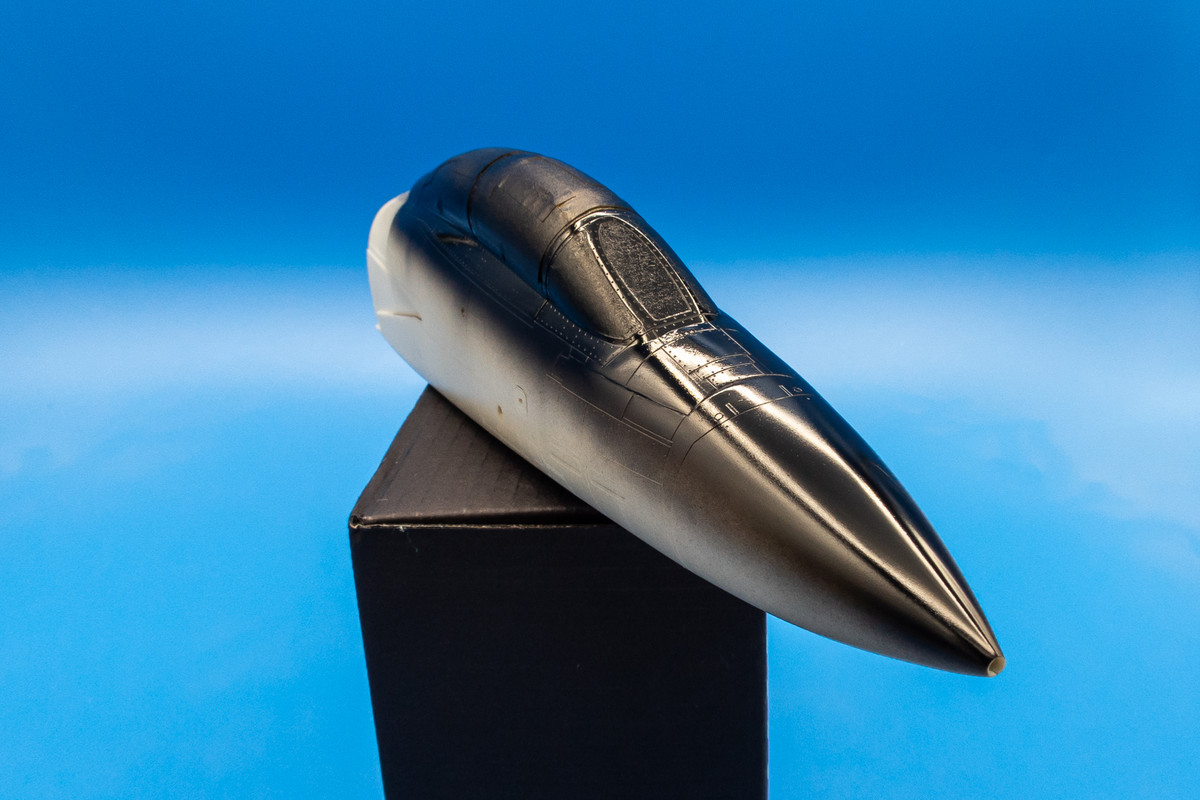
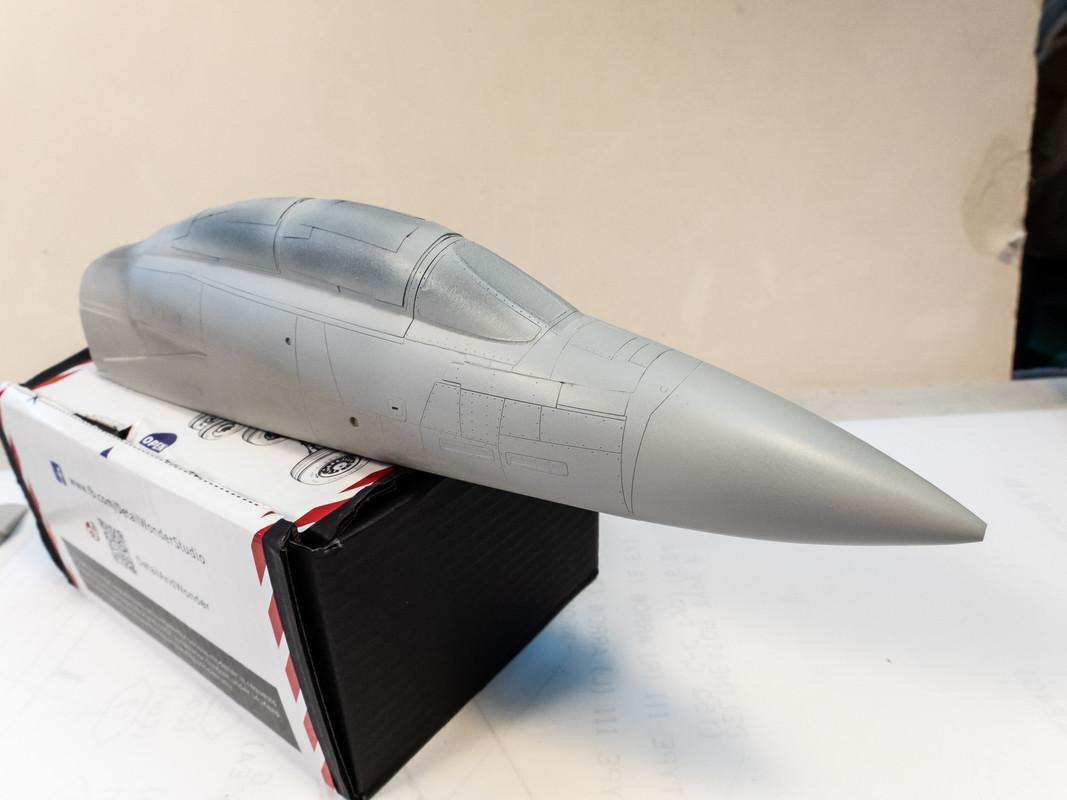
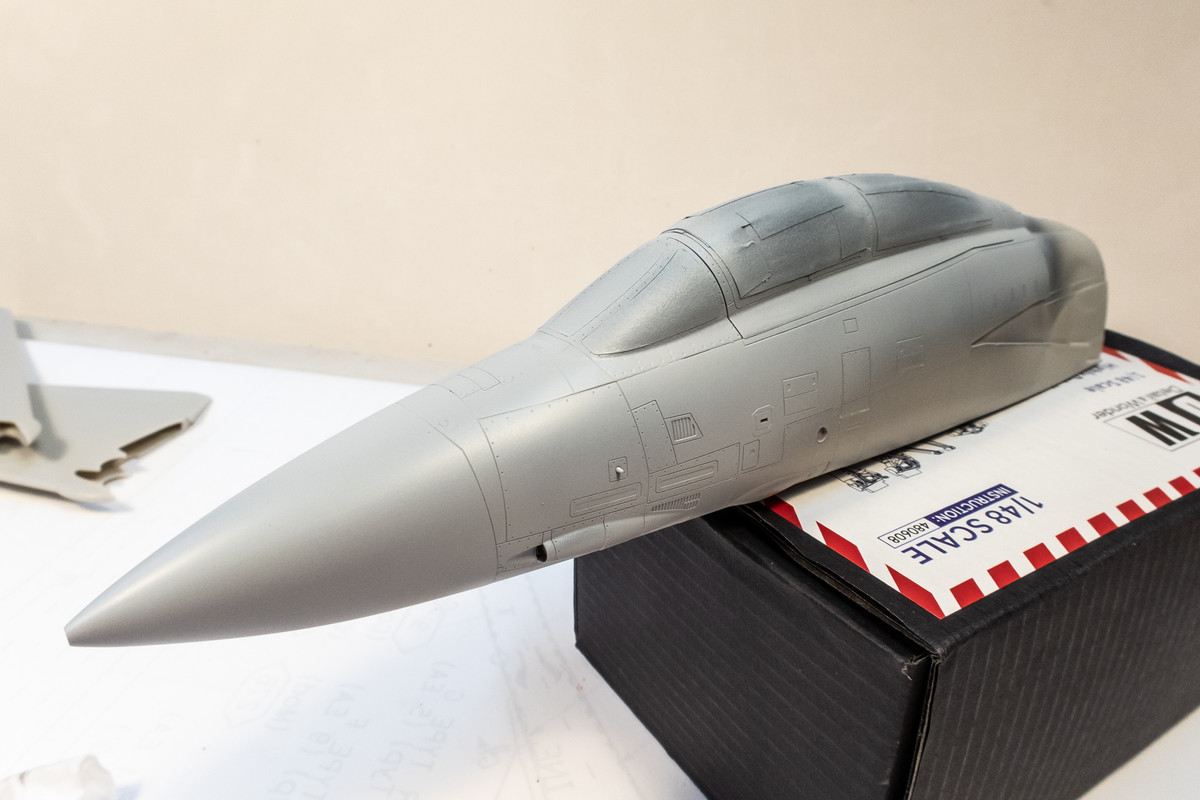
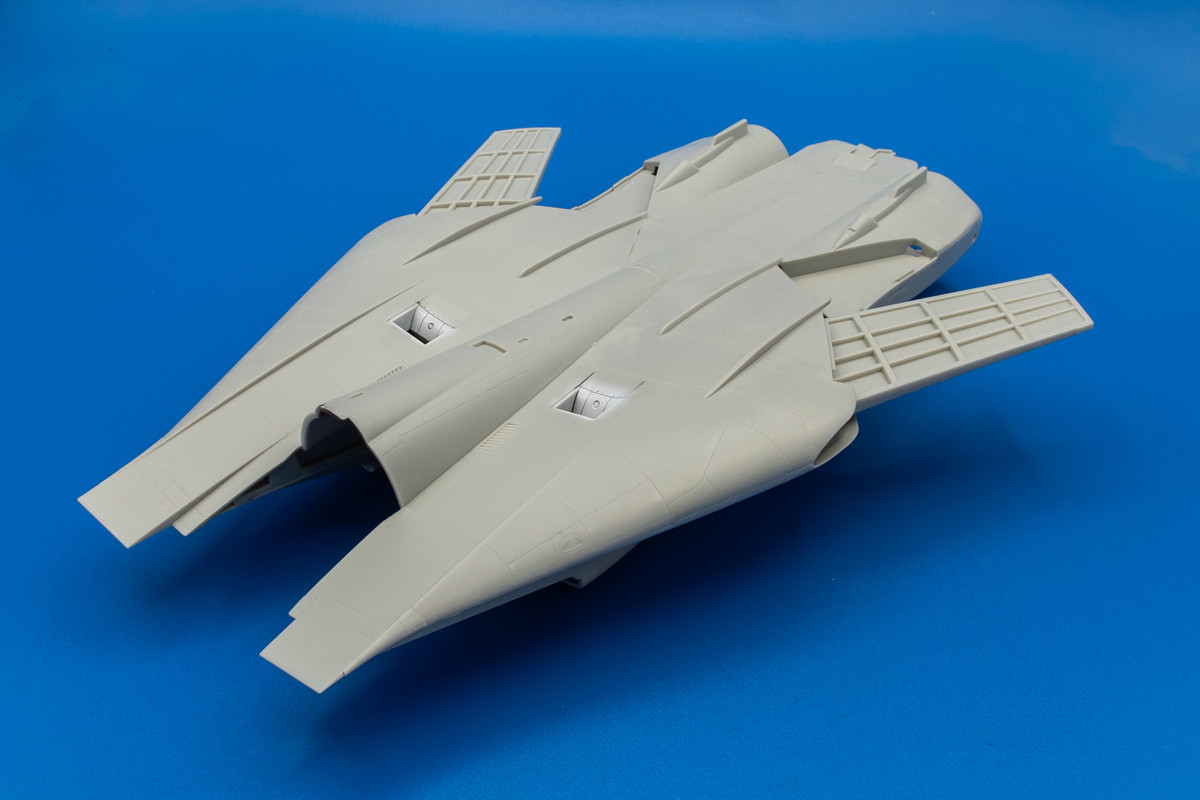
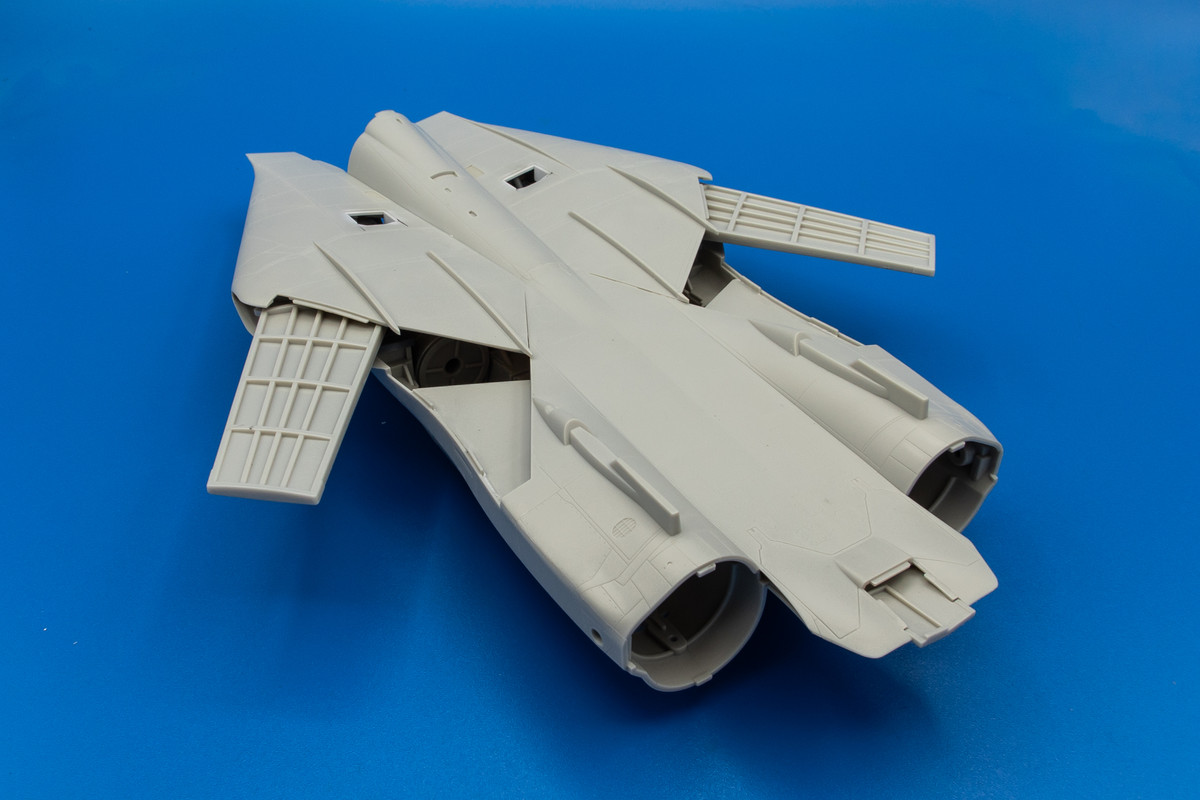
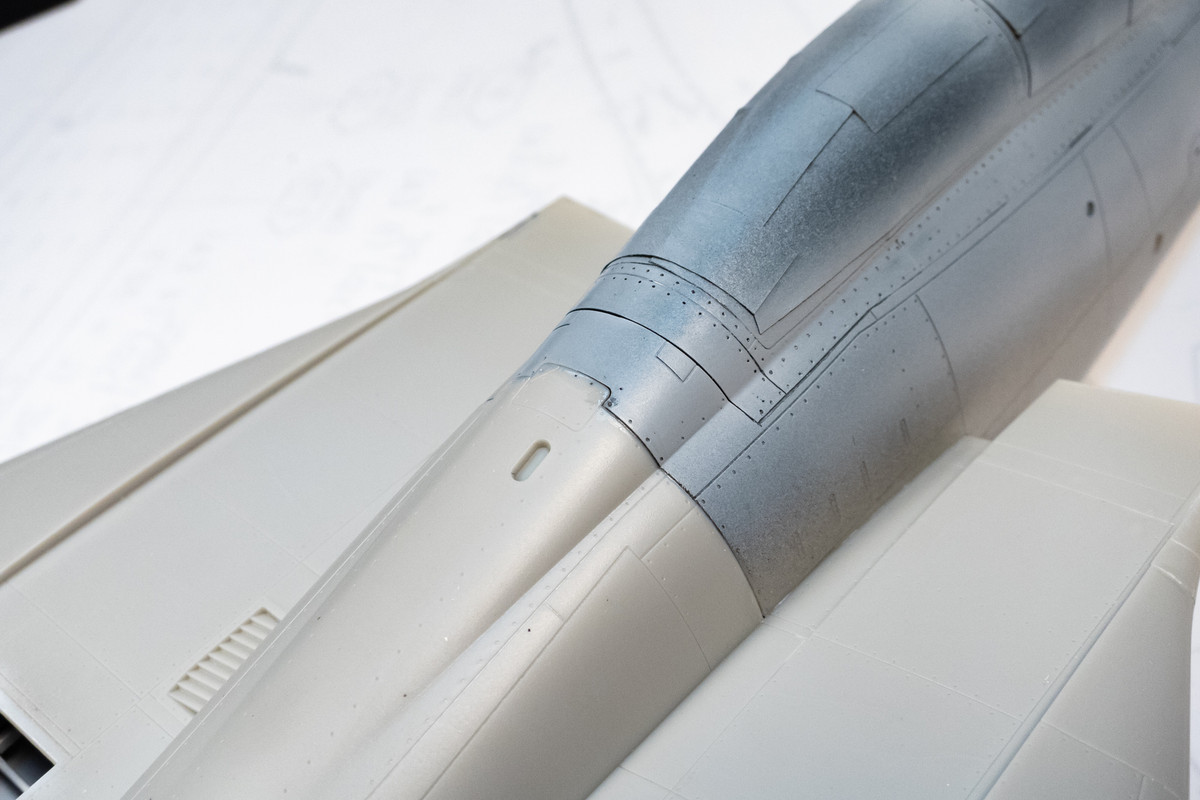
After toying with the idea of keeping the nose separate to simplify painting, I've decided to glue the nose on so that I can fix the glue seam prior to painting.
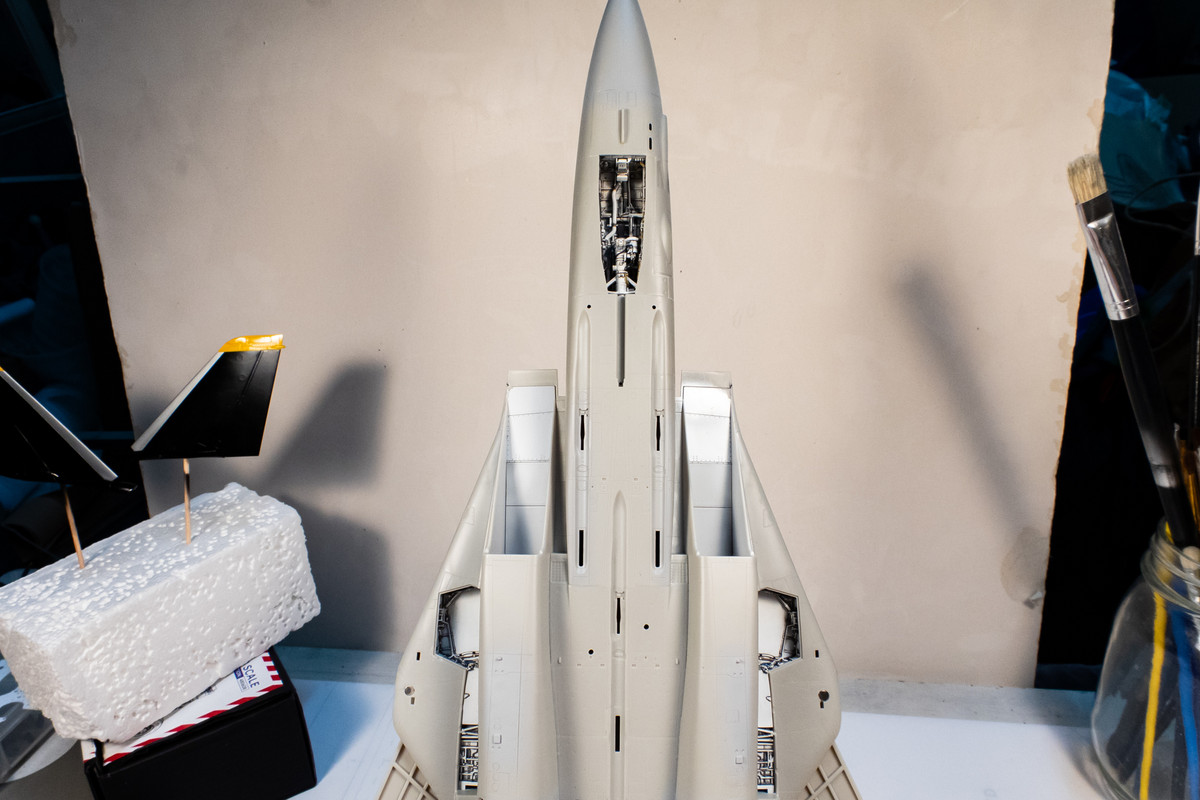
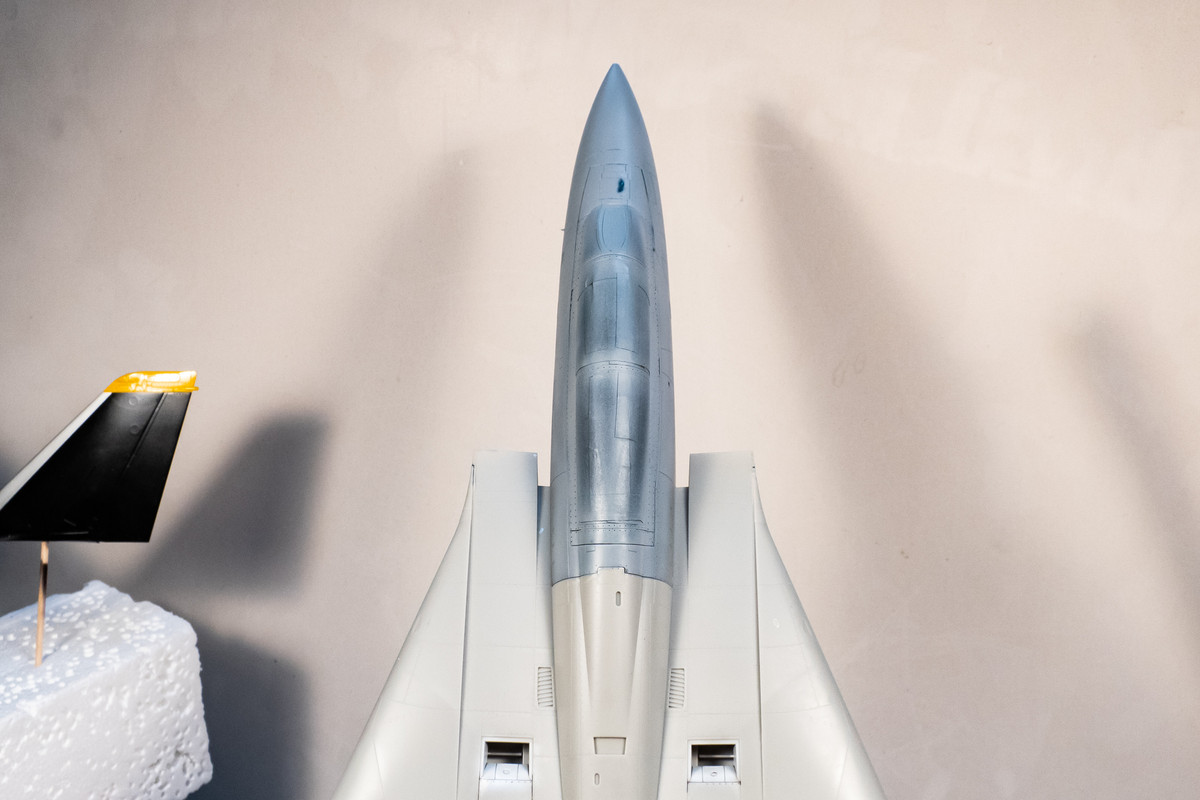
The joint isn't bad but I think it will look more seamless if I address it prior to painting.
To re-cap... the nose is attached and we are very close to the painting stage. Need to add the AIM-54 pylons, finish cleaning up the joints and then find a good way of masking the wheel wells.
So I've decided on a hybrid approach. I used a saw to cut the kit exhaust nozzles in two.
I can then glue the Eduard afterburner cans onto the kit tubes.
So I'll be using the kit exhaust nozzles paired with the Eduard afterburner cans.
The tubes have been painted white and then blackened with random streaks.
The first coat of paint (Mr Metal Iron MC-212) on the exhaust nozzles. The nozzles stay on pretty well without glue so I'm painting all four of them to allow flexibility in which ones are mounted (both open, both closed or one of each).
After toying with the idea of keeping the nose separate to simplify painting, I've decided to glue the nose on so that I can fix the glue seam prior to painting.
The joint isn't bad but I think it will look more seamless if I address it prior to painting.
To re-cap... the nose is attached and we are very close to the painting stage. Need to add the AIM-54 pylons, finish cleaning up the joints and then find a good way of masking the wheel wells.
John aka JKim
-----------<><
-----------<><