1/48 Tamiya F-14A Jolly Rogers

-
BlackSheep214

- Elite Member
- Posts: 12985
- Joined: Sun Apr 06, 2014 8:47 pm
Re: 1/48 Tamiya F-14A Jolly Rogers
“Who controls the skies, controls the fate of this Earth”
Author unknown- 352nd Fighter Group, Blue-Nosed Bastards of Bodney
“Send one plane it’s a sortie; send two planes it’s a flight; send four planes it’s a test of airpower. - Richard Kohn
Author unknown- 352nd Fighter Group, Blue-Nosed Bastards of Bodney
“Send one plane it’s a sortie; send two planes it’s a flight; send four planes it’s a test of airpower. - Richard Kohn
-
Medicman71

- Elite Member
- Posts: 11095
- Joined: Mon Apr 07, 2014 9:32 am
- Location: Houston, Tx
Re: 1/48 Tamiya F-14A Jolly Rogers
Nice work on the photoetch. You did the PE1 and PE4 correctly. I've seen these done before and Eduard left out that part.
Mike
Sponsored by Boeing, Lockheed Martin, Northrop Grumman, Saab, BAE, and Dassault
Sponsored by Boeing, Lockheed Martin, Northrop Grumman, Saab, BAE, and Dassault

Re: 1/48 Tamiya F-14A Jolly Rogers
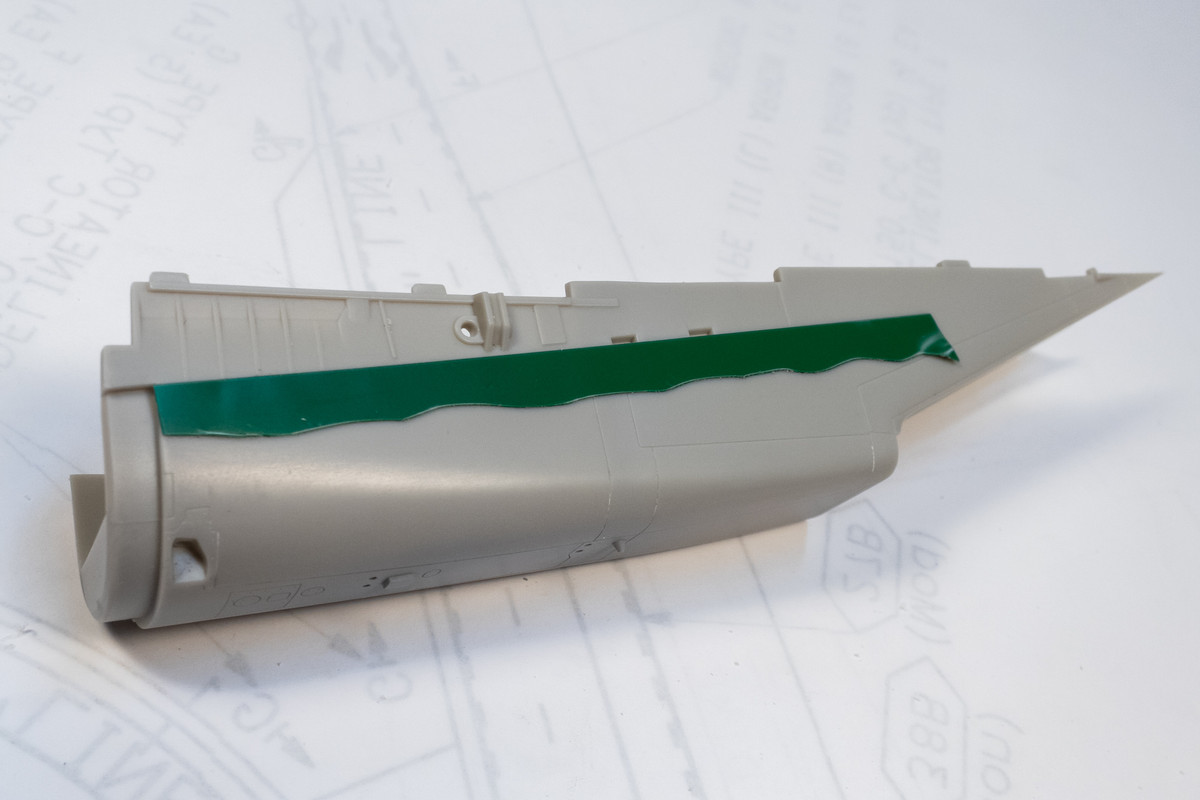
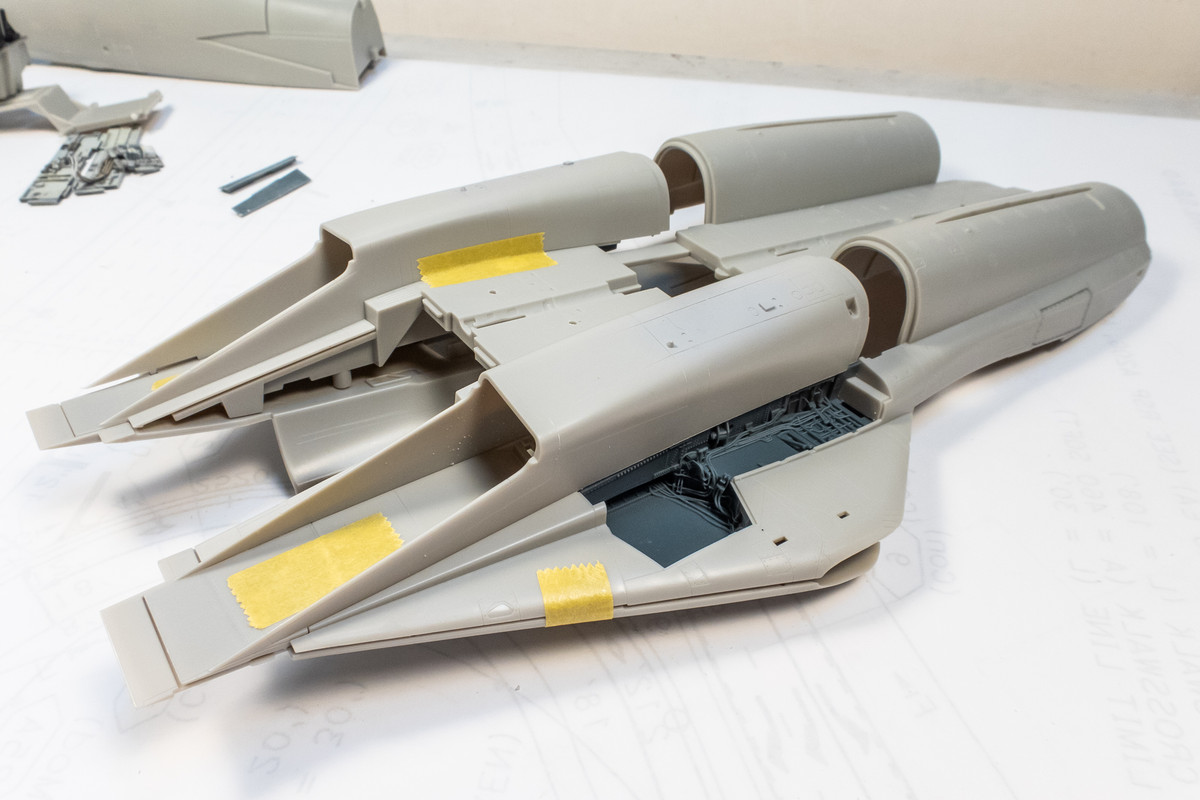
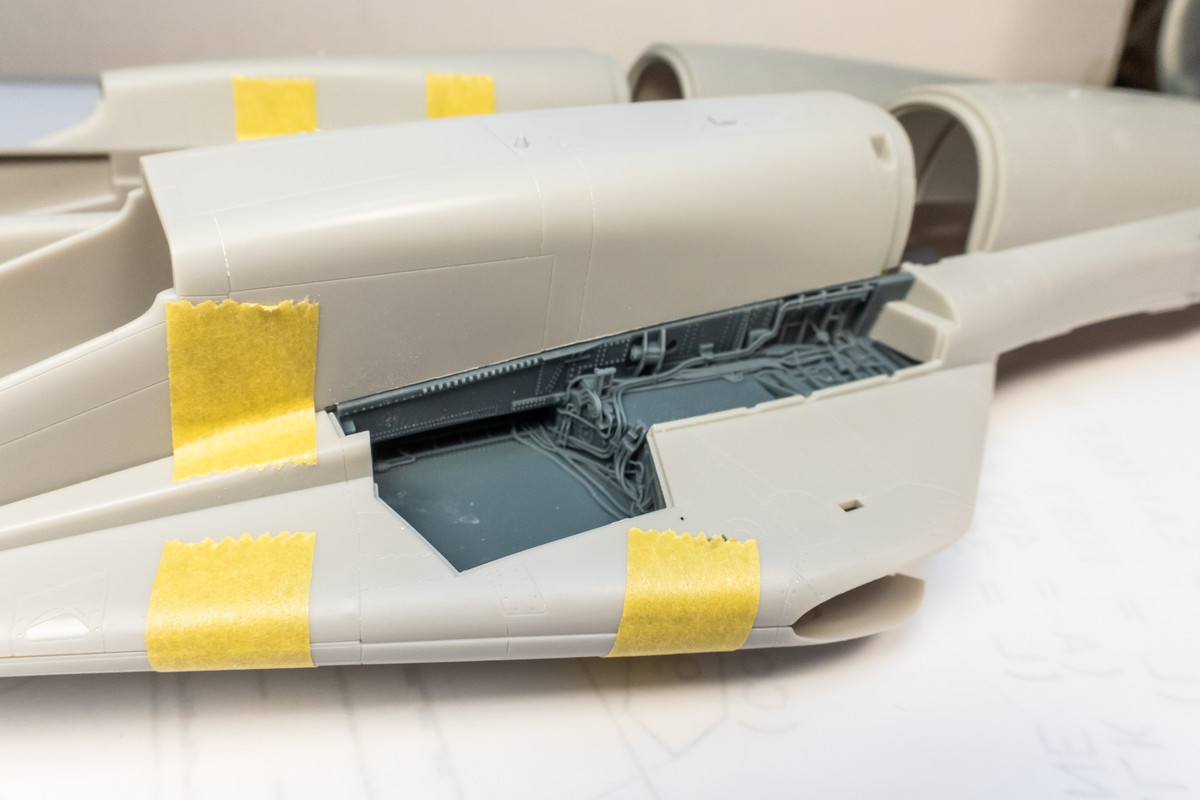
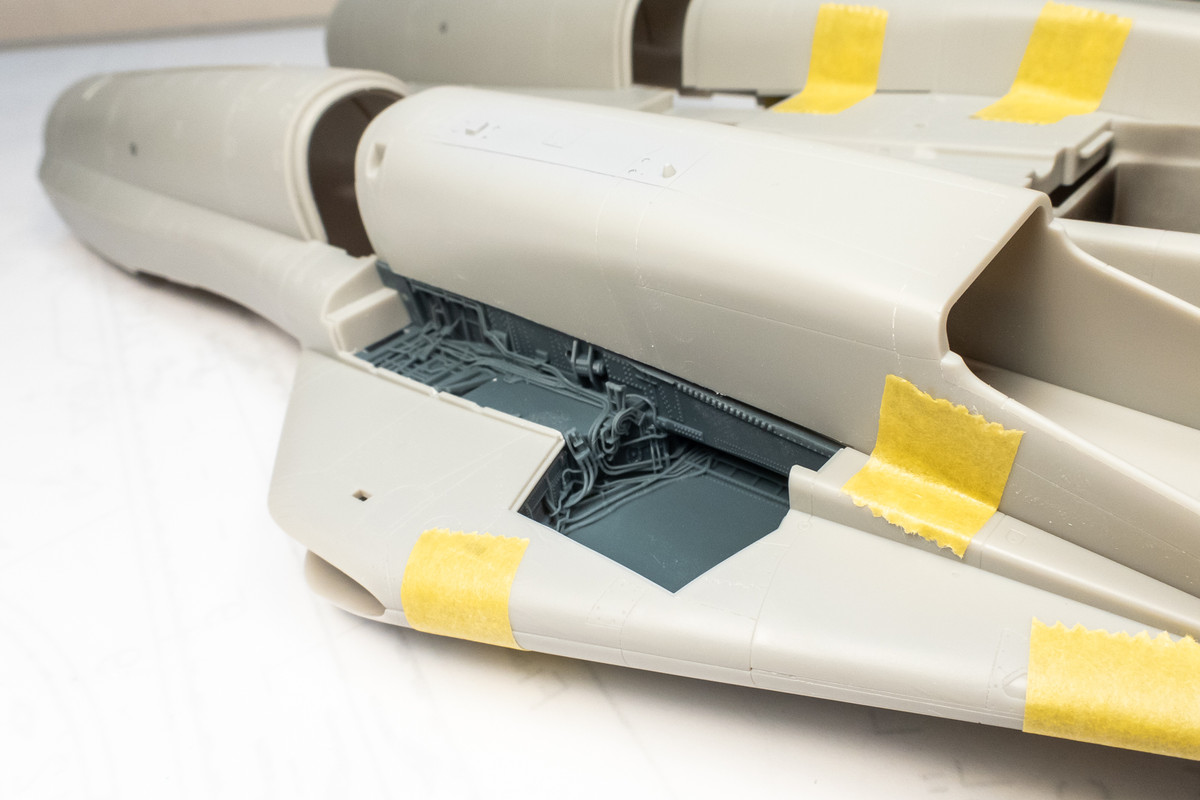
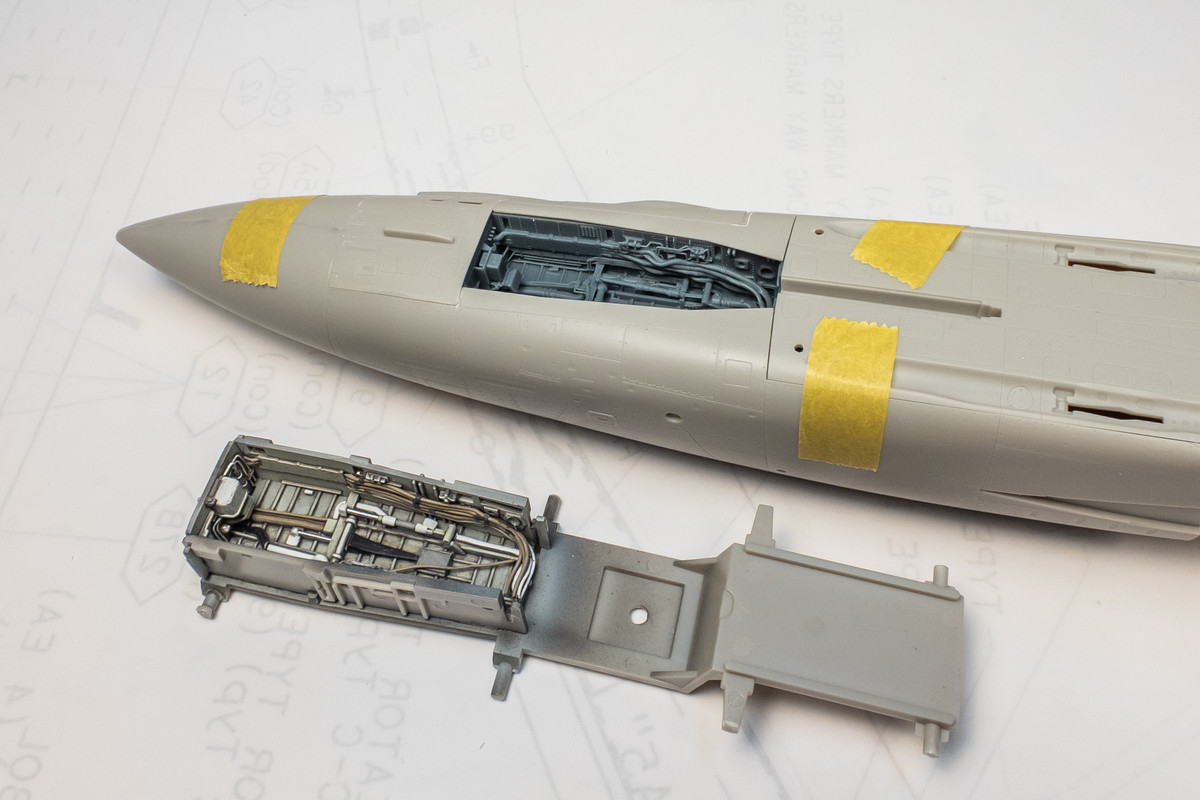
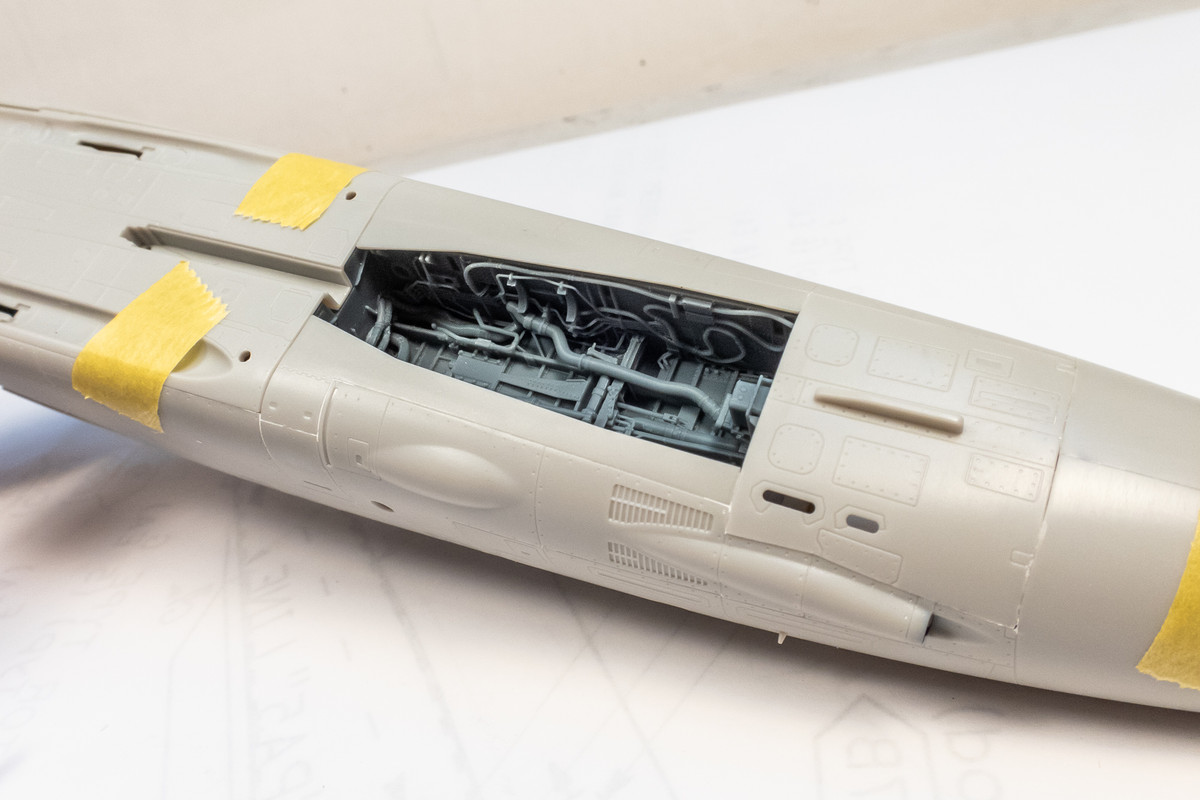
Thanks guys! Fiddly PE work is not my favorite thing to do but thankfully, this one went fairly smoothly for a change.
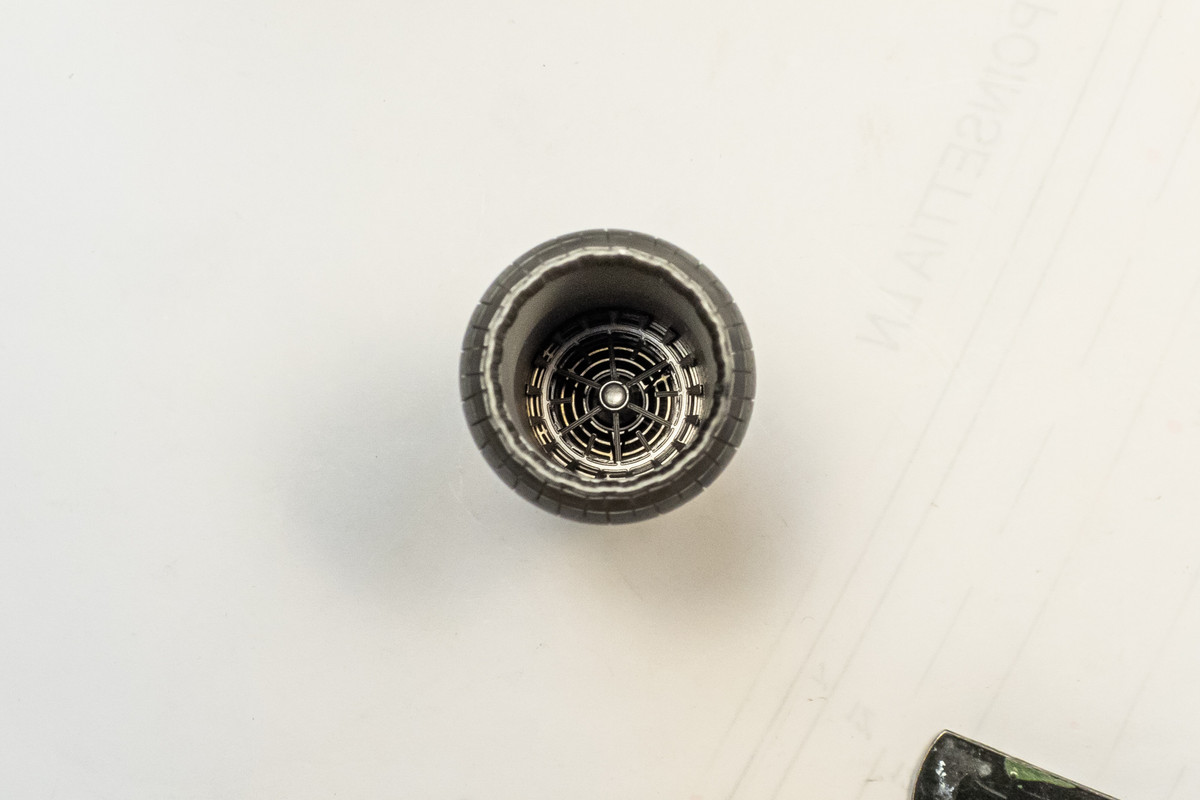
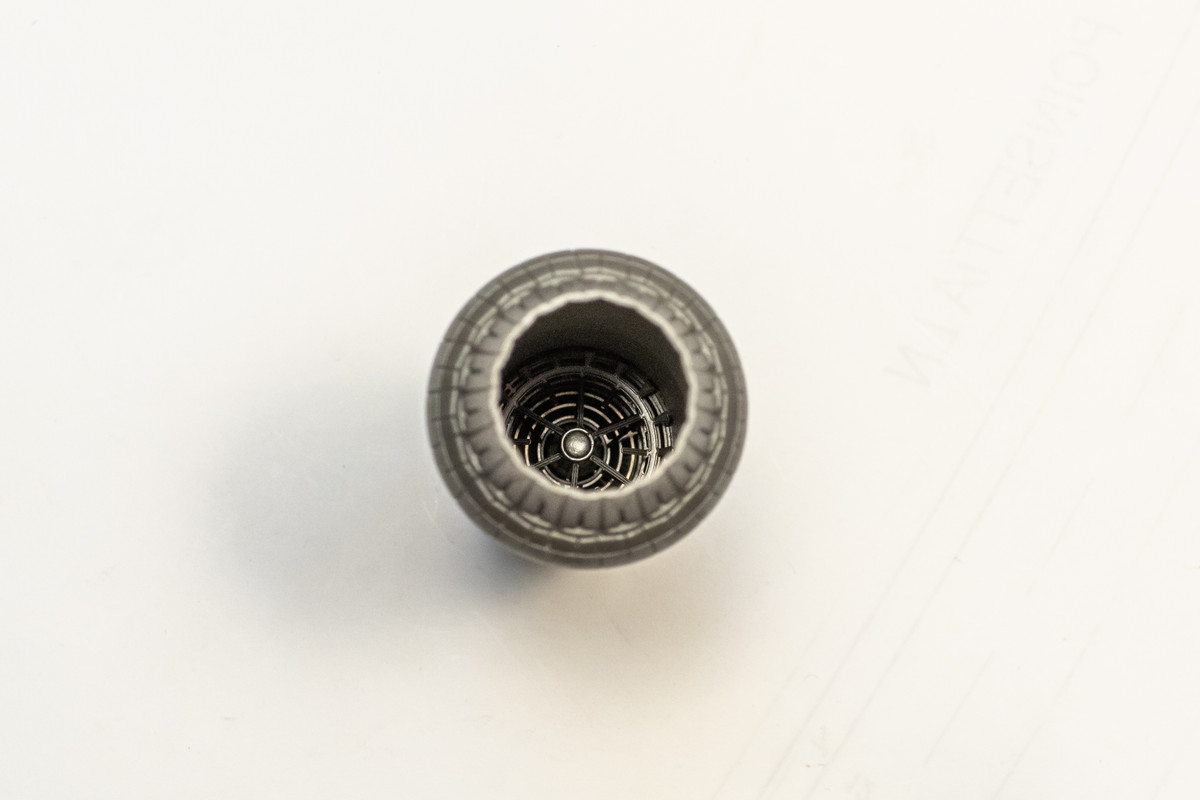
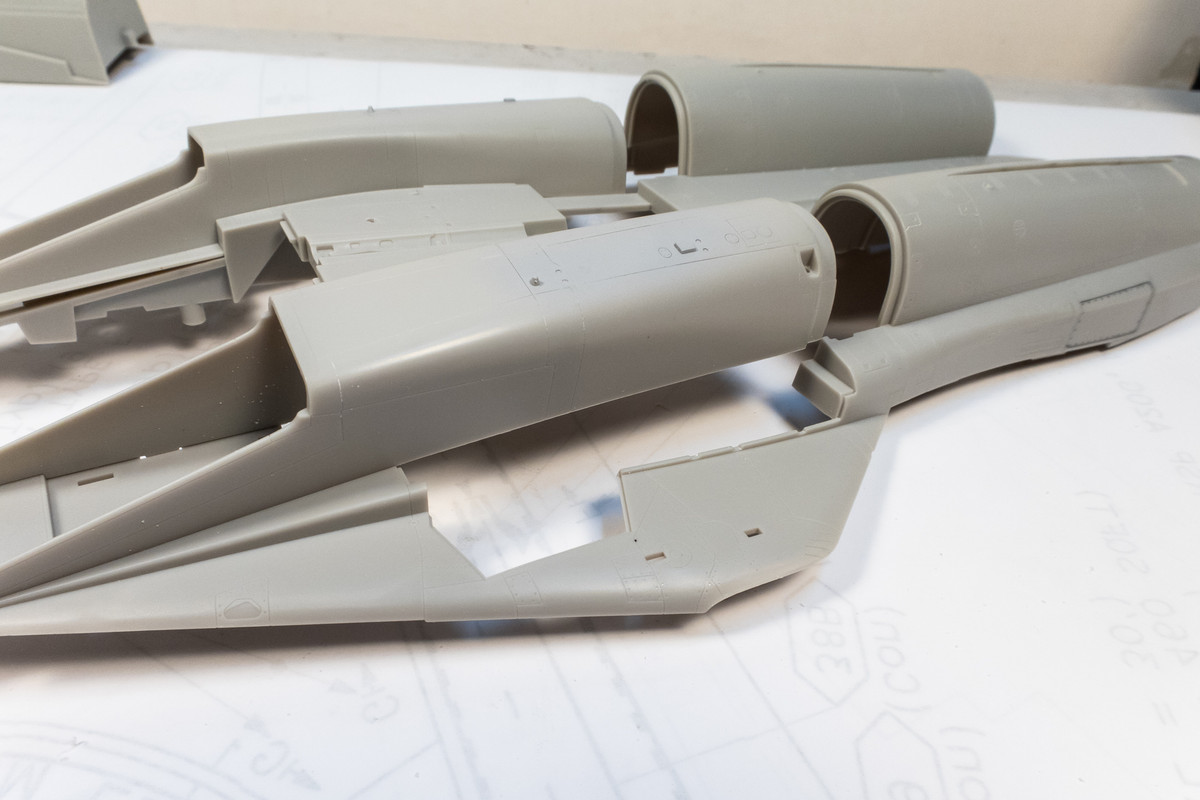
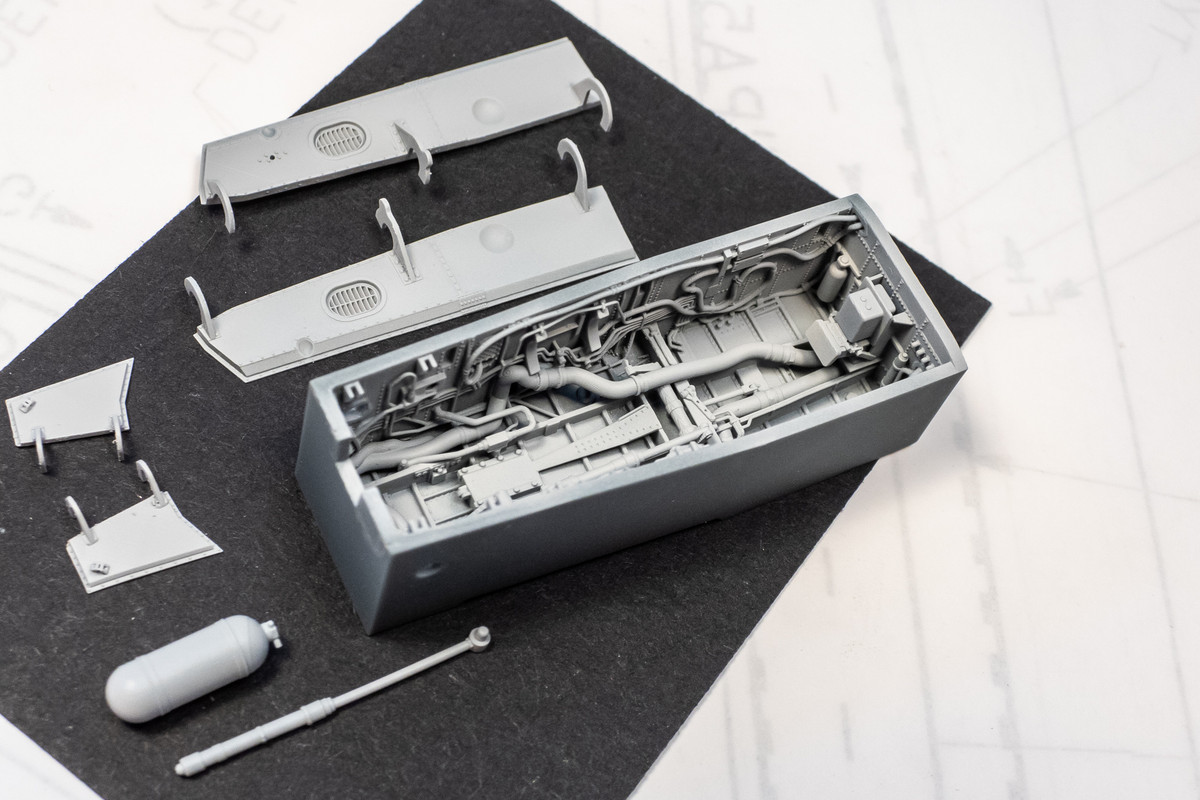
Here are all of the components mounted into the afterburner assembly.
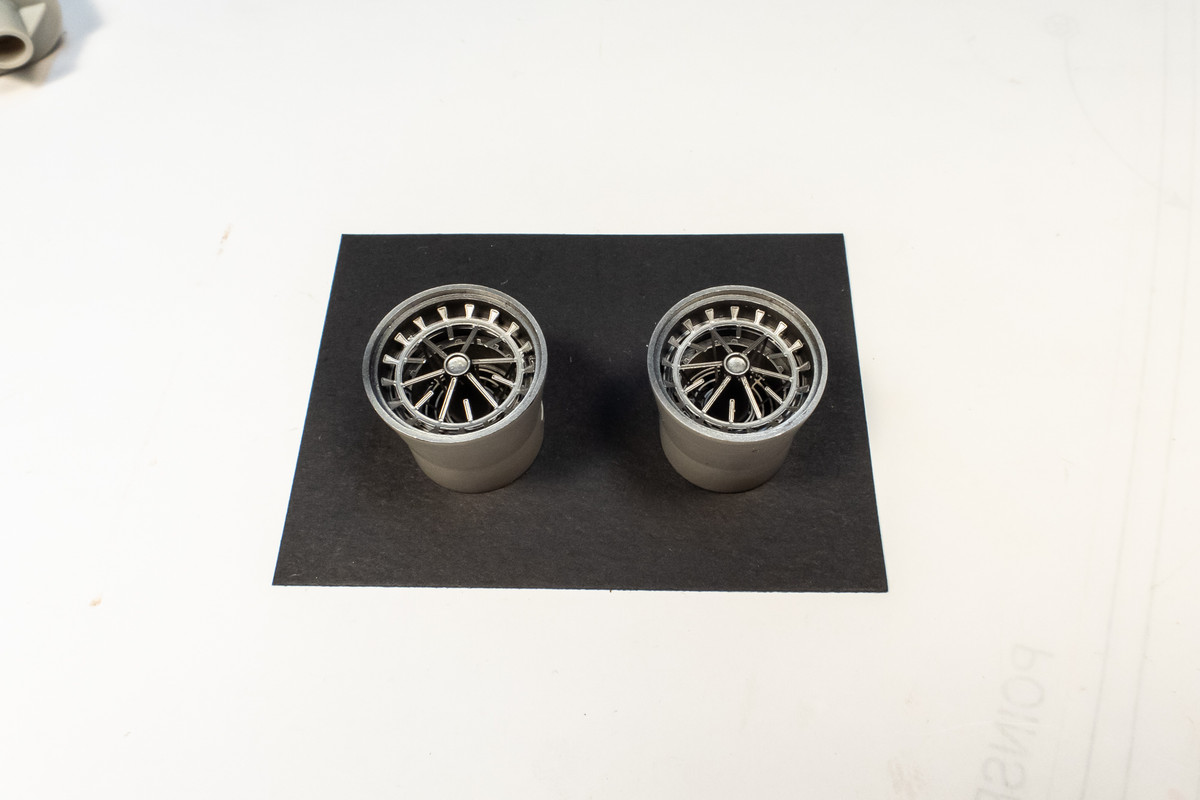
As I said, visibility into the afterburners is very limited without shining a light directly into the exhaust nozzles, which no one is going to do.
The Mini Craft Collection wheel bays are out for delivery so hopefully I'll be getting them today!
Here are all of the components mounted into the afterburner assembly.
As I said, visibility into the afterburners is very limited without shining a light directly into the exhaust nozzles, which no one is going to do.
The Mini Craft Collection wheel bays are out for delivery so hopefully I'll be getting them today!
John aka JKim
-----------<><

-----------<><
Re: 1/48 Tamiya F-14A Jolly Rogers
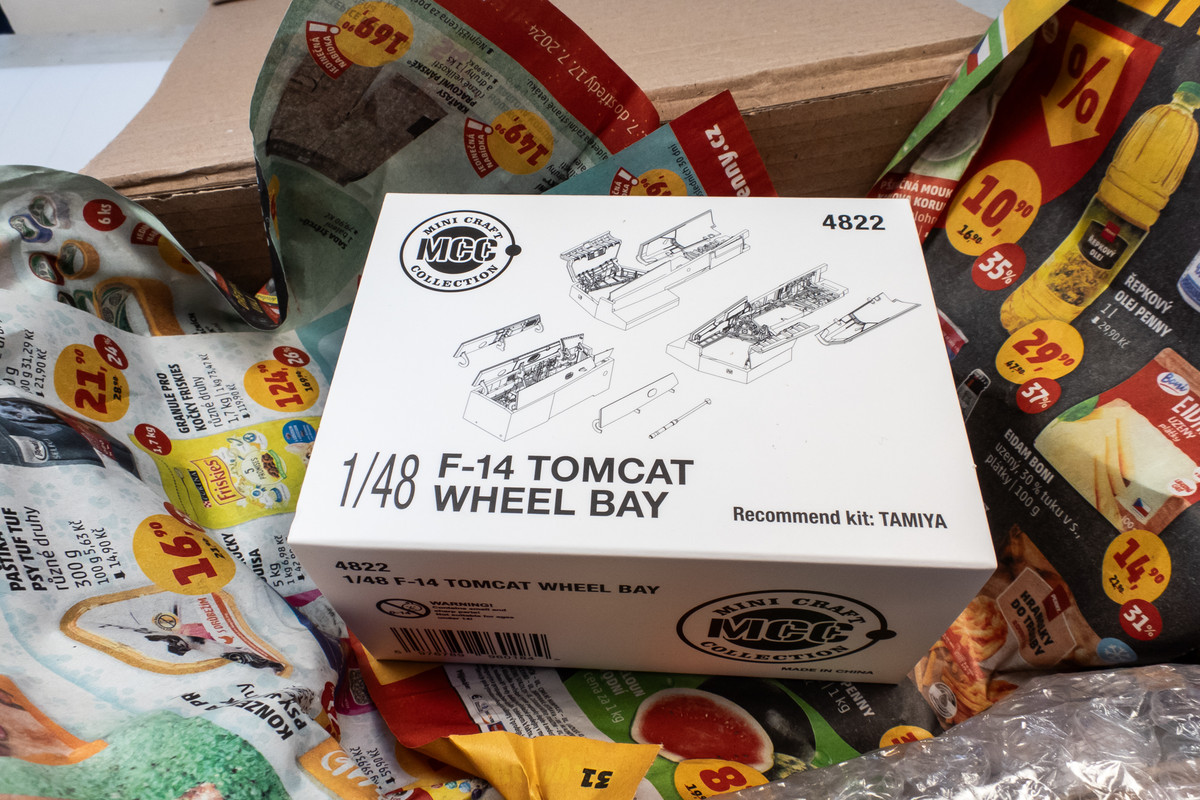
I got present in the post today!
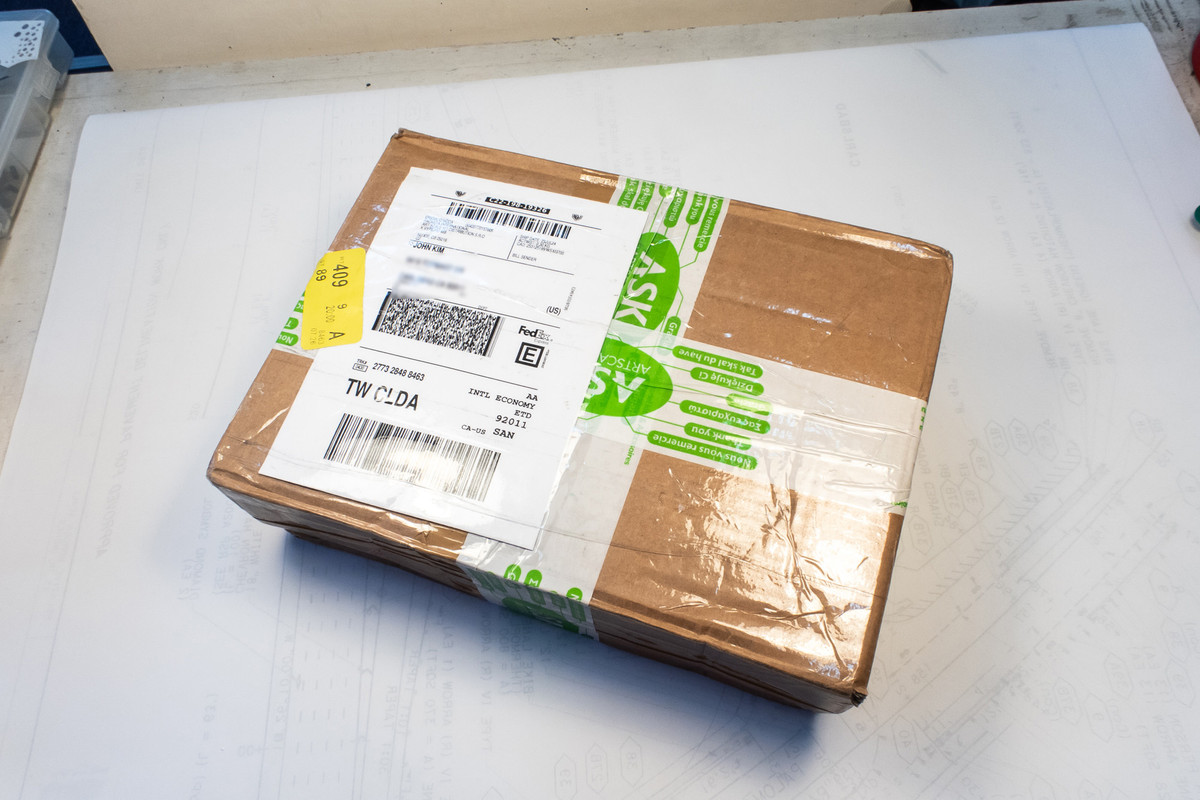
The Mini Craft Collection Wheel Wells for the Tamiya F-14 kit is here.
The 3D-printed cages are packed into a metal box.
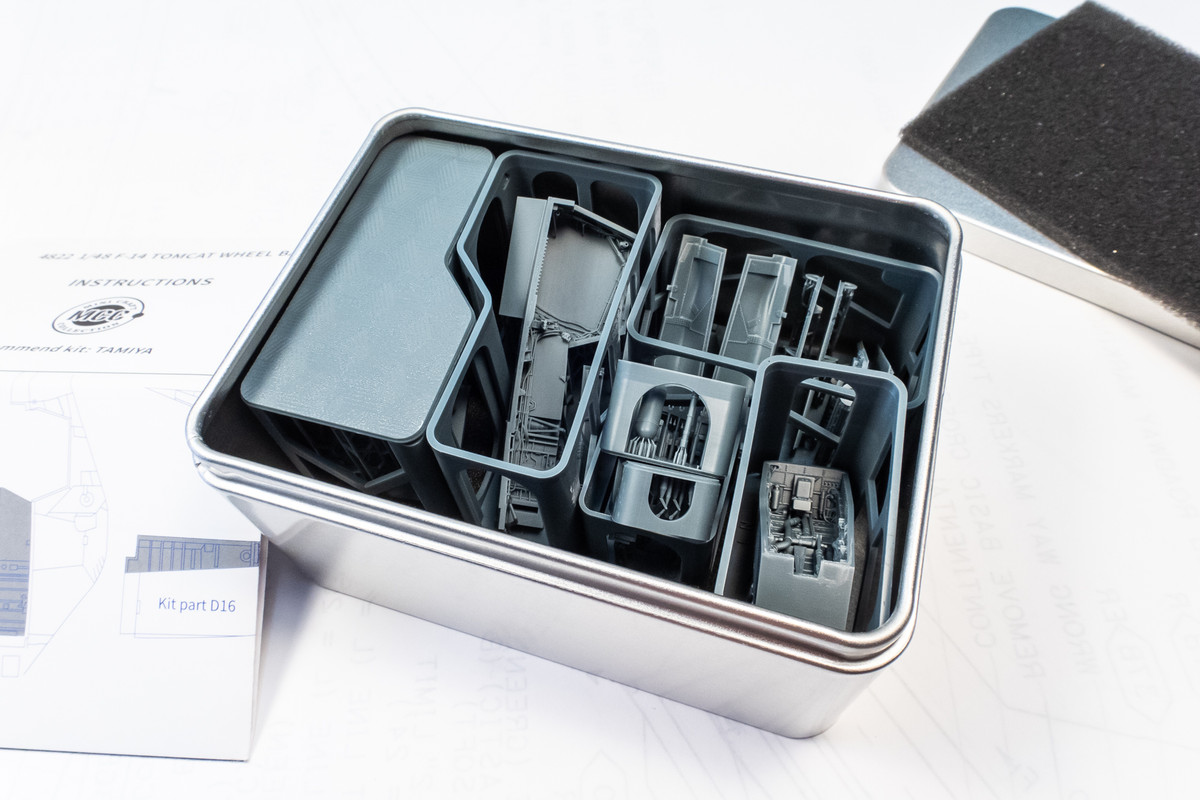
Seven cages total.
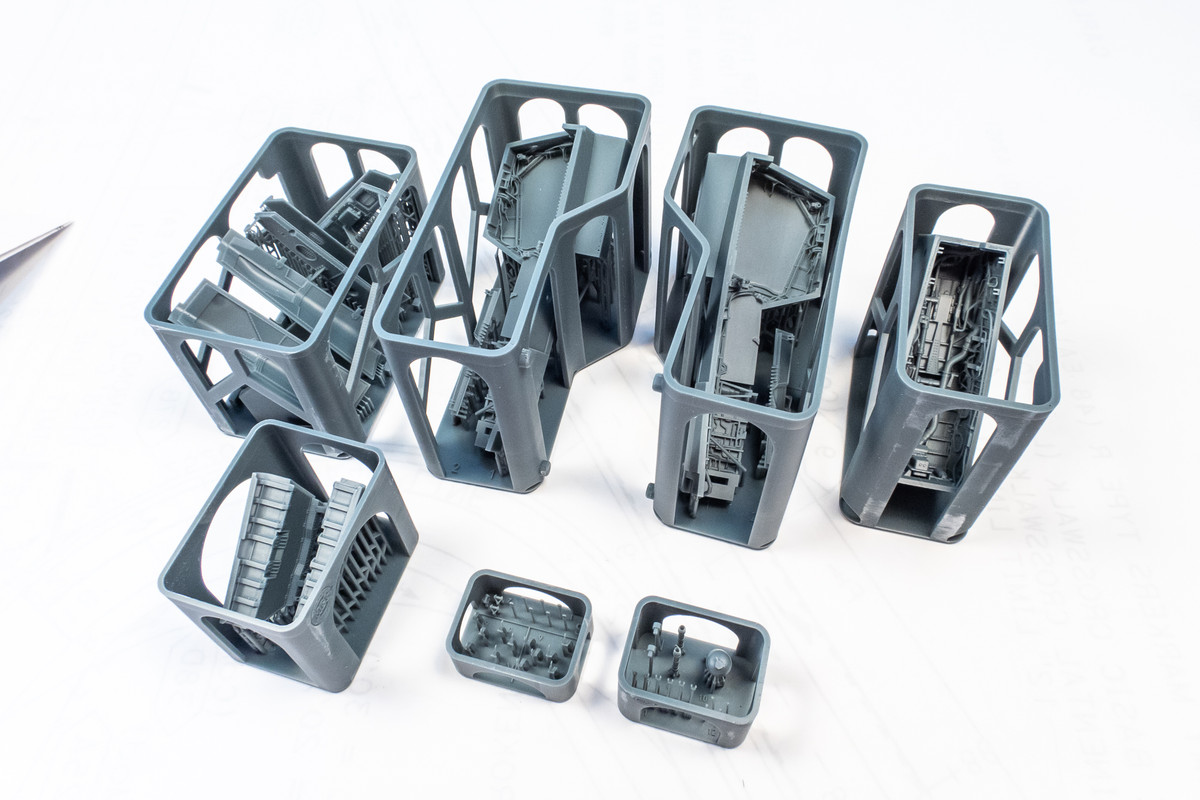
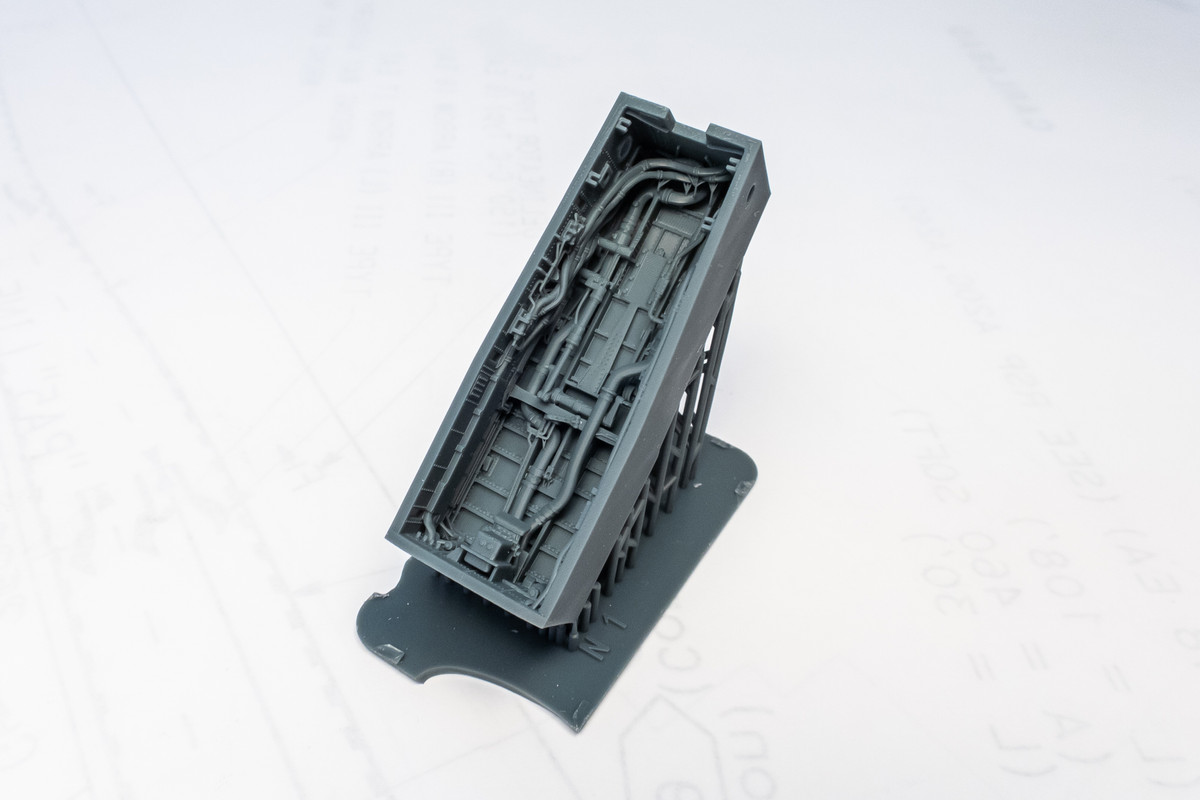
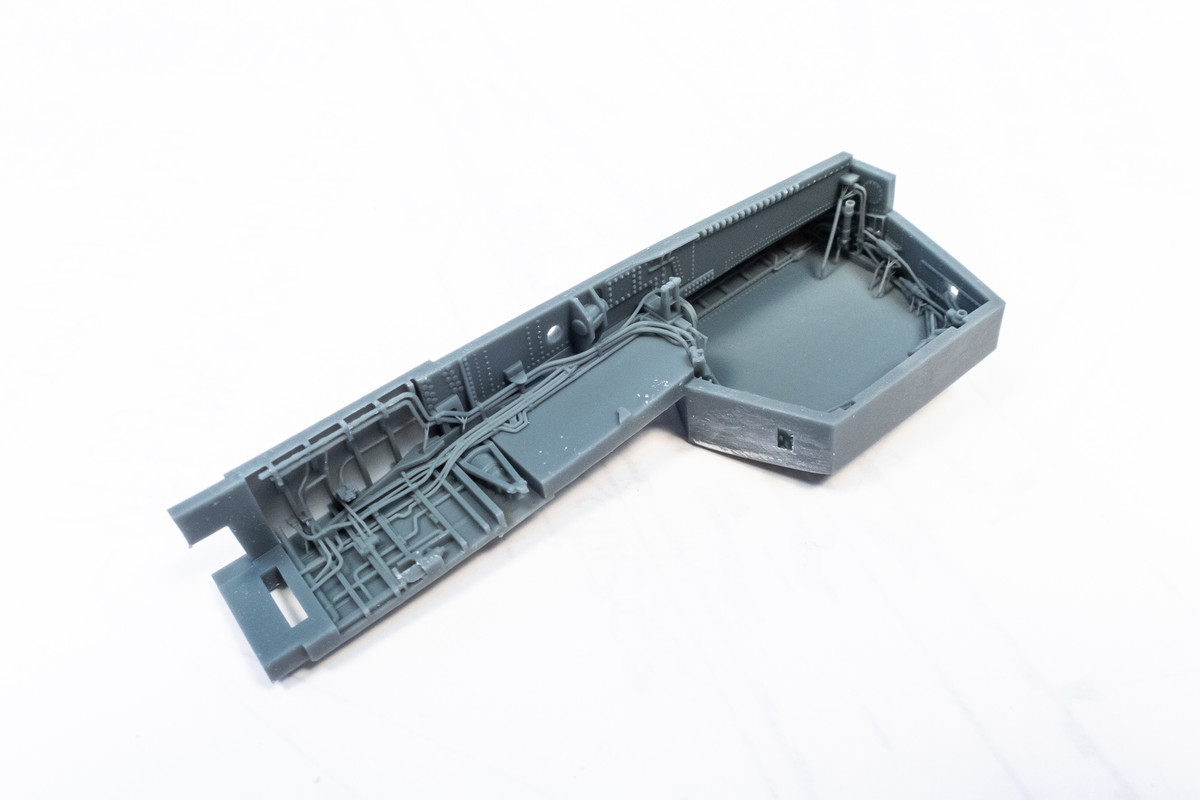
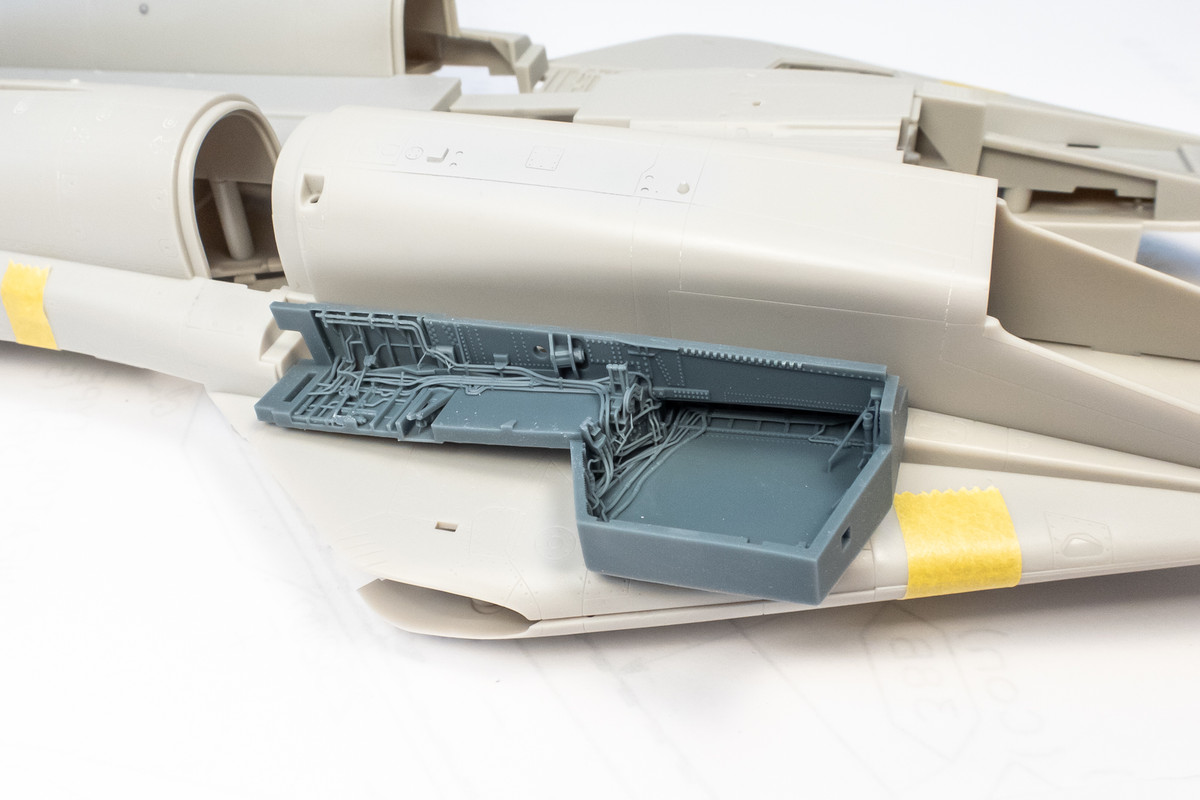
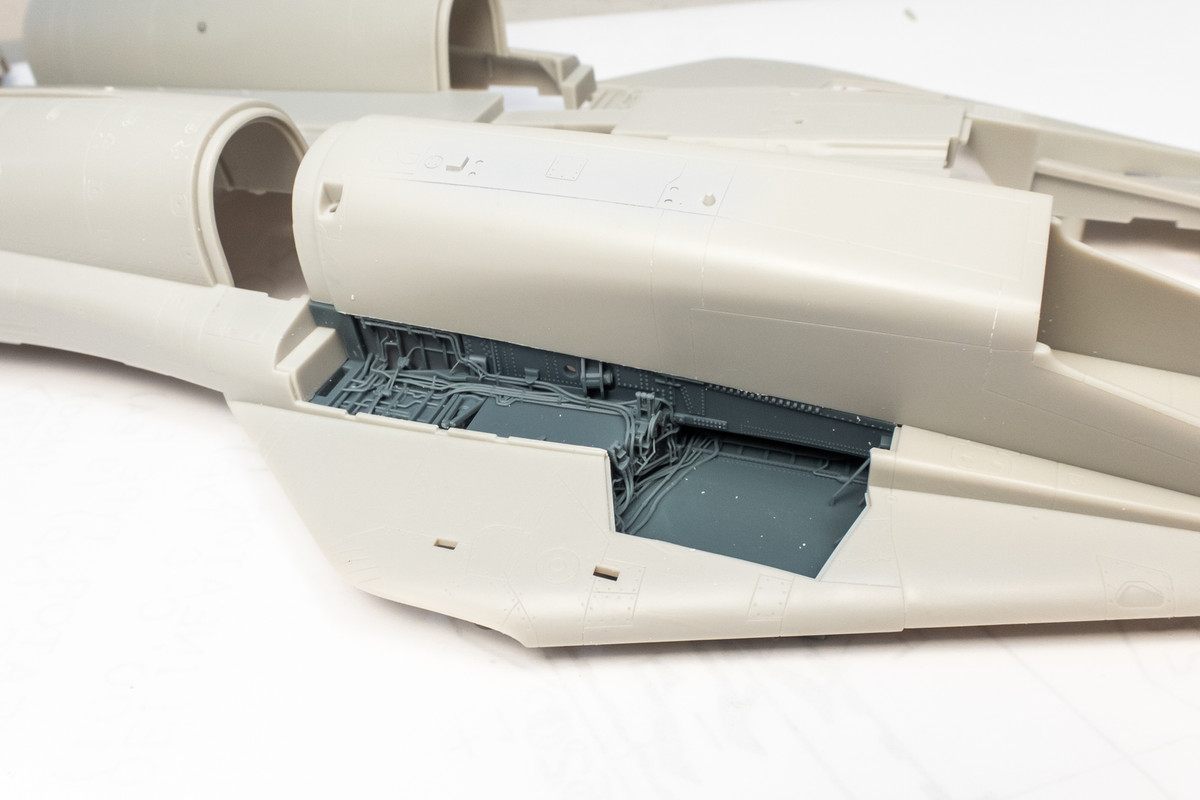
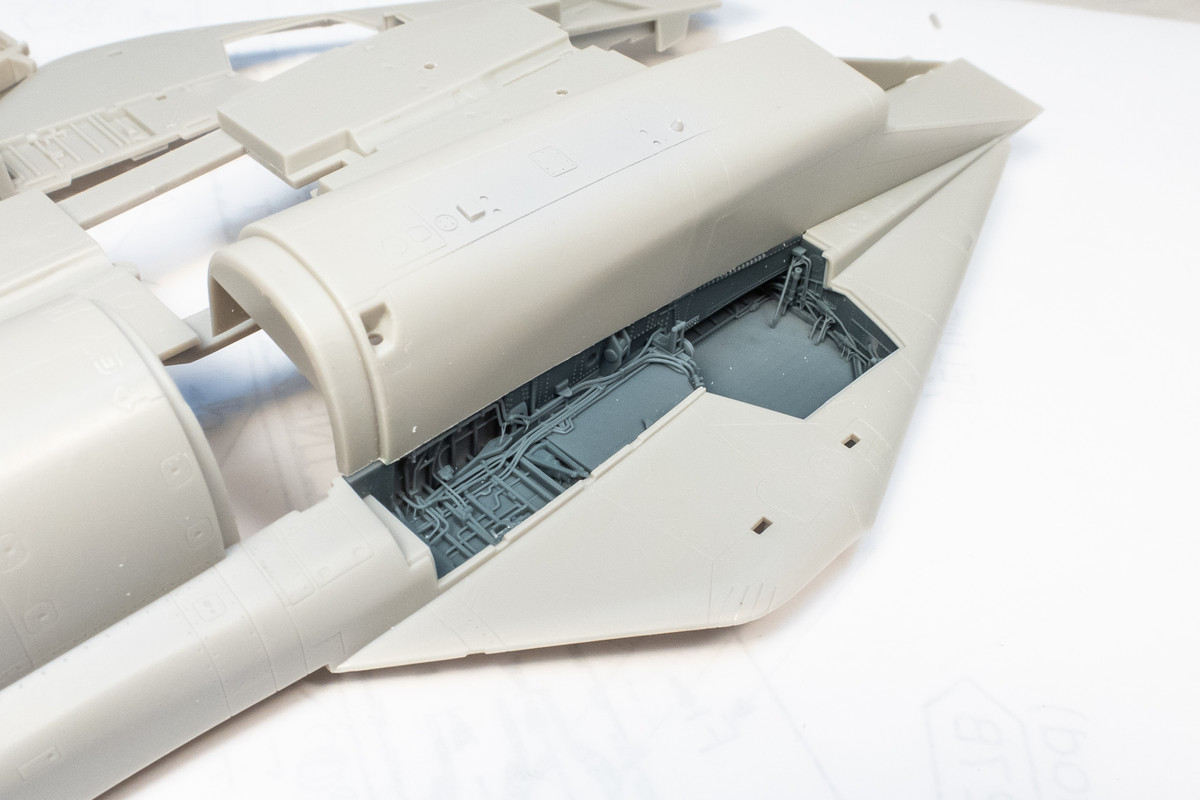
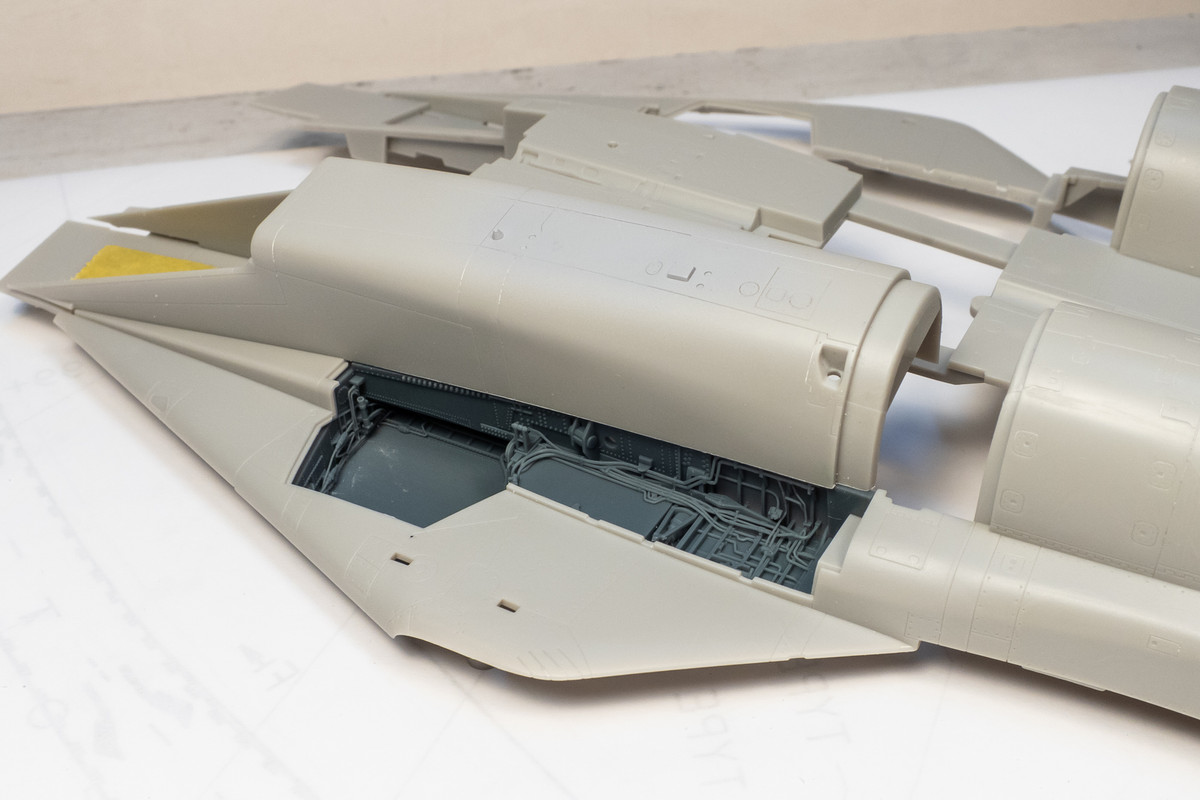
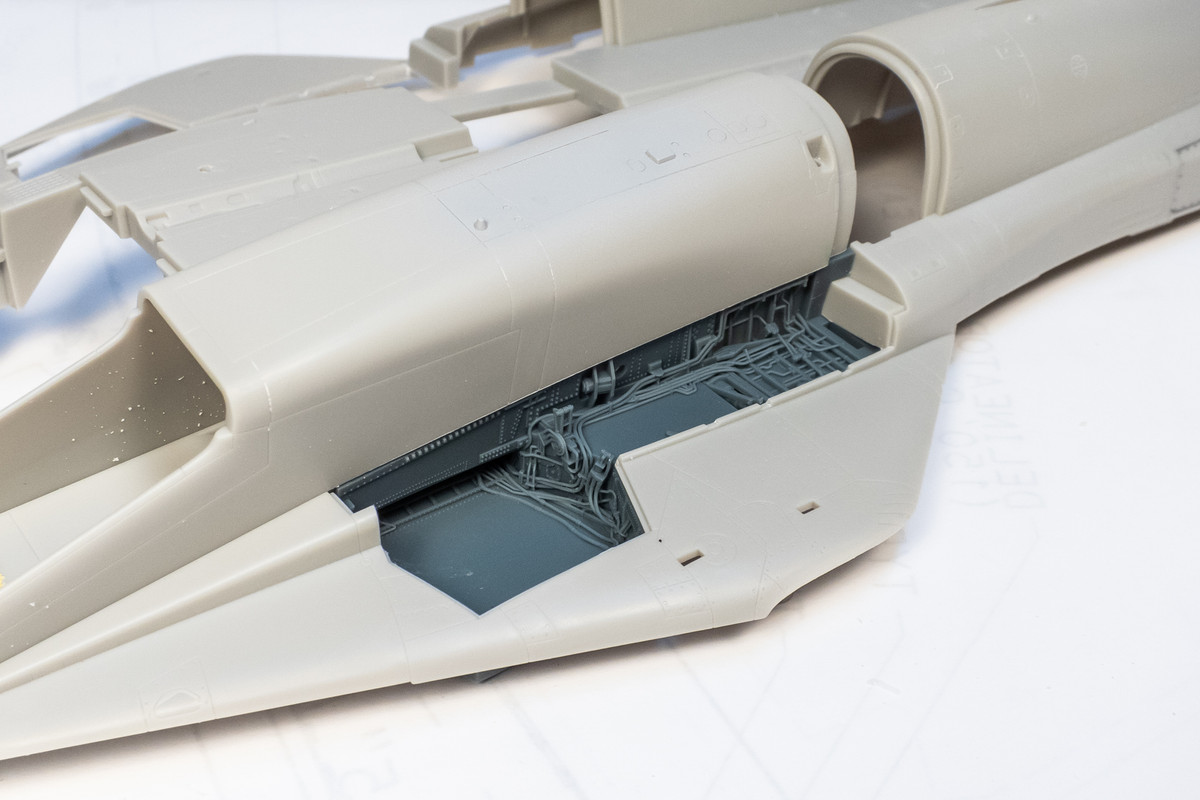
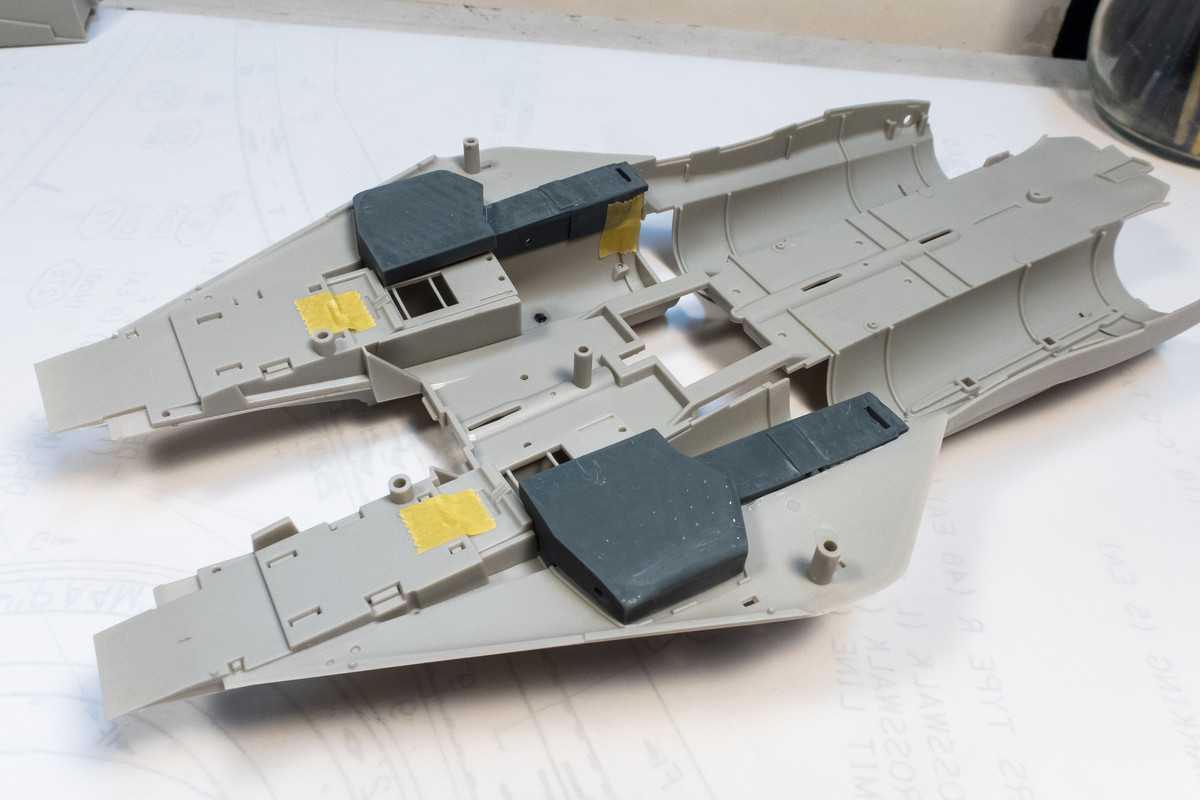
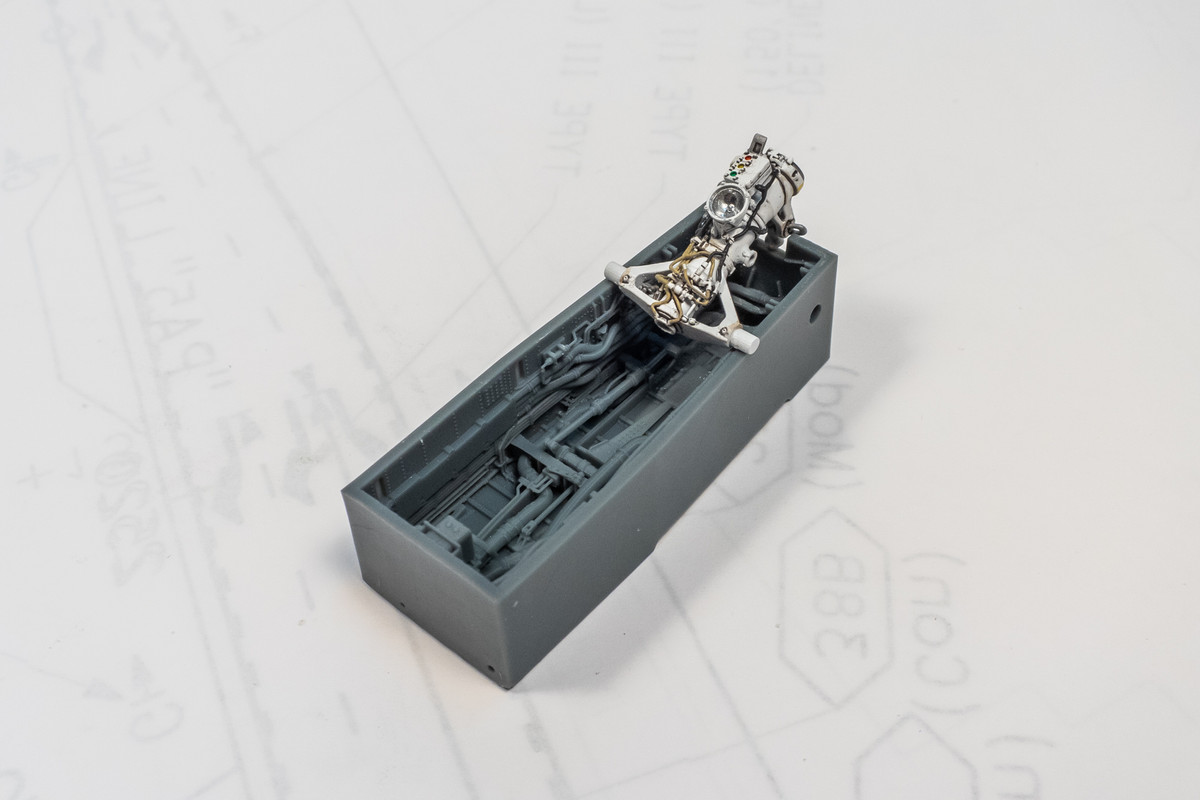
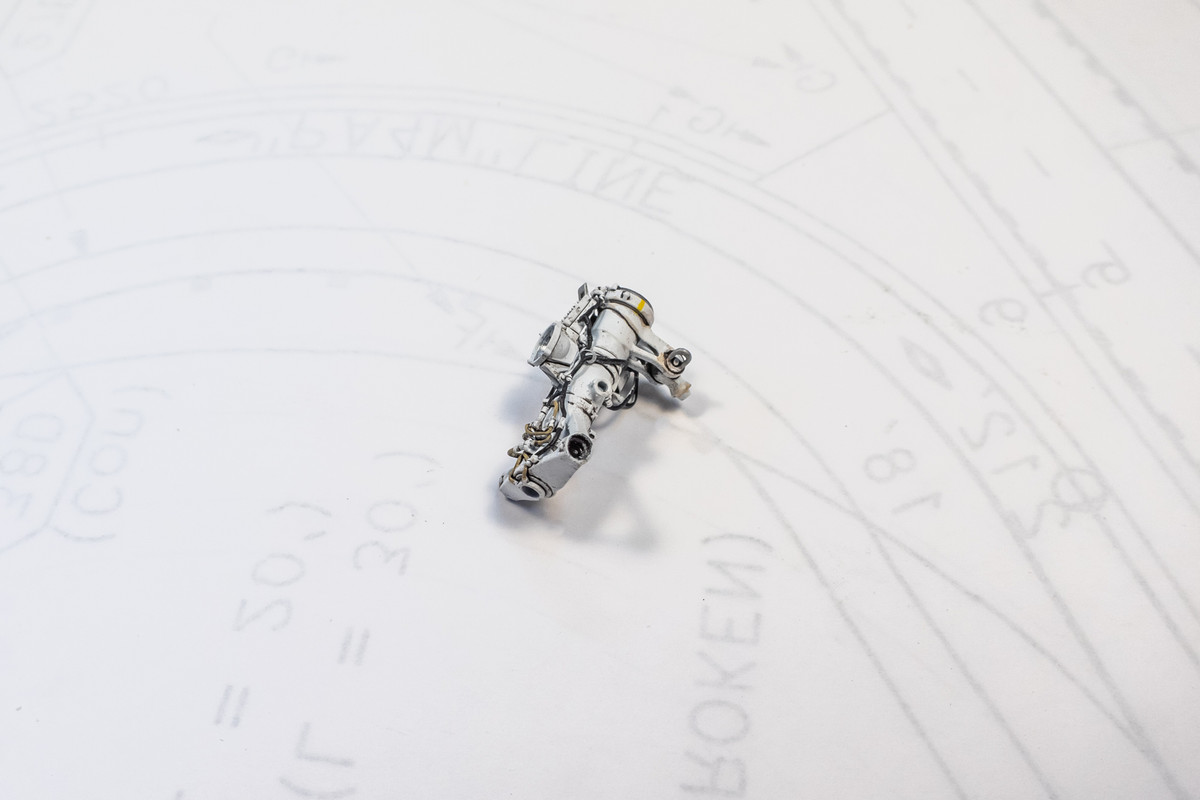
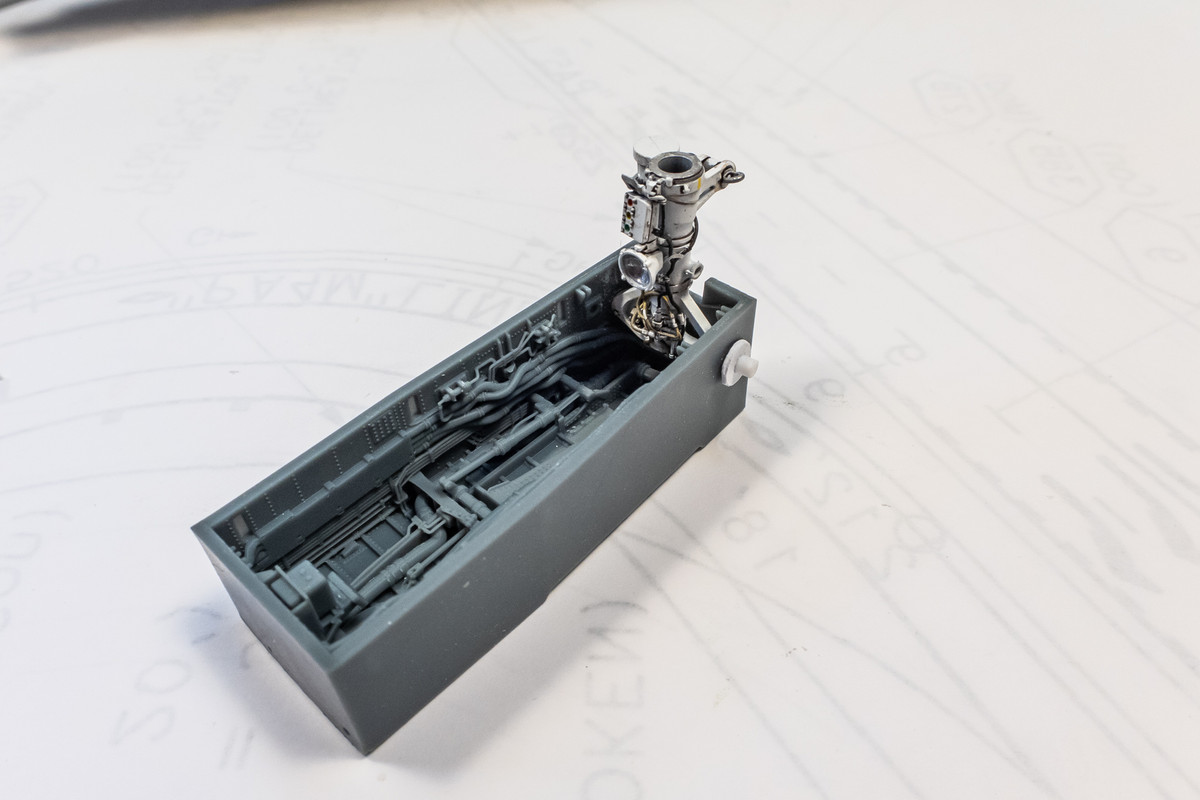
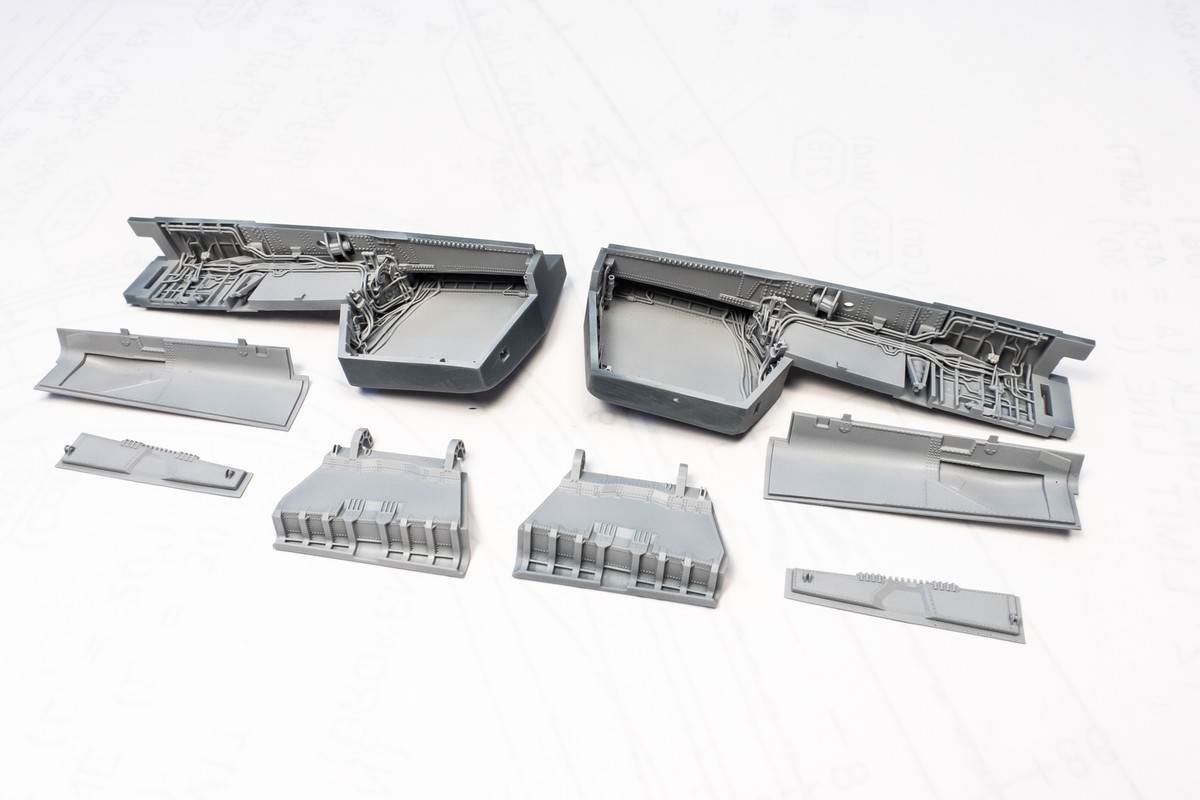
I've added wiring to the kit nose gear bay so I consider it usable but let's take a look at the MCC rendition. The detail is incredible.
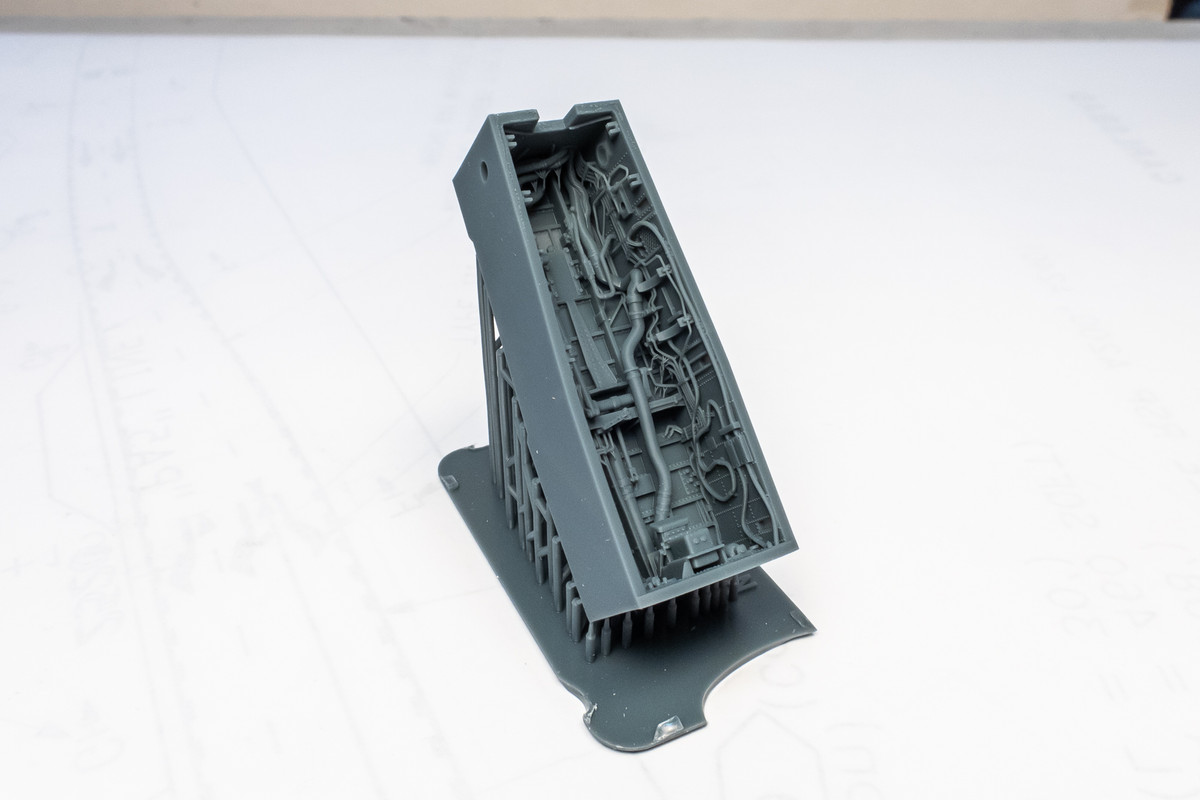
Most of the support attachments are on the backside of the wheel well so you can just hack the supports off. The nose gear bay is a single piece... much different than the 4-sided box structure that you build up with the kit parts. And... the instructions are strangely silent on how you need to adapt the kit parts to make this fit. So I'm going to put this aside for now.
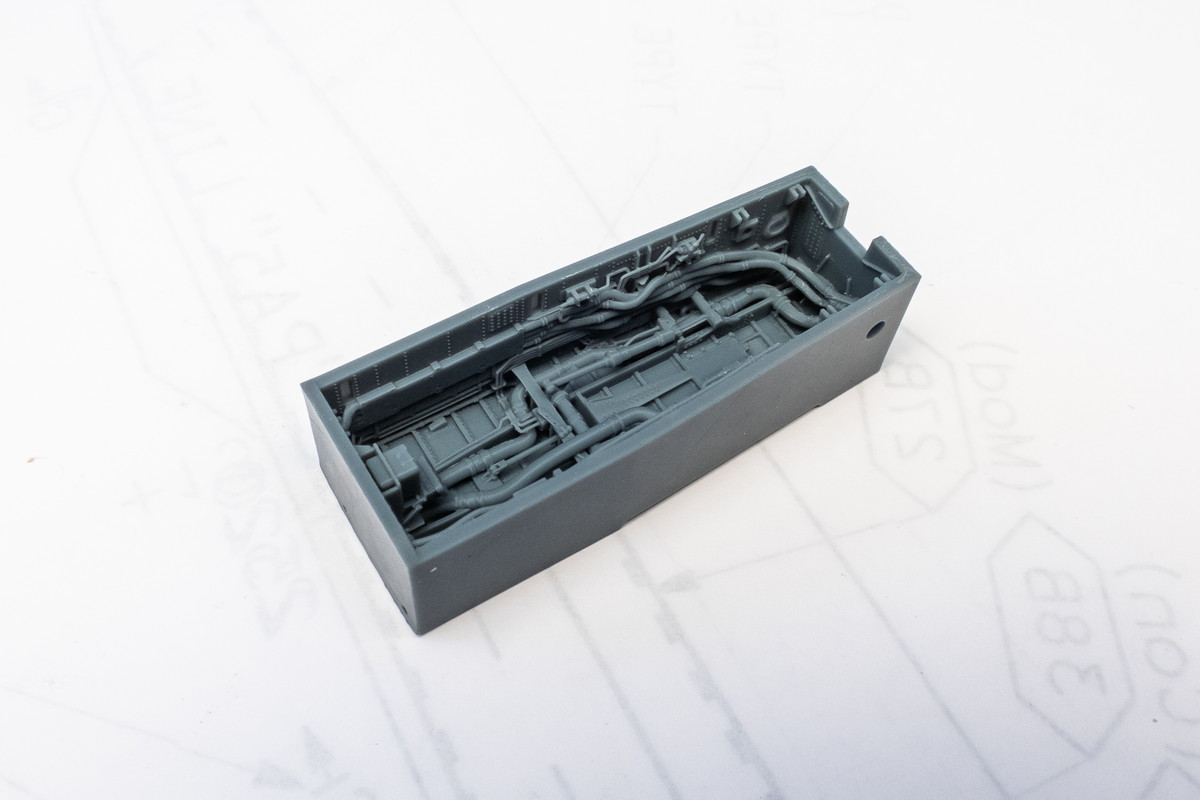
Let's move on to the main wheel wells. Again, most of the support attachments are on the backside, which made removal easier.
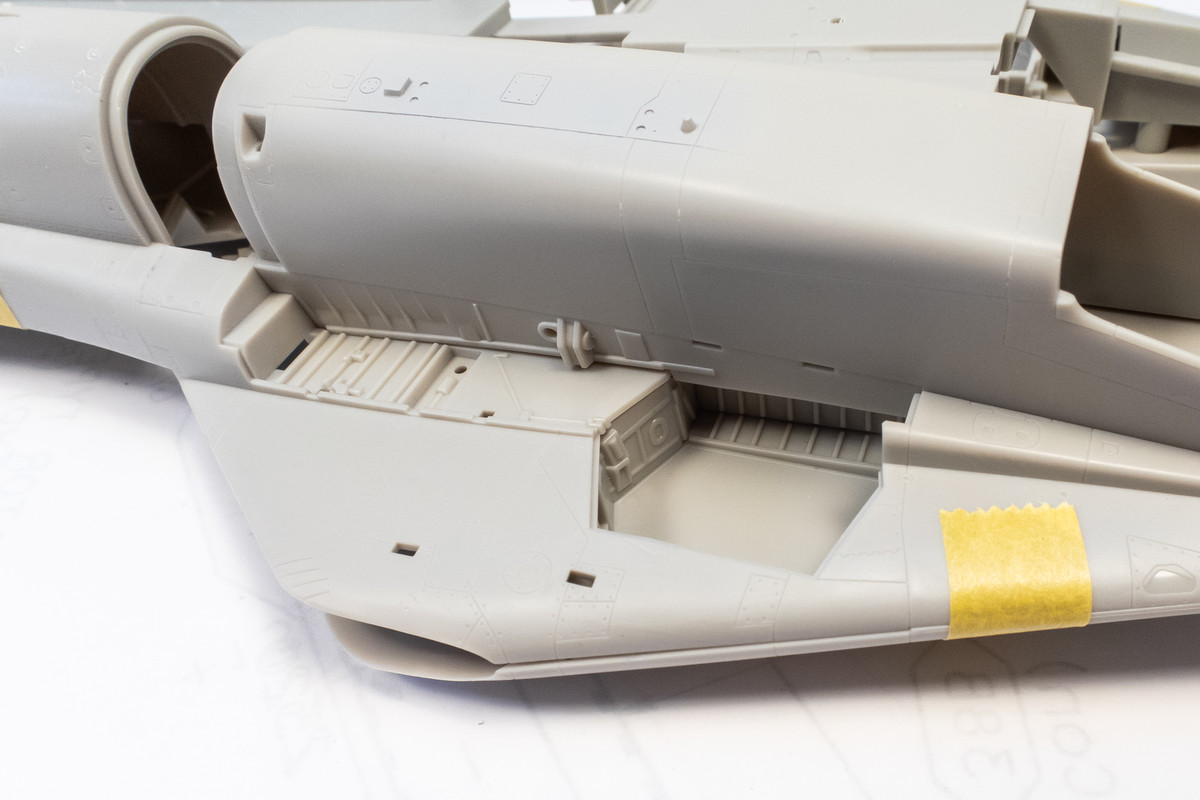
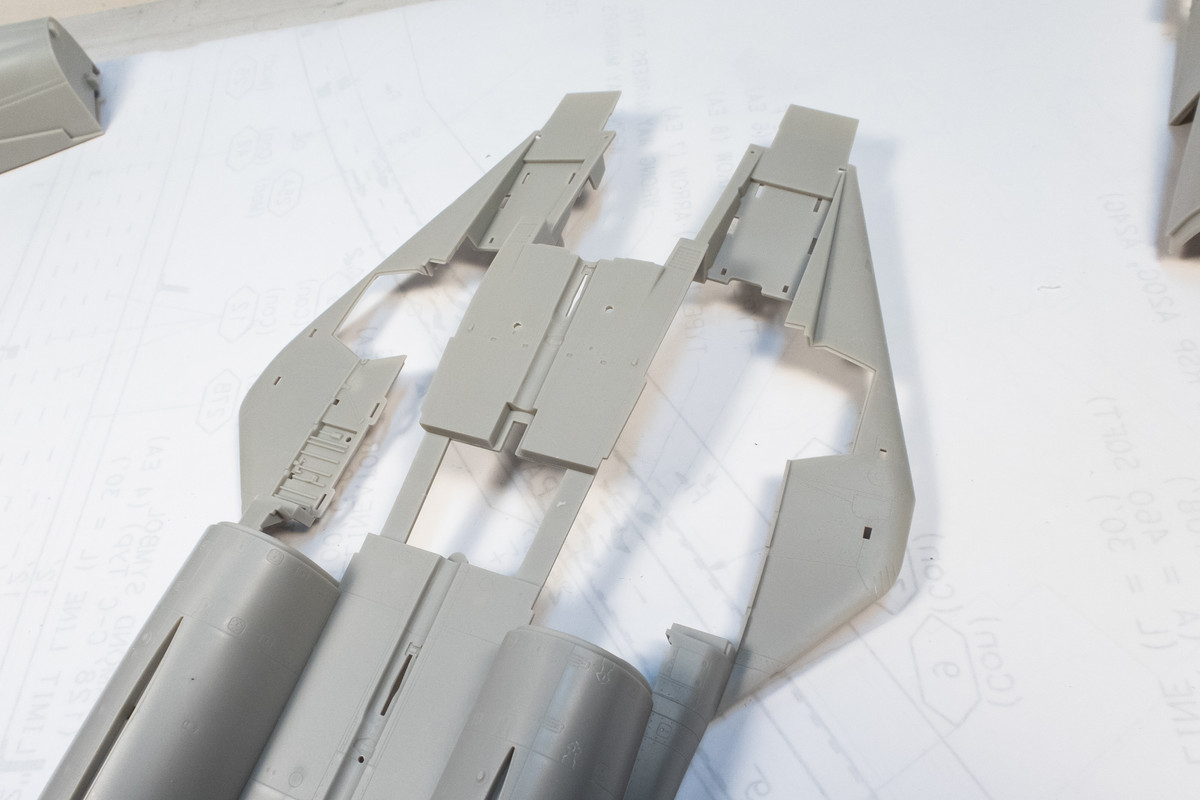
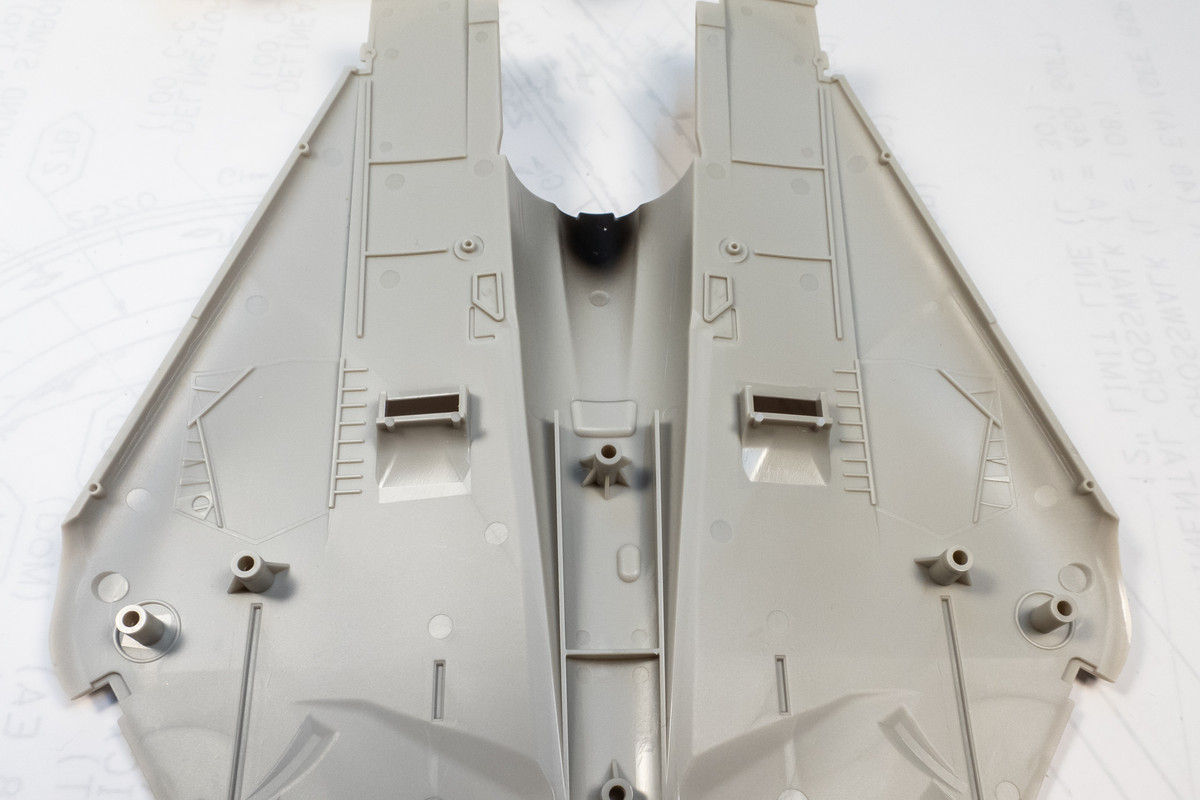
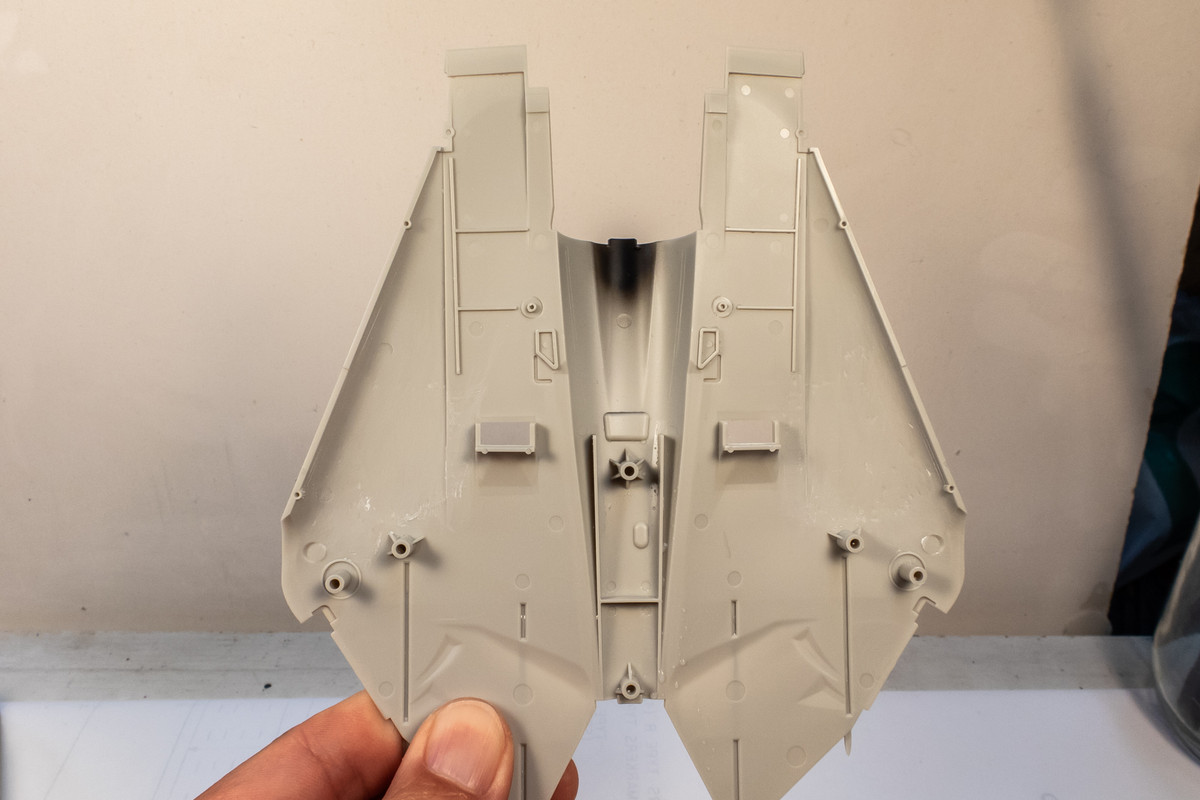
This is what the kit wheel wells look like.
The MCC wells are a huge upgrade, which addresses one of few shortcomings of this Tamiya kit.
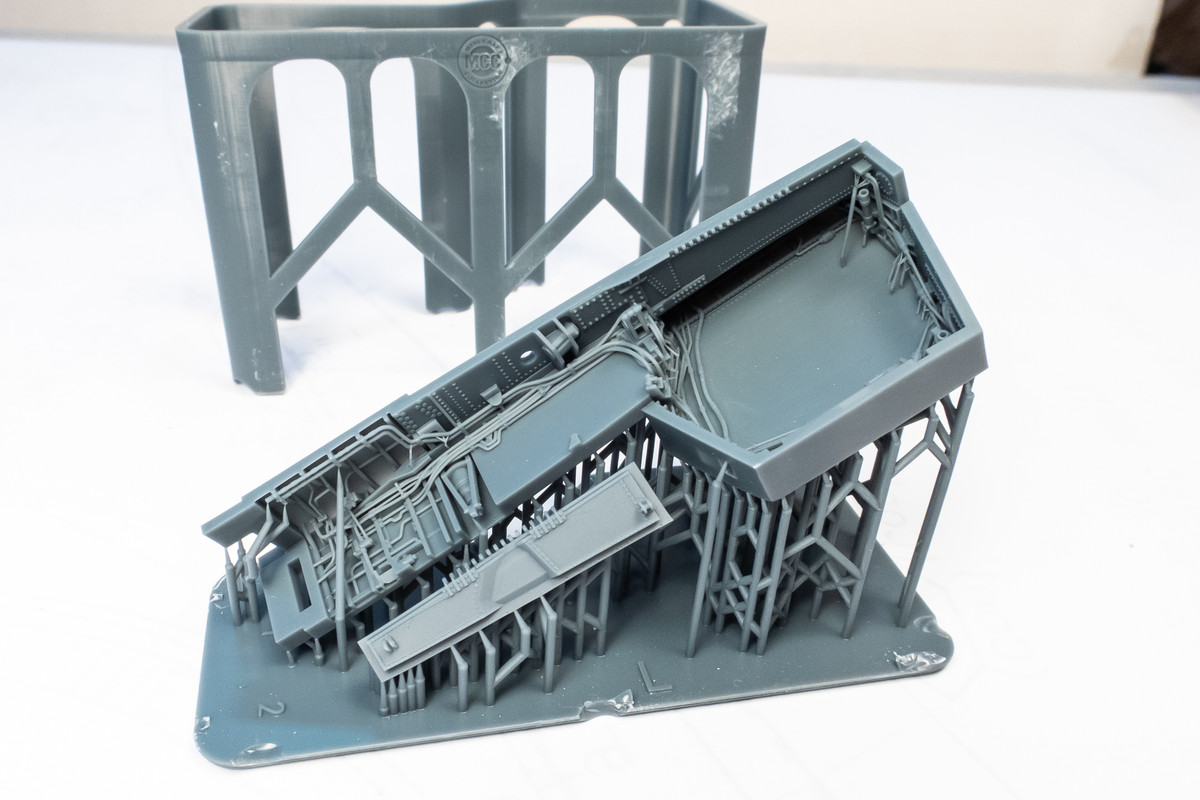
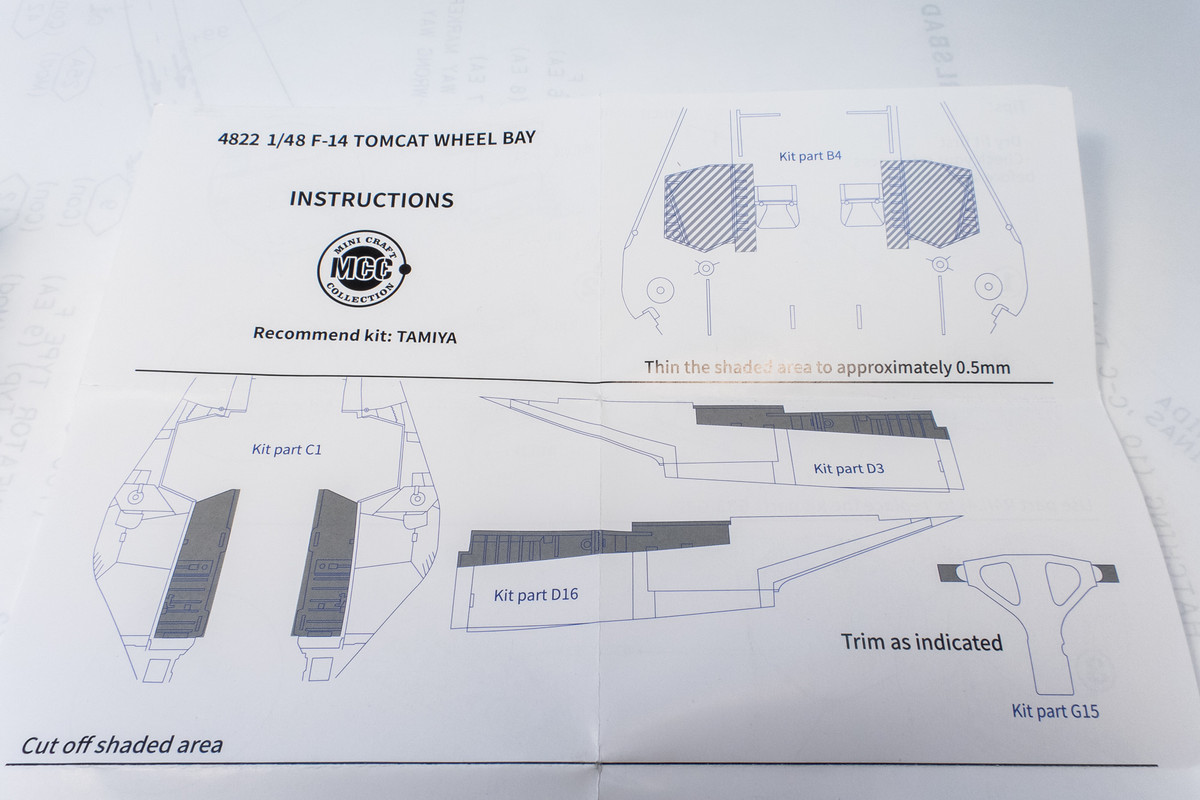
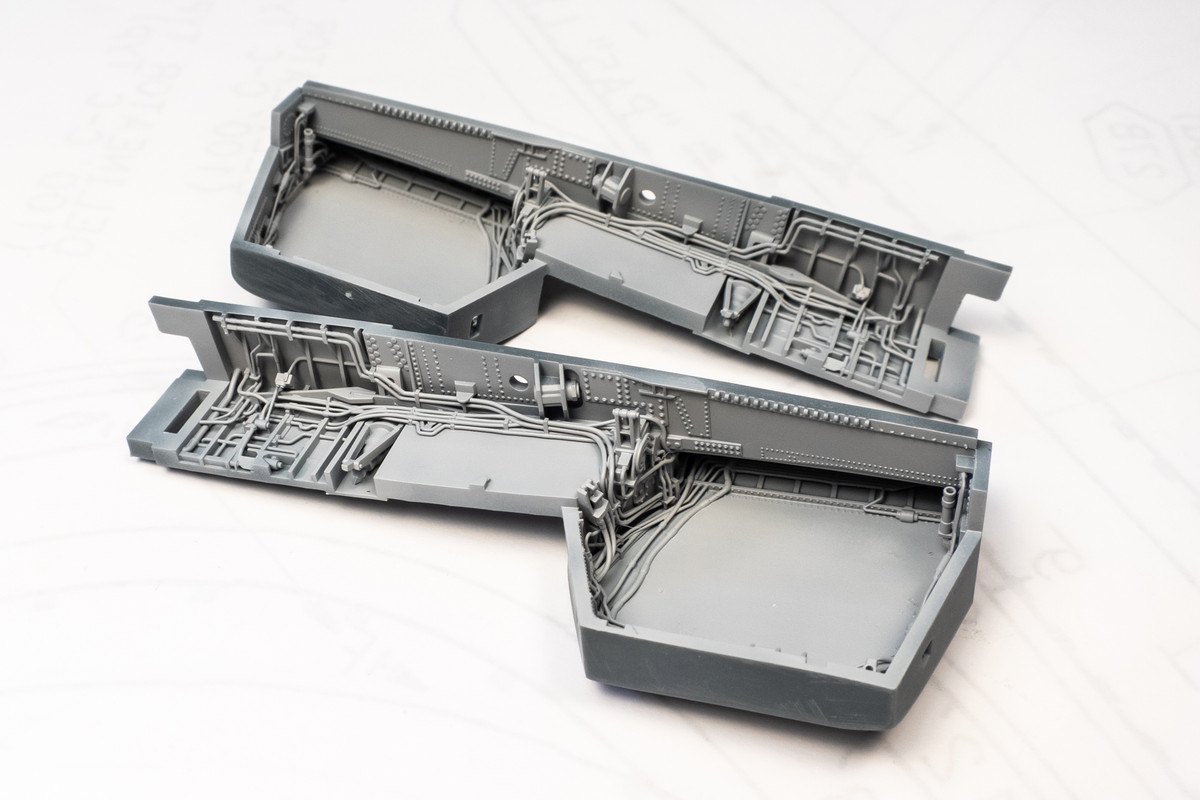
Fitting the MCC wells requires some surgery on the kit parts and the MCC instructions cover where the removals and thinning are needed. Mostly straight lines so this shouldn't be too hard.
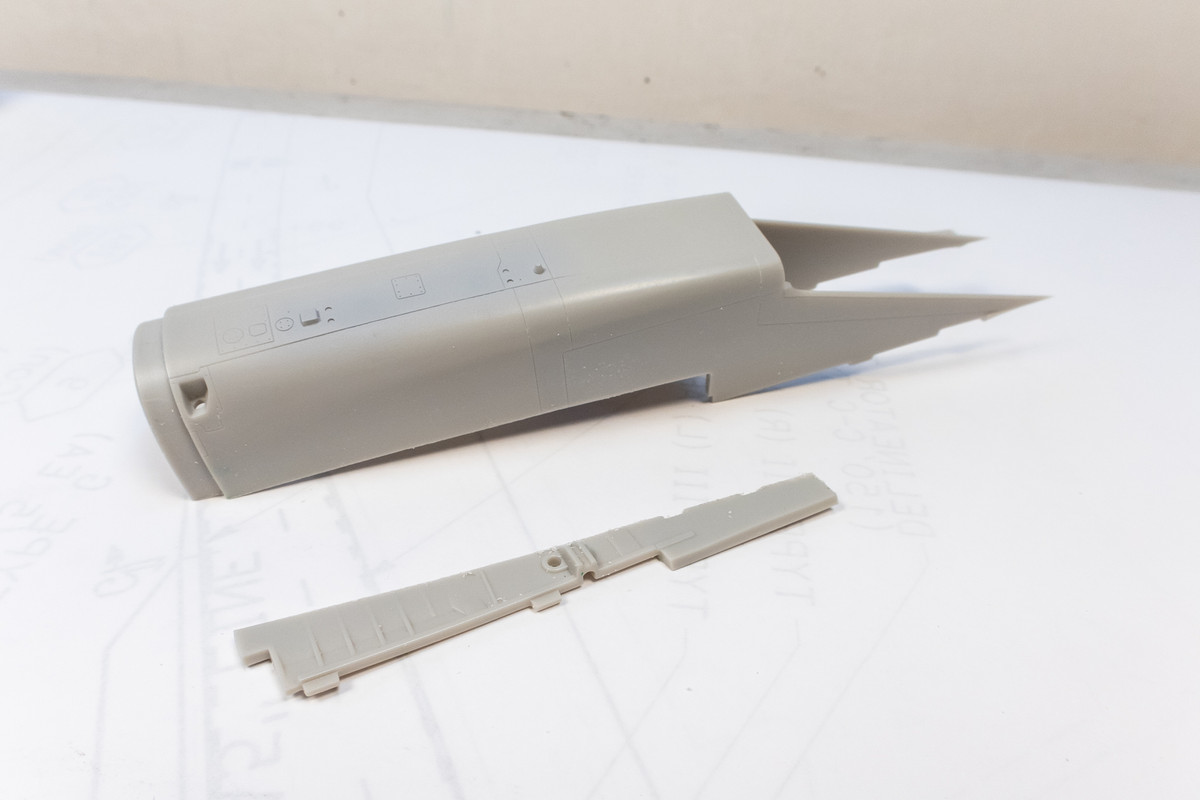
I used a razor saw for the removals.
After the cuts were made, I fit the new wheel well into place. Glad to see that fit is quite good right off the bat!
A quick check to see if the Detail & Wonder landing gear legs fit into the Mini Craft Collection wheel wells... they do!
I'll do the other side next and then take a look at the thinning that's required on the upper wing part.
The Mini Craft Collection Wheel Wells for the Tamiya F-14 kit is here.
The 3D-printed cages are packed into a metal box.
Seven cages total.
I've added wiring to the kit nose gear bay so I consider it usable but let's take a look at the MCC rendition. The detail is incredible.
Most of the support attachments are on the backside of the wheel well so you can just hack the supports off. The nose gear bay is a single piece... much different than the 4-sided box structure that you build up with the kit parts. And... the instructions are strangely silent on how you need to adapt the kit parts to make this fit. So I'm going to put this aside for now.
Let's move on to the main wheel wells. Again, most of the support attachments are on the backside, which made removal easier.
This is what the kit wheel wells look like.
The MCC wells are a huge upgrade, which addresses one of few shortcomings of this Tamiya kit.
Fitting the MCC wells requires some surgery on the kit parts and the MCC instructions cover where the removals and thinning are needed. Mostly straight lines so this shouldn't be too hard.
I used a razor saw for the removals.
After the cuts were made, I fit the new wheel well into place. Glad to see that fit is quite good right off the bat!
A quick check to see if the Detail & Wonder landing gear legs fit into the Mini Craft Collection wheel wells... they do!
I'll do the other side next and then take a look at the thinning that's required on the upper wing part.
John aka JKim
-----------<><
-----------<><
Re: 1/48 Tamiya F-14A Jolly Rogers
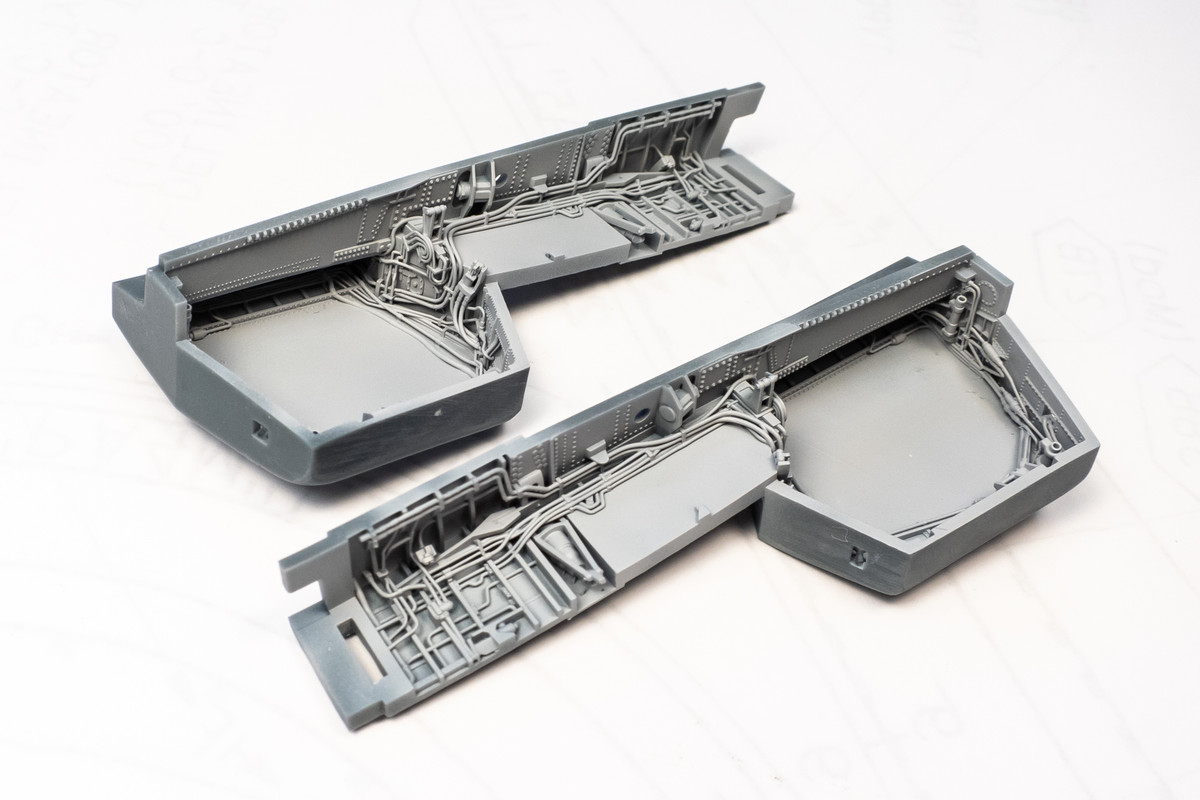
Surgery was performed on the other side to accommodate the MCC wheel well. For the long cut along the engine nacelle, I used a strip of Dymo tape to help keep the cut straight.
Cuts are complete and ready for a test fit.
Again, the fit was pretty good.
As a test, the upper wings were taped into place. The thickness of the wheel well interferes with the fit but surprisingly the gap is pretty small.
The raised details on the interior of the upper wings are shaved off and sanded.
The critical thickness is at the outer edge of the wheel well and the forward corner so these were rounded off.
With these adjustments the gap between the upper and lower wing halves is eliminated. As extra insurance, I'm going to shave the tops of the wheel wells a little further before painting.
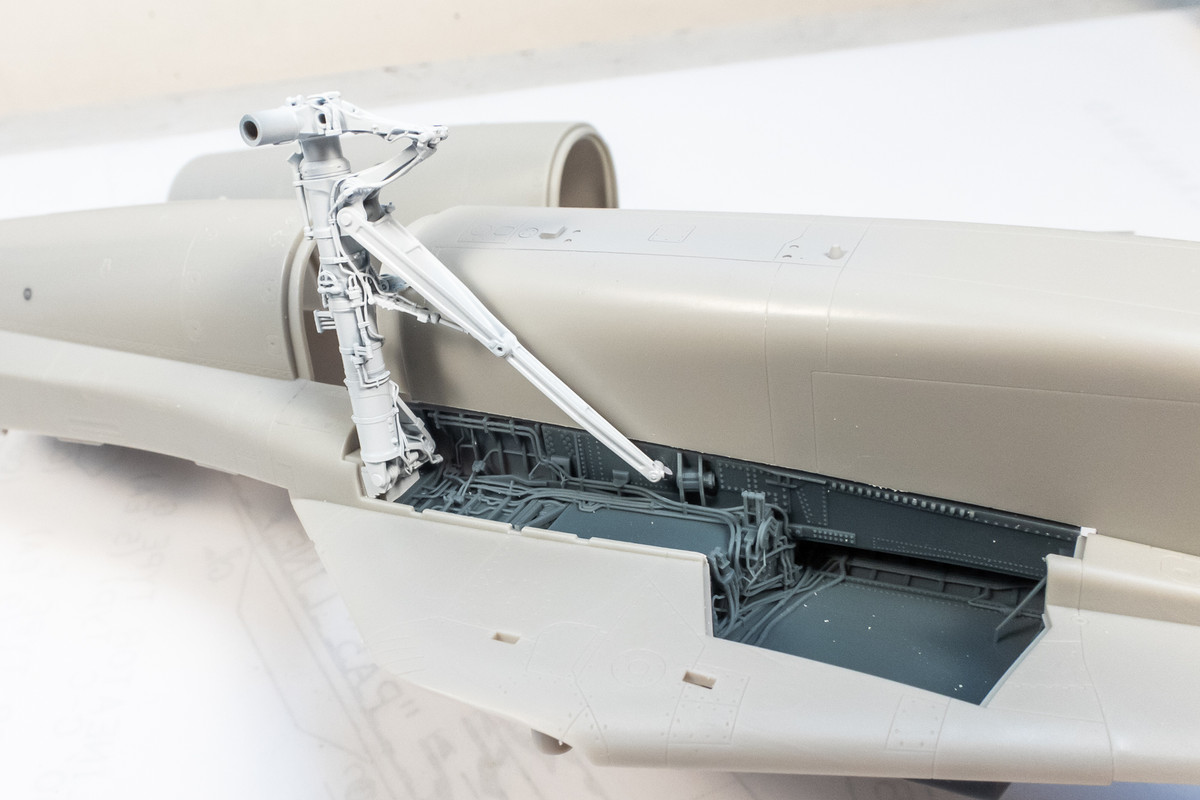
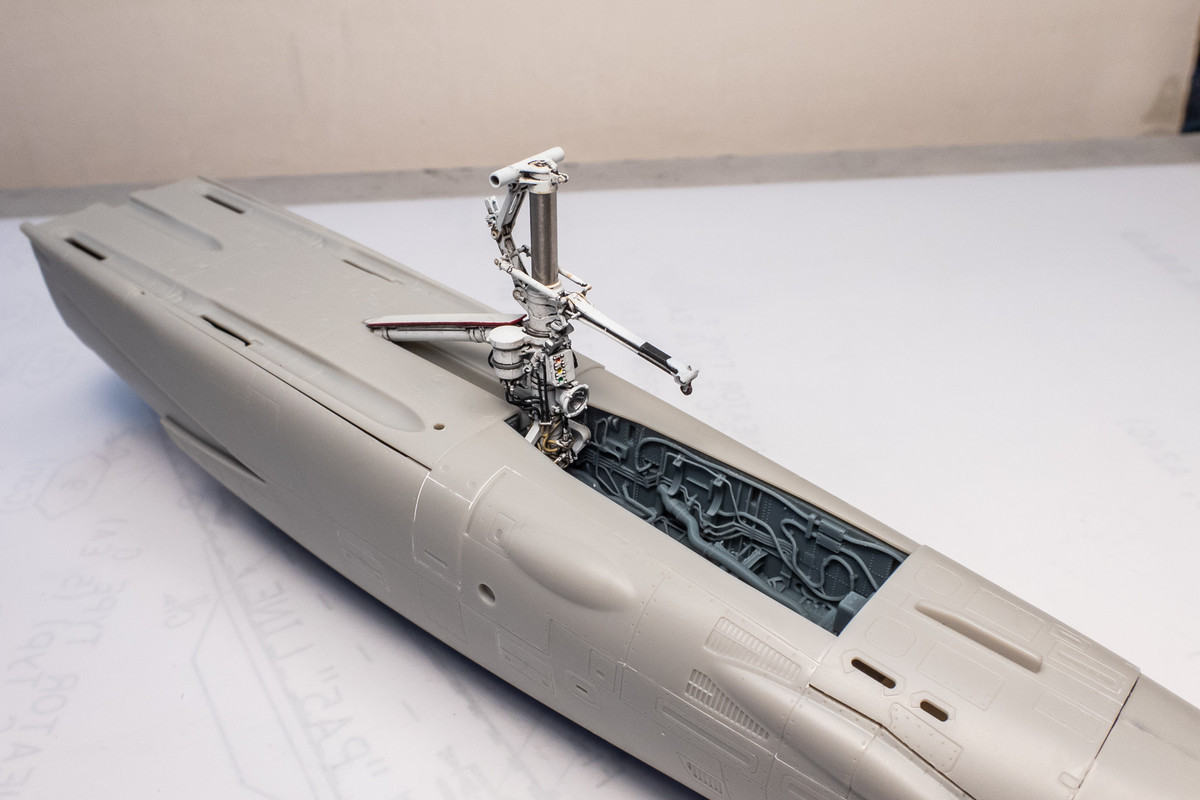
After fiddling around with the MCC nose well, I figure out that the fit solution is really simple... leave out the entire nose wheel assembly. Although the kit cockpit tub mounts onto the wheel well roof, there are other tabs on the nose interior that provide a positive fit.
The nose well fits perfectly without any alignment aids and I'm confident that it won't be a problem getting it to fit properly.
The big question now is how do I mount the nose gear into the wheel well?
The MCC instructions recommend trimming the pins and rounding them off so that you can forcibly push the gear into place. That's one possibility but I'm going to think about this some more.
Cuts are complete and ready for a test fit.
Again, the fit was pretty good.
As a test, the upper wings were taped into place. The thickness of the wheel well interferes with the fit but surprisingly the gap is pretty small.
The raised details on the interior of the upper wings are shaved off and sanded.
The critical thickness is at the outer edge of the wheel well and the forward corner so these were rounded off.
With these adjustments the gap between the upper and lower wing halves is eliminated. As extra insurance, I'm going to shave the tops of the wheel wells a little further before painting.
After fiddling around with the MCC nose well, I figure out that the fit solution is really simple... leave out the entire nose wheel assembly. Although the kit cockpit tub mounts onto the wheel well roof, there are other tabs on the nose interior that provide a positive fit.
The nose well fits perfectly without any alignment aids and I'm confident that it won't be a problem getting it to fit properly.
The big question now is how do I mount the nose gear into the wheel well?
The MCC instructions recommend trimming the pins and rounding them off so that you can forcibly push the gear into place. That's one possibility but I'm going to think about this some more.
Last edited by jkim on Sat Jul 27, 2024 2:19 pm, edited 1 time in total.
John aka JKim
-----------<><
-----------<><
-
Gary Brantley

- Elite Member
- Posts: 2623
- Joined: Tue Apr 08, 2014 9:40 pm
- Location: Cameron, Texas
Re: 1/48 Tamiya F-14A Jolly Rogers
The detail in those wheel wells is incredible, John. If I may ask, how much do they cost? As for mounting the nose gear, how about some metal tubing inserted into the well sides, with the LG "pinned" to those through their current mounting pegs? At any rate, a clever modeler like yourself with come up with an elegant solution, I feel sure! 
-
BlackSheep214
- Elite Member
- Posts: 12985
- Joined: Sun Apr 06, 2014 8:47 pm
Re: 1/48 Tamiya F-14A Jolly Rogers
Watching you put this together makes me wanna get another Tomcat kit. This time I want the Tamiya kit Tomcat kit.
“Who controls the skies, controls the fate of this Earth”
Author unknown- 352nd Fighter Group, Blue-Nosed Bastards of Bodney
“Send one plane it’s a sortie; send two planes it’s a flight; send four planes it’s a test of airpower. - Richard Kohn
Author unknown- 352nd Fighter Group, Blue-Nosed Bastards of Bodney
“Send one plane it’s a sortie; send two planes it’s a flight; send four planes it’s a test of airpower. - Richard Kohn
Re: 1/48 Tamiya F-14A Jolly Rogers
The only place I could find them in stock was Art Scale Kit in Czech Republic. About $38.90 plus shipping. Squadron is a US distributor of MCC products and have some of their products but not the wheel wells.Gary Brantley wrote: ↑Sat Jul 27, 2024 7:32 am The detail in those wheel wells is incredible, John. If I may ask, how much do they cost?
To mount the nose gear into the wheel well, I chopped off the pins from the gear completely and drilled holes instead.
I then fashioned a pair of pins to be stuck through the holes in the wheel well sides, trapping the gear inbetween. If I do this right, I'll be able to swing the gear into the wheel well temporarily during construction and hopefully keeping it out of harms way.
Checking to see how the D&W nose gear fits within the MMC well and kit fuselage.

Now that the fit of the MMC wells has been established, I will start painting these components, starting with a coat of primer.

John aka JKim
-----------<><
-----------<><
-
Gary Brantley
- Elite Member
- Posts: 2623
- Joined: Tue Apr 08, 2014 9:40 pm
- Location: Cameron, Texas
Re: 1/48 Tamiya F-14A Jolly Rogers
"At any rate, a clever modeler like yourself with come up with an elegant solution, I feel sure! "
See below? I knew you would.
See below? I knew you would.
jkim wrote: ↑Sat Jul 27, 2024 2:24 pm
To mount the nose gear into the wheel well, I chopped off the pins from the gear completely and drilled holes instead.
I then fashioned a pair of pins to be stuck through the holes in the wheel well sides, trapping the gear inbetween. If I do this right, I'll be able to swing the gear into the wheel well temporarily during construction and hopefully keeping it out of harms way.